GitLab CI/CD

GitLab CI/CD
GitLab CI/CD is a tool built into GitLab for software development through the continuous methodologies:
- Continuous Integration (CI)
- Continuous Delivery (CD)
- Continuous Deployment (CD)
Note: Out-of-the-box management systems can decrease hours spent on maintaining toolchains by 10% or more. Watch our “Mastering continuous software development” webcast to learn about continuous methods and how GitLab’s built-in CI can help you simplify and scale software development.
- GitLab CI/CD
- Overview
- Getting started
- Migrating from CircleCI
- Concepts
- Configuration
- Feature set
- Code repository
- Static analysis
- Gradle build script with Findbugs and Checkstyle
- $ gradle check
- Packaging and deployment to the test/staging environment
Overview
Continuous Integration works by pushing small code chunks to your application’s code base hosted in a Git repository, and, to every push, run a pipeline of scripts to build, test, and validate the code changes before merging them into the main branch.
Continuous Delivery and Deployment consist of a step further CI, deploying your application to production at every push to the default branch of the repository.
These methodologies allow you to catch bugs and errors early in the development cycle, ensuring that all the code deployed to production complies with the code standards you established for your app.
For a complete overview of these methodologies and GitLab CI/CD, read the Introduction to CI/CD with GitLab.
Getting started
GitLab CI/CD is configured by a file called .gitlab-ci.yml placed at the repository’s root. This file creates a pipeline, which runs for changes to the code in the repository. Pipelines consist of one or more stages that run in order and can each contain one or more jobs that run in parallel. These jobs (or scripts) get executed by the GitLab Runner agent.
To get started with GitLab CI/CD, we recommend you read through the following documents:
- How GitLab CI/CD works.
- Fundamental pipeline architectures.
- GitLab CI/CD basic workflow.
- Step-by-step guide for writing .gitlab-ci.yml for the first time.
If you’re migrating from another CI/CD tool, check out our handy references:
Migrating from CircleCI
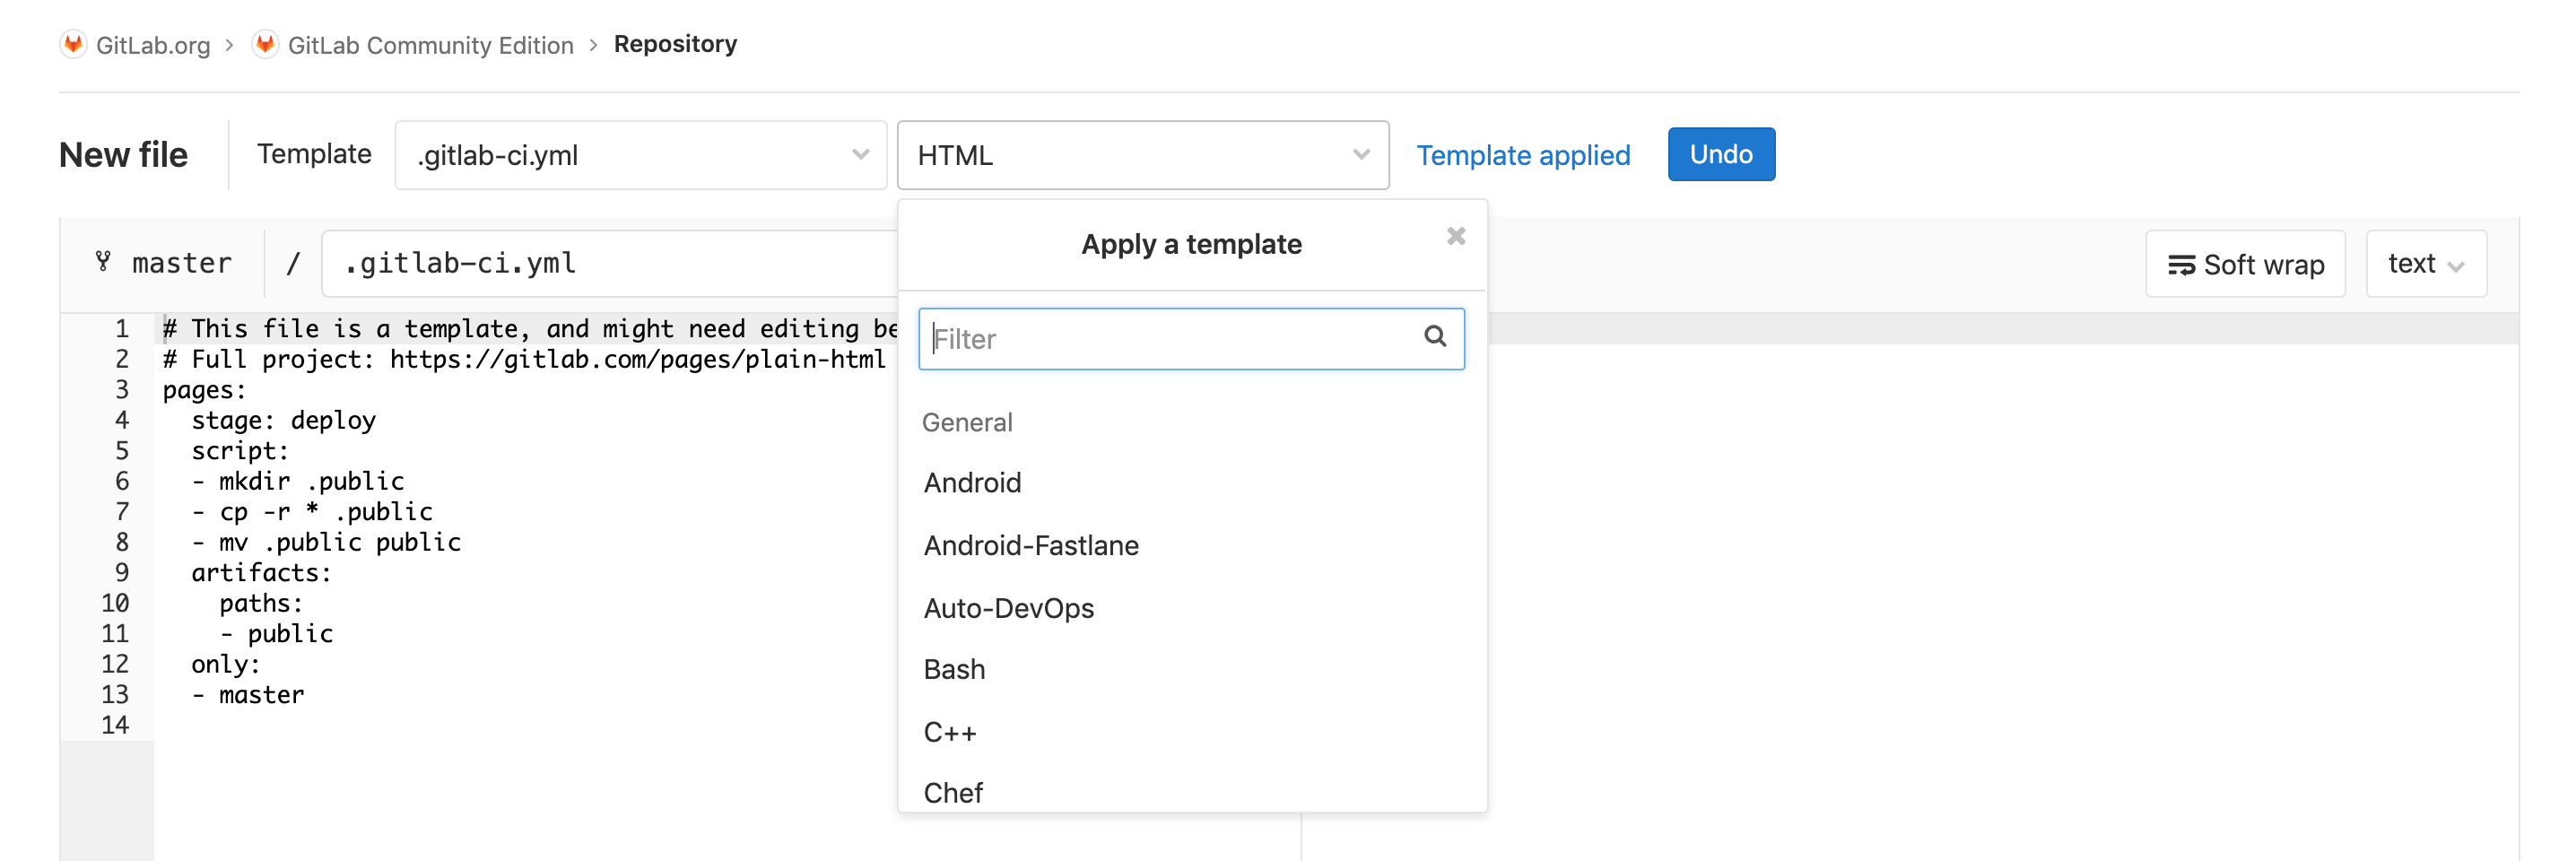
Migrating from Jenkins You can also get started by using one of the .gitlab-ci.yml templates available through the UI. You can use them by creating a new file, choosing a template that suits your application, and adjusting it to your needs:
Concepts
GitLab CI/CD uses a number of concepts to describe and run your build and deploy.
| Concept | Description |
|---|---|
| Pipelines | Structure your CI/CD process through pipelines. |
| Environment variables | Reuse values based on a variable/value key pair. |
| Environments | Deploy your application to different environments (e.g., staging, production). |
| Job artifacts | Output, use, and reuse job artifacts. |
| Cache dependencies | Cache your dependencies for a faster execution. |
| GitLab Runner | Configure your own runners to execute your scripts. |
| Pipeline efficiency | Configure your pipelines to run quickly and effienctly. |
Configuration
GitLab CI/CD supports numerous configuration options:
| Configuration | Description |
|---|---|
| Schedule pipelines | Schedule pipelines to run as often as you need. |
| Custom path for .gitlab-ci.yml | Define a custom path for the CI/CD configuration file. |
| Git submodules for CI/CD | Configure jobs for using Git submodules. |
| SSH keys for CI/CD | Using SSH keys in your CI pipelines. |
| Pipeline triggers | Trigger pipelines through the API. |
| Pipelines for Merge Requests | Design a pipeline structure for running a pipeline in merge requests. |
| Integrate with Kubernetes clusters | Connect your project to Google Kubernetes Engine (GKE) or an existing Kubernetes cluster. |
| Optimize GitLab and GitLab Runner for large repositories | Recommended strategies for handling large repositories. |
| .gitlab-ci.yml full reference | All the attributes you can use with GitLab CI/CD. |
Note that certain operations can only be performed according to the user and job permissions.
Feature set
Use the vast GitLab CI/CD to easily configure it for specific purposes. Its feature set is listed on the table below according to DevOps stages.
| Feature | Description |
|---|---|
| Configure | |
| Auto DevOps | Set up your app’s entire lifecycle. |
| ChatOps | Trigger CI jobs from chat, with results sent back to the channel. |
| Verify | |
| Browser Performance Testing | Quickly determine the browser performance impact of pending code changes. |
| Load Performance Testing | Quickly determine the server performance impact of pending code changes. |
| CI services | Link Docker containers with your base image. |
| Code Quality | Analyze your source code quality. |
| GitLab CI/CD for external repositories | Get the benefits of GitLab CI/CD combined with repositories in GitHub and Bitbucket Cloud. |
| Interactive Web Terminals | Open an interactive web terminal to debug the running jobs. |
| Unit test reports | Identify script failures directly on merge requests. |
| Using Docker images | Use GitLab and GitLab Runner with Docker to build and test applications. |
| Release | |
| Auto Deploy | Deploy your application to a production environment in a Kubernetes cluster. |
| Building Docker images | Maintain Docker-based projects using GitLab CI/CD. |
| Canary Deployments | Ship features to only a portion of your pods and let a percentage of your user base to visit the temporarily deployed feature. |
| Deploy Boards | Check the current health and status of each CI/CD environment running on Kubernetes. |
| Feature Flags | Deploy your features behind Feature Flags. |
| GitLab Pages | Deploy static websites. |
| GitLab Releases | Add release notes to Git tags. |
| Review Apps | Configure GitLab CI/CD to preview code changes. |
| Cloud deployment | Deploy your application to a main cloud provider. |
| Secure | |
| Container Scanning | Check your Docker containers for known vulnerabilities. |
| Dependency Scanning | Analyze your dependencies for known vulnerabilities. |
| License Compliance | Search your project dependencies for their licenses. |
| Security Test reports | Check for app vulnerabilities. |
#####################
Continuous Integration (CI) is a phase in the software development cycle where code from different team members or different features are integrated together. This usually involves merging code (integration), building the application and carrying out basic tests all within an ephemeral environment.
In the past, the code was integrated at an “integration phase” of the software development life cycle. This phase came after different teams would have spent weeks, months or even years working in separately, dedicated to different (parts of) application or services. You can guess how painful the integration phase of the project would have been. It was not uncommon to spend weeks or even months in this phase. This was during the waterfall era.
With Extreme Programming (XP) and agile, integration became frequent with developers integrating as often as possible usually soon after a unit is complete. This is done on the shared source code repository. The frequent integration became automated and continuous which prompted the need for some kind of checks before the new code is integrated. Thus, Continuous Integration.
CI workflows vary a lot depending on tools, programming language, project and many other factors but a common flow has these steps.
- Pushing to the code repository
- Static analysis
- Pre-deployment testing
- Packaging and deployment to the test environment
- Post-deployment testing
Let’s take a look at how this flow would work on a java project with Gradle as the build tool.
Code repository
Typically, there would have a code repository and some kind of workflow for contributing new code. Depending on the workflow, committing code kicks off the CI pipeline, which often starts with static code analysis. You could refer to this post to help choose an appropriate workflow.
Static analysis
Static (code) analysis is done on the code base of the application without the need to run the software. The goal here is to ensure the code doesn’t have possible bugs and conforms to standard formatting and styling.
Let’s add FindBugs to check for possible errors and Checkstyle to ensure the project conforms to coding standard (we’ll use the Google Java Style).
The Gradle build script would be something like this:
apply plugin: 'java'
apply plugin: 'findbugs'
apply plugin: 'checkstyle'


repositories {
    mavenCentral()
}

dependencies {
  ...
}

tasks.withType(FindBugs) {
  reports {
    xml.enabled false
    html.enabled true
  }
}

tasks.withType(Checkstyle) {
  reports {
    xml.enabled false
    html.enabled true
  }
}
Gradle build script with Findbugs and Checkstyle
To complete the Checkstyle configuration, we’ll need to add a Checkstyle configuration file to the project path config/checkstyle/checkstyle.xml. There’s a sample config file on GitHub based on the Google Java style. With FindBugs and Checkstyle configured, static analysis can now be run:
$ gradle check
At this phase, any test that could be run without deploying to a server should be. This will include unit tests and various other types of tests (maybe functional or integration). This phase is used to ensure that the change set doesn’t break functionalities and works well with other parts code since the tests are run on the whole code base, not just the new changes (as the author might have done on the dev env).
Packaging and deployment to the test/staging environment
Depending on the kind of project, the application is built, packaged, sent to a test or staging environment (that mimics production). This ensures that the integrated changes build well with other parts and can be deployed for a functional test can to be carried out. It’s at this phase that we also verify that the new changes are compatible with other libraries and the deployment environment. This is phase should also automated.
For tests that need the application to be deployed, this phase of the CI pipeline is where they’re run. The tests vary depending on tools, frameworks, and language of the application but they’re usually functional integration and performance tests. Successful execution of this phase ends the CI pipeline for the changeset signalling it’s good enough for users.
Once the CI pipeline completes successfully, the deployed application could undergo a manual test by a “user” or the QA team to ensure that it fits the client’s requirements. The packages or artifacts generated by the CI pipeline can now be taken/deployed to production. This can also be automated with a successful implementation of a Continuous Delivery (CD) pipeline.
Hope you find this useful. look forward to seeing how this is implemented for different projects.