Gazebo & ROS2 Basic Installation

Setup
Install ROS2
Make sure you have a locale which supports UTF-8:
sudo apt update && sudo apt install locales
sudo locale-gen en_US en_US.UTF-8
sudo update-locale LC_ALL=en_US.UTF-8 LANG=en_US.UTF-8
export LANG=en_US.UTF-8
First ensure that the Ubuntu Universe repository is enabled.
sudo apt install software-properties-common
sudo add-apt-repository universe
Now add the ROS 2 GPG key with apt.
sudo apt update && sudo apt install curl -y
sudo curl -sSL https://raw.githubusercontent.com/ros/rosdistro/master/ros.key -o /usr/share/keyrings/ros-archive-keyring.gpg
Then add the repository to your sources list.
echo "deb [arch=$(dpkg --print-architecture) signed-by=/usr/share/keyrings/ros-archive-keyring.gpg] http://packages.ros.org/ros2/ubuntu $(. /etc/os-release && echo $UBUNTU_CODENAME) main" | sudo tee /etc/apt/sources.list.d/ros2.list > /dev/null
Update your apt repository caches after setting up the repositories.
sudo apt update
ROS 2 packages are built on frequently updated Ubuntu systems. It is always recommended that you ensure your system is up to date before installing new packages.
sudo apt upgrade
Desktop Install (Recommended): ROS, RViz, demos, tutorials.
sudo apt install ros-iron-desktop-full
Environment Variables
Set up your environment by sourcing the following file.
# Replace ".bash" with your shell if you're not using bash
# Possible values are: setup.bash, setup.sh, setup.zsh
echo "source /opt/ros/iron/setup.bash" >> ~/.bashrc
source ~/.bashrc
Sourcing ROS 2 setup files will set several environment variables necessary for operating ROS 2:
printenv | grep -i ROS

ROS_VERSION=2
ROS_PYTHON_VERSION=3
ROS_DISTRO=iron
...
The default middleware that ROS 2 uses for communication is DDS. In DDS, the primary mechanism for having different logical networks share a physical network is known as the Domain ID. ROS 2 nodes on the same domain can freely discover and send messages to each other, while ROS 2 nodes on different domains cannot. All ROS 2 nodes use domain ID 0 by default. To avoid interference between different groups of computers running ROS 2 on the same network, a different domain ID should be set for each group. To skip that background and just choose a safe number, simply choose a domain ID between 0 and 101, inclusive.
echo "export ROS_DOMAIN_ID=88" >> ~/.bashrc
ROS Dependencies
Before using ROS, you have to initialize rosdep, which enables you to easily install system dependencies for sources you want to compile, and also is required to run some core components in ROS:
sudo rosdep init
rosdep update
API Test
In one terminal, source the setup file and then run a C++ talker:
source /opt/ros/iron/setup.bash
ros2 run demo_nodes_cpp talker
In another terminal source the setup file and then run a Python listener:
source /opt/ros/iron/setup.bash
ros2 run demo_nodes_py listener
You should see the talker saying that it’s Publishing messages and the listener saying I heard those messages. This verifies both the C++ and Python APIs are working properly.

Turtlesim Hello World
Install the turtlesim package for your ROS 2 distro::
sudo apt install ros-iron-turtlesim
ros2 run turtlesim turtlesim_node
ros2 run turtlesim turtle_teleop_key
At this point you should have three windows open: a terminal running turtlesim_node, a terminal running turtle_teleop_key and the turtlesim window. Arrange these windows so that you can see the turtlesim window, but also have the terminal running turtle_teleop_key active so that you can control the turtle in turtlesim.

Open a new terminal to install rqt and its plugins:
sudo apt install ~nros-iron-rqt*
To run rqt:
rqt --force-discover
When running rqt for the first time, the window will be blank. No worries; just select Plugins > Services > Service Caller from the menu bar at the top.
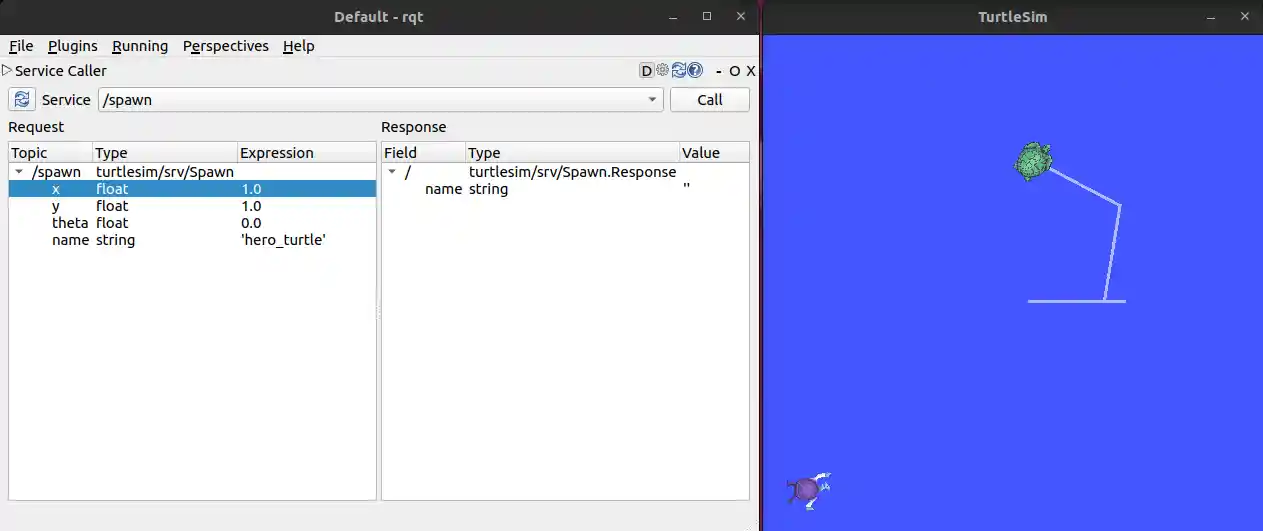
Let’s use rqt to call the /spawn service. You can guess from its name that /spawn will create another turtle in the turtlesim window. Give the new turtle a unique name like hero_turtle and enter some valid coordinates at which to spawn the new turtle, like x = 1.0 and y = 1.0:

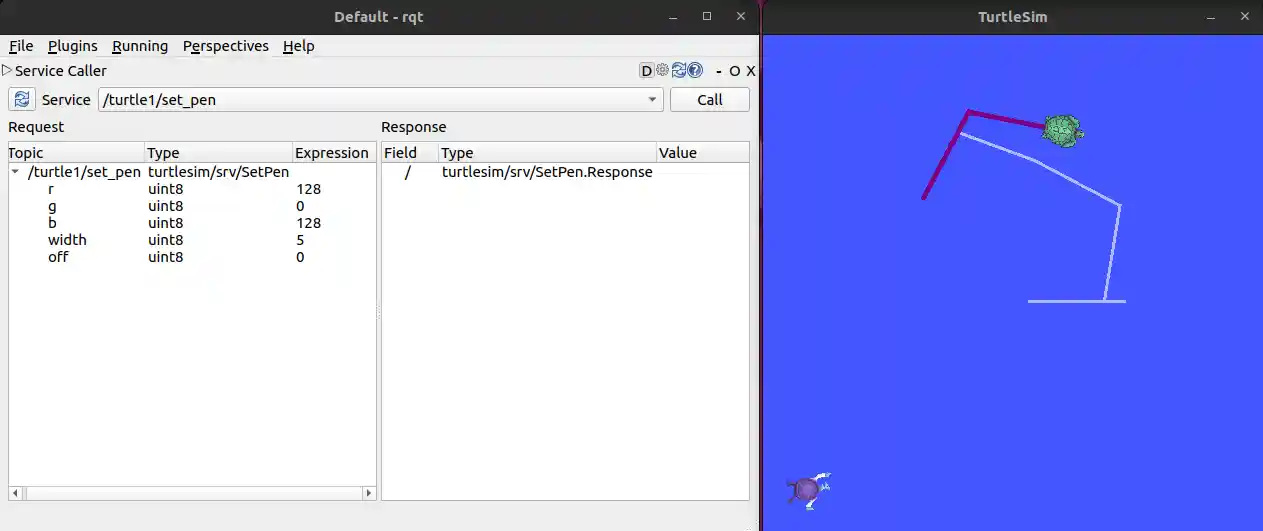
Now let’s give turtle1 a unique pen using the /set_pen service:
Start another teleop node and remap the cmd_vel topic to take control of the second turtle:
ros2 run turtlesim turtle_teleop_key --ros-args --remap turtle1/cmd_vel:=hero_turtle/cmd_vel

Gazebo
First install some necessary tools:
sudo apt-get update
sudo apt-get install lsb-release wget gnupg
Then install Ignition Fortress:
sudo wget https://packages.osrfoundation.org/gazebo.gpg -O /usr/share/keyrings/pkgs-osrf-archive-keyring.gpg
echo "deb [arch=$(dpkg --print-architecture) signed-by=/usr/share/keyrings/pkgs-osrf-archive-keyring.gpg] http://packages.osrfoundation.org/gazebo/ubuntu-stable $(lsb_release -cs) main" | sudo tee /etc/apt/sources.list.d/gazebo-stable.list > /dev/null
sudo apt-get update
sudo apt-get install ignition-fortress
All libraries should be ready to use and the ign gazebo app ready to be executed.
Installing Gazebo with ROS
sudo apt-get install ros-iron-ros-gz
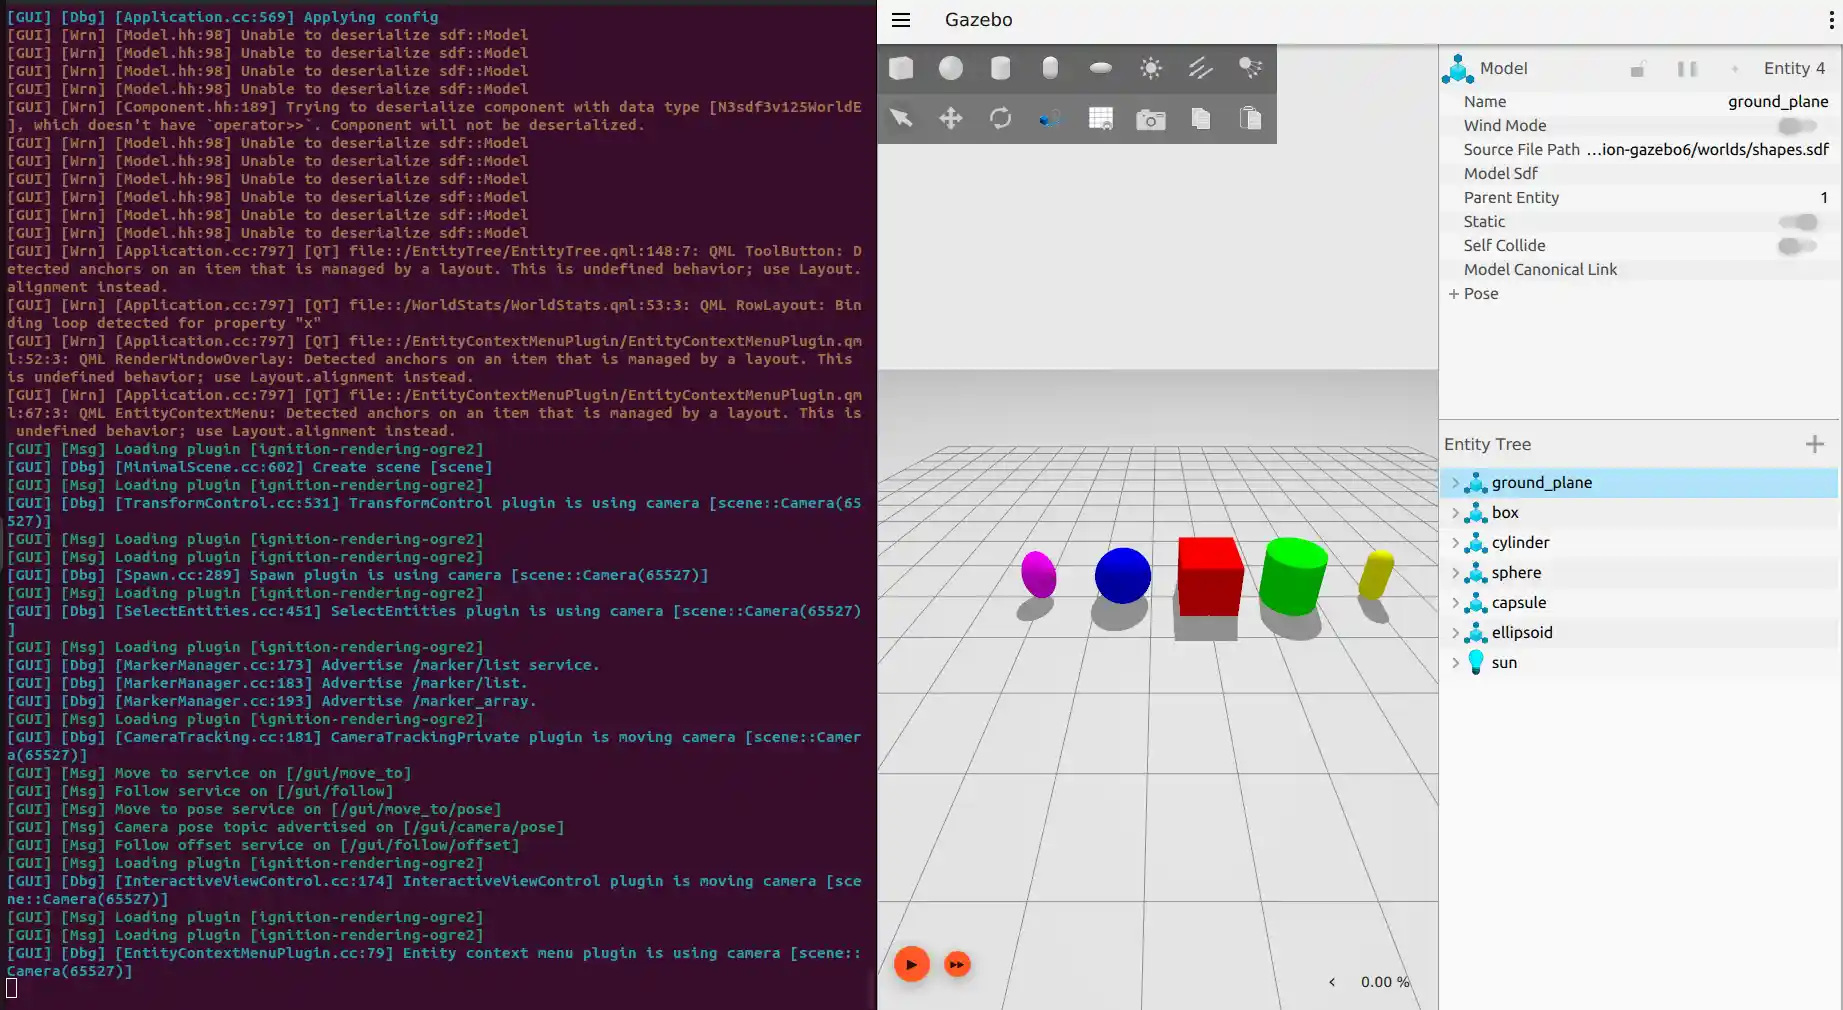
After installing Gazebo in Step 1, you can launch Gazebo Sim, a 3D robotics simulator, from a terminal. This command will launch both the Sim server and Sim GUI with a world that contains three simple shapes:
ign gazebo sim shapes.sdf -v 4

There are a wide variety of simulation resources at your disposal on https://app.gazebosim.org/fuel. Further Tutorial => gazebosim.org