ROS2 Webots Robot Simulation

Excerpt from ROS 2 Documentation (IRON): The Robot Operating System (ROS) is a set of software libraries and tools for building robot applications. From drivers and state-of-the-art algorithms to powerful developer tools, ROS has the open source tools you need for your next robotics project.
Installation
Install the webots, webots_ros2 package and run simulation examples on Ubuntu.
Start by importing the `Cyberbotics.asc`` signature file using these commands:
sudo mkdir -p /etc/apt/keyrings
cd /etc/apt/keyrings
sudo wget -q https://cyberbotics.com/Cyberbotics.asc
Adding the Cyberbotics repository:
echo "deb [arch=amd64 signed-by=/etc/apt/keyrings/Cyberbotics.asc] https://cyberbotics.com/debian binary-amd64/" | sudo tee /etc/apt/sources.list.d/Cyberbotics.list
sudo apt update
Then proceed to the installation of Webots using:
sudo apt install webots
Add the installed version:
echo "export WEBOTS_HOME=/usr/local/webots" >> ~/.bashrc
source ~/.bashrc
Install webots_ros2:
sudo apt install ros-iron-webots-ros2
Use the ROS2 launch command to start demo packages (e.g. webots_ros2_universal_robot):
ros2 launch webots_ros2_universal_robot multirobot_launch.py
Robot Simulation and Control
This tutorial is compatible with version 2023.1.0 of webots_ros2 and Webots R2023b, as well as upcoming versions.
Create the Package Structure
Create a new package named hello_webots from the src folder of your ROS2 workspace. Change the current directory of your terminal to ros2_ws/src and run:
cd ~/ros2_ws/src
ros2 pkg create --build-type ament_python --license Apache-2.0 --node-name my_webot_driver hello_webots --dependencies rclpy geometry_msgs webots_ros2_driver
The --dependencies rclpy geometry_msgs webots_ros2_driver option specifies the packages needed by the my_webot_driver.py plugin in the package.xml file.
Let’s add a launch and a worlds folder inside the hello_webots folder and add a "world":
mkdir hello_webots/{launch,worlds}
wget https://docs.ros.org/en/iron/_downloads/5ad123fc6a8f1ea79553d5039728084a/my_world.wbt -P hello_webots/worlds
hello_webots/
├── hello_webots
│   ├── __init__.py
│   └── my_webot_driver.py
├── launch
├── LICENSE
├── package.xml
├── resource
│   └── hello_webots
├── setup.cfg
├── setup.py
├── test
│   ├── test_copyright.py
│   ├── test_flake8.py
│   └── test_pep257.py
└── worlds
│   └── my_world.wbt
Edit the Driver Plugin
The webots_ros2_driver sub-package automatically creates a ROS2 interface for most sensors. We can create custom plugin as a ROS node to access the Webots robot API and create custom topics and services to control your robot.
The purpose of this tutorial is to show a basic example with a minimum number of dependencies. However, you could avoid the use of this plugin by using another webots_ros2 sub-package named webots_ros2_control, introducing a new dependency. This other sub-package creates an interface with the ros2_control package that facilitates the control of a differential wheeled robot.
Open hello_webots/hello_webots/my_webot_driver.py and replace its contents with the following:
import rclpy
from geometry_msgs.msg import Twist

HALF_DISTANCE_BETWEEN_WHEELS = 0.045
WHEEL_RADIUS = 0.025

class MyRobotDriver:
    def init(self, webots_node, properties):
        self.__robot = webots_node.robot

        self.__left_motor = self.__robot.getDevice('left wheel motor')
        self.__right_motor = self.__robot.getDevice('right wheel motor')

        self.__left_motor.setPosition(float('inf'))
        self.__left_motor.setVelocity(0)

        self.__right_motor.setPosition(float('inf'))
        self.__right_motor.setVelocity(0)

        self.__target_twist = Twist()

        rclpy.init(args=None)
        self.__node = rclpy.create_node('my_webot_driver')
        self.__node.create_subscription(Twist, 'cmd_vel', self.__cmd_vel_callback, 1)

    def __cmd_vel_callback(self, twist):
        self.__target_twist = twist

    def step(self):
        rclpy.spin_once(self.__node, timeout_sec=0)

        forward_speed = self.__target_twist.linear.x
        angular_speed = self.__target_twist.angular.z

        command_motor_left = (forward_speed - angular_speed * HALF_DISTANCE_BETWEEN_WHEELS) / WHEEL_RADIUS
        command_motor_right = (forward_speed + angular_speed * HALF_DISTANCE_BETWEEN_WHEELS) / WHEEL_RADIUS

        self.__left_motor.setVelocity(command_motor_left)
        self.__right_motor.setVelocity(command_motor_right)
As you can see, the MyRobotDriver class implements three methods.
- The first method, named
init(self, ...), is actually the ROS node counterpart of the Python__init__(self, ...)constructor.
- The init method always takes two arguments:
- The webots_node argument contains a reference on the Webots instance.
- The properties argument is a dictionary created from the XML tags given in the URDF files (
my_robot.urdffile see below) and allows you to pass parameters to the controller.
- The robot instance from the simulation
self.__robotcan be used to access the Webots robot API. Then, it gets the two motor instances and initializes them with a target position and a target velocity. Finally a ROS node is created and a callback method is registered for a ROS topic named/cmd_velthat will handle Twist messages.
- The second is an implementation of the
__cmd_vel_callback(self, twist)callback private method that will be called for each Twist message received on the/cmd_veltopic and will save it in theself.__target_twistmember variable. - Finally, the
step(self)method is called at every time step of the simulation. The call torclpy.spin_once()is needed to keep the ROS node running smoothly. At each time step, the method will retrieve the desiredforward_speedandangular_speedfromself.__target_twist. As the motors are controlled with angular velocities, the method will then convert the forward_speed and angular_speed into individual commands for each wheel. This conversion depends on the structure of the robot, more specifically on the radius of the wheel and the distance between them.
Declare the Plugin
You now have to create a URDF file to declare the MyRobotDriver plugin. This will allow the webots_ros2_driver ROS node to launch the plugin and connect it to the target robot.
In the hello_webots/resource folder create a text file named my_robot.urdf with this content:
nano hello_webots/resource/my_robot.urdf
<?xml version="1.0" ?>
<robot name="My robot">
    <webots>
        <plugin type="hello_webots.my_webot_driver.MyRobotDriver" />
    </webots>
</robot>
The type attribute specifies the path to the class given by the hierarchical structure of files. webots_ros2_driver is responsible for loading the class based on the specified package and modules.
Create the Launch File
Let’s create the launch file to easily launch the simulation and the ROS controller with a single command:
nano hello_webots/launch/robot_launch.py
import os
import launch
from launch import LaunchDescription
from ament_index_python.packages import get_package_share_directory
from webots_ros2_driver.webots_launcher import WebotsLauncher
from webots_ros2_driver.webots_controller import WebotsController


def generate_launch_description():
    package_dir = get_package_share_directory('hello_webots')
    robot_description_path = os.path.join(package_dir, 'resource', 'my_robot.urdf')

    webots = WebotsLauncher(
        world=os.path.join(package_dir, 'worlds', 'my_world.wbt')
    )

    my_webot_driver = WebotsController(
        robot_name='my_robot',
        parameters=[
            {'robot_description': robot_description_path},
        ]
    )

    return LaunchDescription([
        webots,
        my_webot_driver,
        launch.actions.RegisterEventHandler(
            # shutdown when webots terminates
            event_handler=launch.event_handlers.OnProcessExit(
                target_action=webots,
                on_exit=[launch.actions.EmitEvent(event=launch.events.Shutdown())],
            )
        )
    ])
The WebotsLauncher object is a custom action that allows you to start a Webots simulation instance. You have to specify in the constructor which world file the simulator will open.
The robot_name parameter is used to define the name of the robot the driver should connect to. The robot_description parameter holds the path to the URDF file which refers to the MyRobotDriver plugin. You can see the WebotsController node as the interface that connects your controller plugin to the target robot.
Add added Files to Plugin Setup
Before you can start the launch file, you have to modify the setup.py file to include the extra files you added:
nano hello_webots/setup.py
from setuptools import find_packages, setup

package_name = 'hello_webots'
data_files = []
data_files.append(('share/ament_index/resource_index/packages', ['resource/' + package_name]))
data_files.append(('share/' + package_name + '/launch', ['launch/robot_launch.py']))
data_files.append(('share/' + package_name + '/worlds', ['worlds/my_world.wbt']))
data_files.append(('share/' + package_name + '/resource', ['resource/my_robot.urdf']))
data_files.append(('share/' + package_name, ['package.xml']))

setup(
    name=package_name,
    version='0.0.0',
    packages=find_packages(exclude=['test']),
    data_files=data_files,
    install_requires=['setuptools'],
    zip_safe=True,
    maintainer='user',
    maintainer_email='user.name@mail.com',
    description='TODO: Package description',
    license='TODO: License declaration',
    tests_require=['pytest'],
    entry_points={
        'console_scripts': [
            'my_robot_driver = hello_webots.my_robot_driver:main',
        ],
    },
)
This sets-up the package and adds in the data_files variable the newly added files: my_world.wbt, my_robot.urdf and robot_launch.py.
Test Run
From a terminal in your ROS2 workspace run:
cd ~/ros2_ws
colcon build
source install/local_setup.bash
ros2 launch hello_webots robot_launch.py
This will launch the simulation:
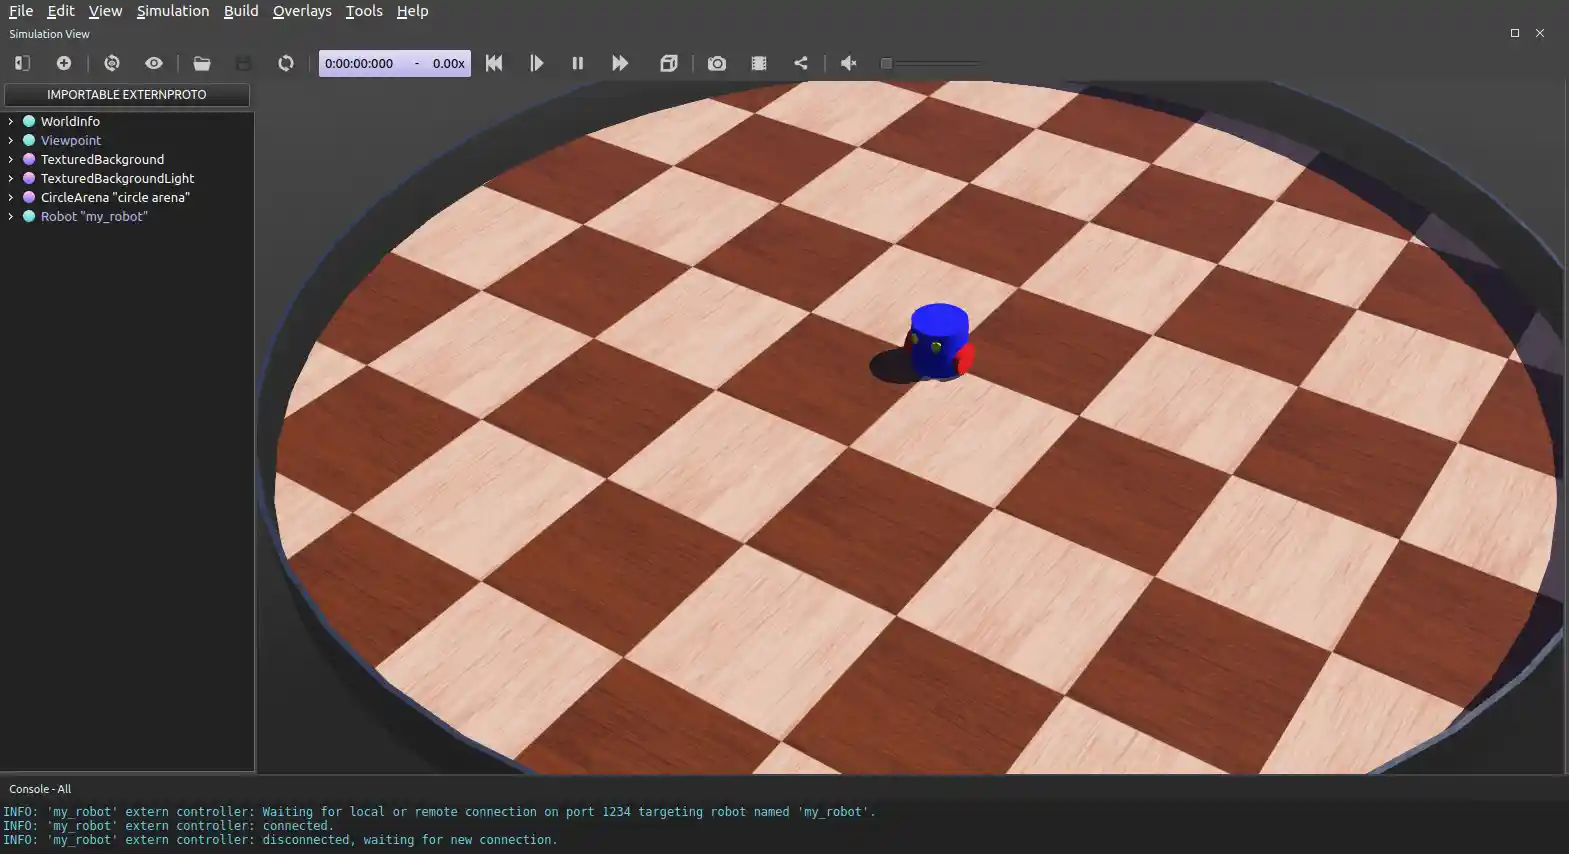
Open a second terminal and send a command with:
ros2 topic pub /cmd_vel geometry_msgs/Twist "linear: { x: 0.1 }"
At this point, the robot is able to blindly follow your motor commands. But it will eventually bump into the wall as you order it to move forwards.
Integrating Sensors
Implementing a ROS 2 node that avoids obstacles using the robot’s distance sensors with the webots_ros2_driver interface.
Updating the Plugin Declaration
webots_ros2_driver contains plugins to interface most of Webots devices with ROS2 directly. These plugins can be loaded using the <device> tag in the URDF file of the robot. The list of all existing interfaces and the corresponding parameters can be found on the devices reference page - e.g. currently available sensors devices:
In my_robot.urdf replace the whole contents with:
nano hello_webots/resources/my_robot.urdf
<?xml version="1.0" ?>
<robot name="My robot">
    <webots>
        <device reference="ds0" type="DistanceSensor">
            <ros>
                <topicName>/left_sensor</topicName>
                <alwaysOn>true</alwaysOn>
            </ros>
        </device>
        <device reference="ds1" type="DistanceSensor">
            <ros>
                <topicName>/right_sensor</topicName>
                <alwaysOn>true</alwaysOn>
            </ros>
        </device>
        <plugin type="hello_webots.my_webot_driver.MyRobotDriver" />
    </webots>
</robot>
In addition to your custom plugin, the webots_ros2_driver will parse the <device> tags referring to the DistanceSensor nodes and use the standard parameters in the <ros> tags to enable the sensors and name their topics.
Creating a ROS Sensor Node
The robot will use a standard ROS node to detect the wall and send motor commands to avoid it. In the hello_webots/hello_webots/ folder, create a file named `obstacle_avoider.py`` with this code:
nano hello_webots/hello_webots/obstacle_avoider.py
import rclpy
from rclpy.node import Node
from sensor_msgs.msg import Range
from geometry_msgs.msg import Twist


MAX_RANGE = 0.15


class ObstacleAvoider(Node):
    def __init__(self):
        super().__init__('obstacle_avoider')

        self.__publisher = self.create_publisher(Twist, 'cmd_vel', 1)

        self.create_subscription(Range, 'left_sensor', self.__left_sensor_callback, 1)
        self.create_subscription(Range, 'right_sensor', self.__right_sensor_callback, 1)

    def __left_sensor_callback(self, message):
        self.__left_sensor_value = message.range

    def __right_sensor_callback(self, message):
        self.__right_sensor_value = message.range

        command_message = Twist()

        command_message.linear.x = 0.1

        if self.__left_sensor_value < 0.9 * MAX_RANGE or self.__right_sensor_value < 0.9 * MAX_RANGE:
            command_message.angular.z = -2.0

        self.__publisher.publish(command_message)


def main(args=None):
    rclpy.init(args=args)
    avoider = ObstacleAvoider()
    rclpy.spin(avoider)
    # Destroy the node explicitly
    # (optional - otherwise it will be done automatically
    # when the garbage collector destroys the node object)
    avoider.destroy_node()
    rclpy.shutdown()


if __name__ == '__main__':
    main()
This node will create a publisher for the command and subscribe to the sensors topics here:
self.__publisher = self.create_publisher(Twist, 'cmd_vel', 1)

self.create_subscription(Range, 'left_sensor', self.__left_sensor_callback, 1)
self.create_subscription(Range, 'right_sensor', self.__right_sensor_callback, 1)
The node sends a message to the /cmd_vel topic when a measurement from the right sensor is received. The command_message will register at least a forward speed in linear.x in order to make the robot move when no obstacle is detected. If any of the two sensors detect an obstacle, command_message will also register a rotational speed in angular.z in order to make the robot turn right:
def __right_sensor_callback(self, message):
    self.__right_sensor_value = message.range

    command_message = Twist()

    command_message.linear.x = 0.1

    if self.__left_sensor_value < 0.9 * MAX_RANGE or self.__right_sensor_value < 0.9 * MAX_RANGE:
        command_message.angular.z = -2.0

    self.__publisher.publish(command_message)
Add the new Node to Plugin Setup
Edit setup.py and add the new entry point to console_scripts with:
nano hello_webots/setup.py
'console_scripts': [
    'my_robot_driver = hello_webots.my_robot_driver:main',
    'obstacle_avoider = hello_webots.obstacle_avoider:main'
],
This will add an entry point for the obstacle_avoider node.
Go to the file robot_launch.py and add the obstacle avoider to generate_launch_description() with:
nano hello_webots/launch/robot_launch.py
from rclpy.node import Node

...

def generate_launch_description():

    ...

    obstacle_avoider = Node(
        package='hello_webots',
        executable='obstacle_avoider',
    )

    return LaunchDescription([
        webots,
        my_robot_driver,
        obstacle_avoider,
        launch.actions.RegisterEventHandler(
            event_handler=launch.event_handlers.OnProcessExit(
                target_action=webots,
                on_exit=[launch.actions.EmitEvent(event=launch.events.Shutdown())],
            )
        )
    ])
Test Run
From a terminal in your ROS2 workspace run:
cd ~/ros2_ws
colcon build
source install/local_setup.bash
ros2 launch hello_webots robot_launch.py
This will launch the simulation:

Your robot should go forward and before hitting the wall it should turn clockwise. You can press Ctrl+F10 in Webots or go to the View menu, Optional Rendering and Show DistanceSensor Rays to display the range of the distance sensors of the robot.
Adding Reset Handler
Extend a robot simulation with a reset handler to restart nodes when the reset button of Webots is pressed.
The Webots reset button reverts the world to the initial state and restarts controllers. It is convenient as it quickly resets the simulation, but in the context of ROS 2, robot controllers are not started again making the simulation stop. The reset handler allows you to restart specific nodes or perform additional actions when the reset button in Webots is pressed.
On reset, Webots kills all driver nodes. Therefore, to start them again after reset, you should set the `respawn`` property of the driver node in the launch file to True. It will ensure driver nodes are up and running after the reset:
nano ~/ros2_ws/src/hello_webots/launch/robot_launch.py
def generate_launch_description():
    robot_driver = WebotsController(
        robot_name='my_robot',
        parameters=[
            {'robot_description': robot_description_path}
        ],

        # Every time one resets the simulation the controller is automatically respawned
        respawn=True
    )