Install Tomcat 9 on Ubuntu 20.04

- Install Java
- Creating a System User
- Install Tomcat 9
- Access the Tomcat Webfrontend
- Deploying a Demo Application
Apache Tomcat is an open-source web server and Java servlet container. It is one of the most popular choices for building Java-based websites and applications. Tomcat is lightweight, easy to use, and has a robust ecosystem of add-ons.
Install Java
Tomcat 9 requires Java SE 8 or later to be installed on the system. Ì’ll install OpenJDK 11 , the open-source implementation of the Java Platform.
apt update
apt install openjdk-11-jdk
Verify the installation by checking the Java version:
java -version
Creating a System User
I’ll create a new system user and group with home directory /opt/tomcat that will run the Tomcat service:
useradd -m -U -d /opt/tomcat -s /bin/false tomcat
Install Tomcat 9
Download the latest Tomcat
Tomcat binary distribution is available for download from the Tomcat downloads page:
wget https://mirrors.tuna.tsinghua.edu.cn/apache/tomcat/tomcat-9/v9.0.41/bin/apache-tomcat-9.0.41.tar.gz -P /tmp
Extract the Files
Extract the tar file to the Tomcat user home directory /opt/tomcat directory:
tar -xf /tmp/apache-tomcat-9.0.41.tar.gz -C /opt/tomcat/
ln -s /opt/tomcat/apache-tomcat-9.0.41 /opt/tomcat/latest
Change the directory ownership to user and group tomcat:
chown -R tomcat: /opt/tomcat
The shell scripts inside the Tomcat’s bin directory must be executable:
sudo sh -c 'chmod +x /opt/tomcat/latest/bin/*.sh'
Create a SystemD Service
Open your text editor and create a tomcat.service unit file in the /etc/systemd/system/ directory:
nano /etc/systemd/system/tomcat.service
[Unit]
Description=Tomcat 9 servlet container
After=network.target

[Service]
Type=forking

User=tomcat
Group=tomcat

Environment="JAVA_HOME=/usr/lib/jvm/java-11-openjdk-amd64"
Environment="JAVA_OPTS=-Djava.security.egd=file:///dev/urandom -Djava.awt.headless=true"

Environment="CATALINA_BASE=/opt/tomcat/latest"
Environment="CATALINA_HOME=/opt/tomcat/latest"
Environment="CATALINA_PID=/opt/tomcat/latest/temp/tomcat.pid"
Environment="CATALINA_OPTS=-Xms512M -Xmx1024M -server -XX:+UseParallelGC"

ExecStart=/opt/tomcat/latest/bin/startup.sh
ExecStop=/opt/tomcat/latest/bin/shutdown.sh

[Install]
WantedBy=multi-user.target
Find the Java home directory:
find / -name java-11-openjdk-amd64

/usr/lib/jvm/java-11-openjdk-amd64
Save and close the file and notify systemd that a new unit file exists:
systemctl daemon-reload
sudo systemctl enable --now tomcat
sudo systemctl status tomcat
You can start, stop and restart Tomcat same as any other systemd service:
service tomcat start
service tomcat stop
service tomcat restart
Access the Tomcat Webfrontend
Open the port 8080 in your firewall:
ufw allow 8080/tcp
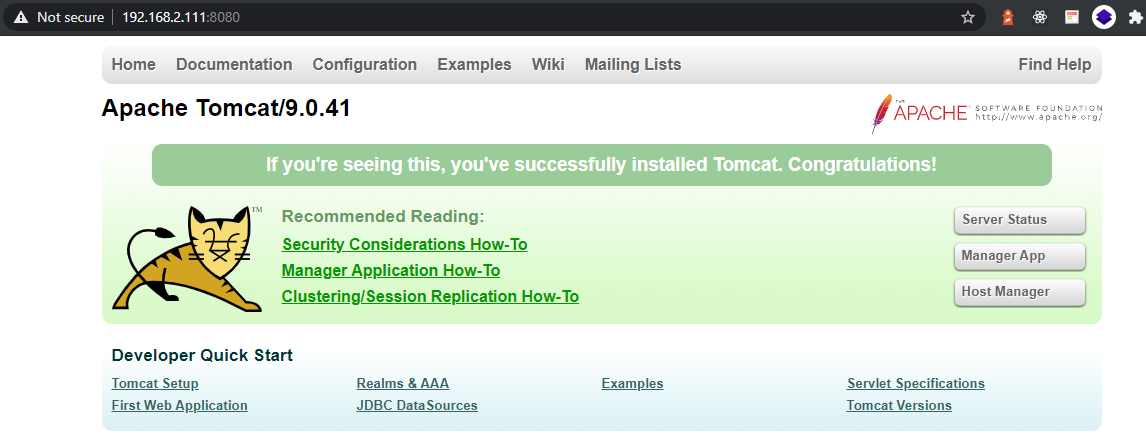
And access the IP address of your server with your web browser:

Deploying a Demo Application
To deploy an application, simply drag the application folder into the webapps folder in the Tomcat installation directory - in my case /opt/tomcat/apache-tomcat-9.0.41/webapps. I do not have an application so I will just create an empty folder boilerplate and add an index.jsp file with the following content:
<!-- nano /opt/tomcat/apache-tomcat-9.0.41/webapps/boilerplate/index.jsp -->

<%@ page language="java" contentType="text/html; charset=ISO-8859-1"
pageEncoding="ISO-8859-1"%>

<!DOCTYPE html PUBLIC "-//W3C//DTD HTML 4.01 Transitional//EN" "http://www.w3.org/TR/html4/loose.dtd">
<html>
  <head>
    <meta http-equiv="Content-Type" content="text/html; charset=ISO-8859-1" />
    <title>Tomcat Boilerplate</title>
  </head>
  <body>
    <h1>This is just a test..</h1>
    <h3>Tomcats!</h3>
  </body>
</html>
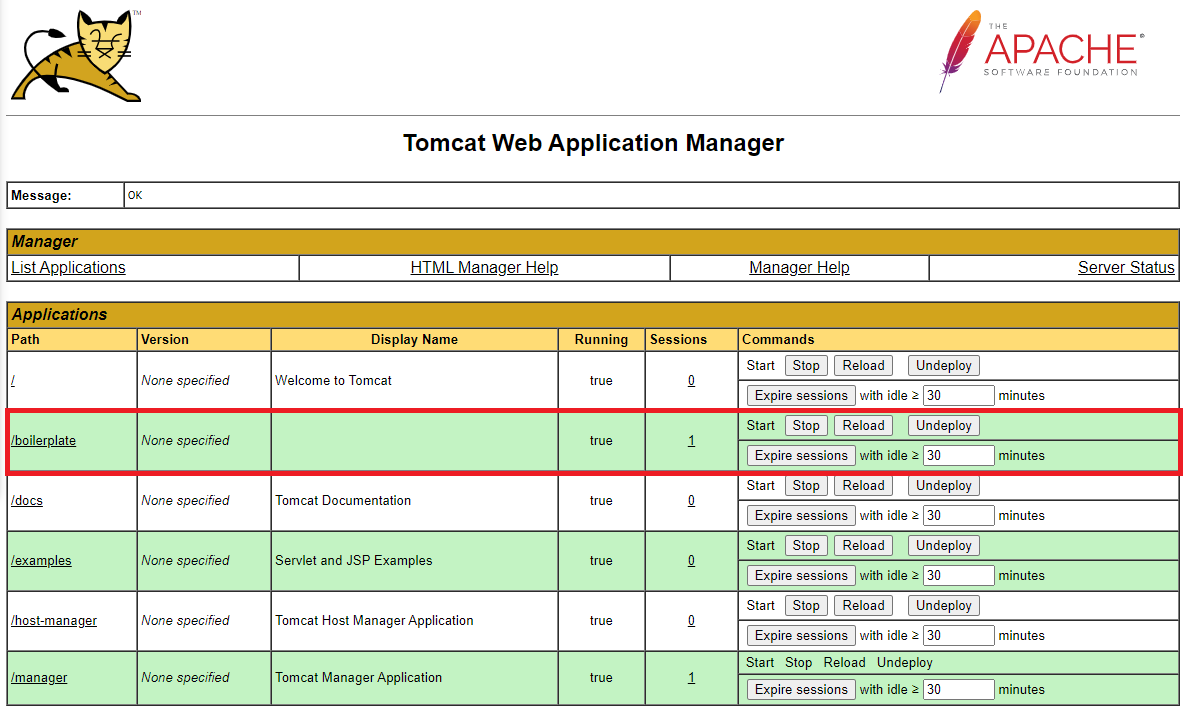
The application will automatically be deployed and be reachable under /boilerplate/ - e.g.:
http://192.168.2.111:8080/boilerplate/
The compiled work file for the servlet can be found in
/opt/tomcat/apache-tomcat-9.0.41/work/Catalina/localhost/boilerplate.
Manger App
To use the manager app we first have to create a user login. This can be done in the tomcat-users.xml in the conf directory. Add the manager-gui role as follows:
<!-- nano /opt/tomcat/apache-tomcat-9.0.41/conf/tomcat-users.xml -->

<tomcat-users xmlns="http://tomcat.apache.org/xml"
              xmlns:xsi="http://www.w3.org/2001/XMLSchema-instance"
              xsi:schemaLocation="http://tomcat.apache.org/xml tomcat-users.xsd"
              version="1.0">

  <role rolename="manager-gui"/>
  <user username="admin" password="instar" roles="manager-gui"/>

</tomcat-users>
Access to the Manager App is only allowed on
localhost. Since I am accessing remotely I will have to add my IP address to the allowedorg.apache.catalina.valves.RemoteAddrValveinside thecontext.xmlof the manager app:
<!-- nano /opt/tomcat/apache-tomcat-9.0.41/webapps/manager/META-INF/context.xml -->

<Valve className="org.apache.catalina.valves.RemoteAddrValve"
         allow="127\.\d+\.\d+\.\d+|::1|0:0:0:0:0:0:0:1|192.168.2.112" />
or allow all address with an regular expression:
<Valve className="org.apache.catalina.valves.RemoteAddrValve"
         allow=".*" />
Restart your server:
service tomcat restart
I can now access the Manager App http://192.168.2.111:8080/manager/html with the login admin/instar.
