Debugging MQTT Sensor Networks

Windows and macOS Software
There are plenty of free tools available that you can use to test a MQTT network and to keep an eye on all messages that are processed through it. This is extremely useful when connecting new clients. In the following we are going to take a look at two of these tools that are both available for Windows, macOS and Linux:
MQTT Explorer
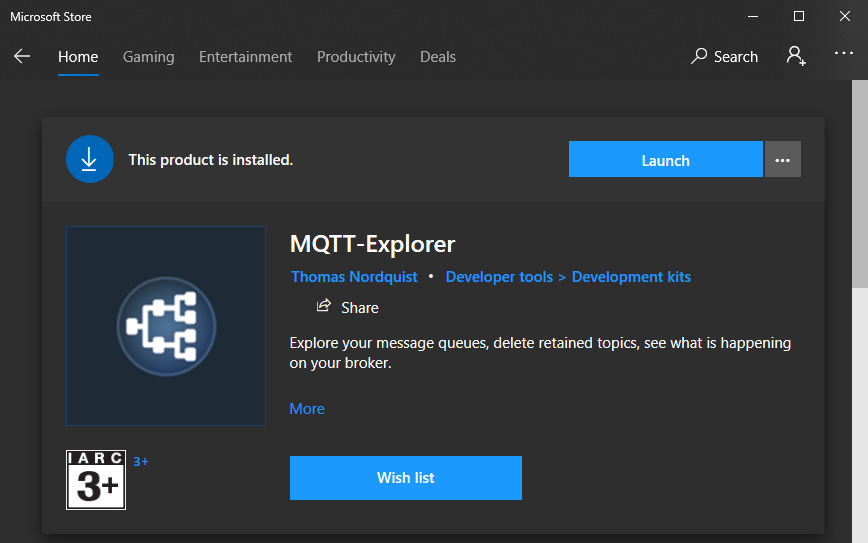
Once you downloaded, installed and started the app click on the Plus icon in the top left to add your MQTT broker - in our case, our INSTAR Full HD camera.
Connect to your Cameras Broker
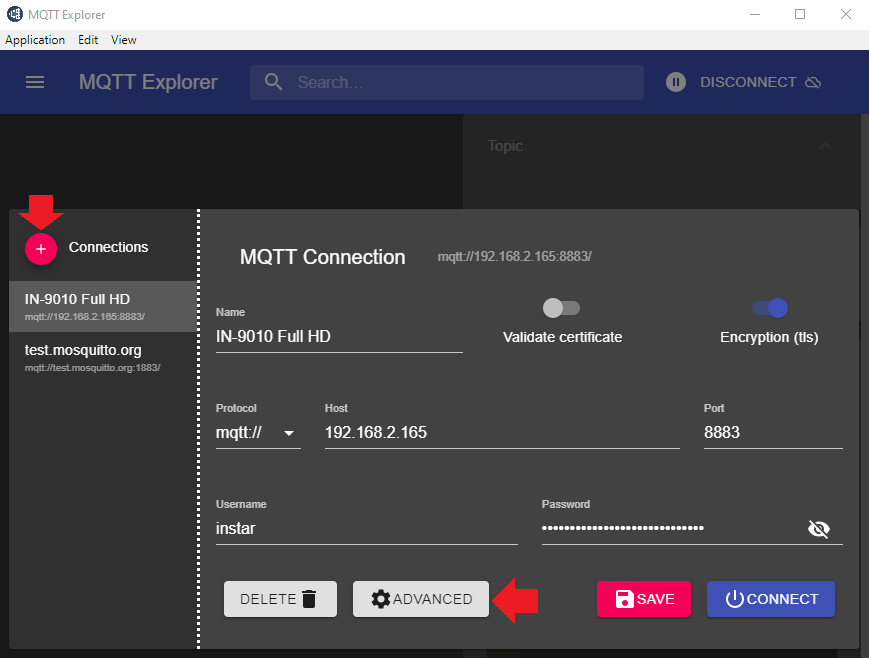
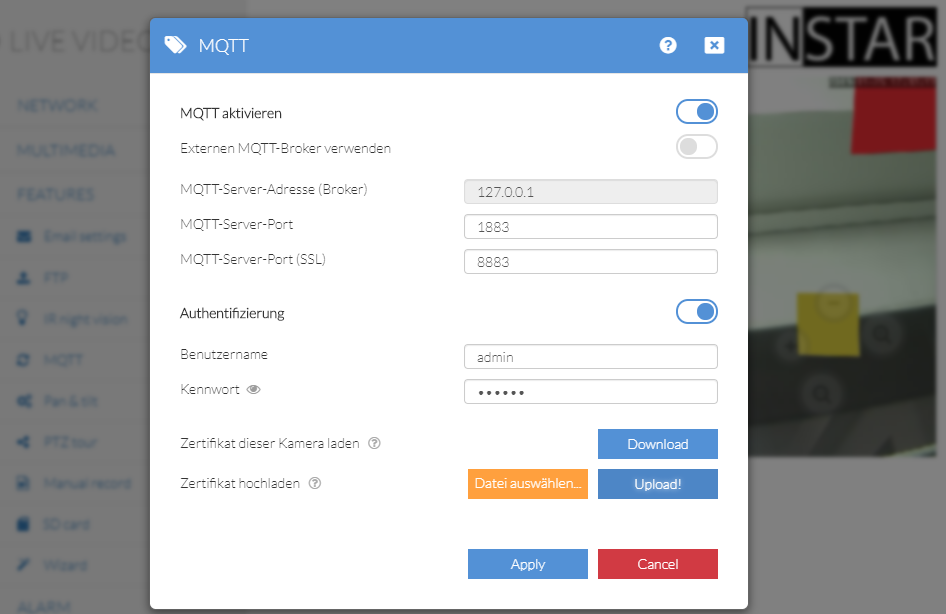
Type in your cameras local IP address as Host, e.g. 192.168.2.165, with the Port 8883 (with Encryption (tls) enabled) or 1883 (without encryption). The last line is your MQTT broker login that you have set in your cameras WebUI:
If you have chosen to use the TLS Encryption you now have to click on Advanced back inside the MQTT Explorer broker setup:
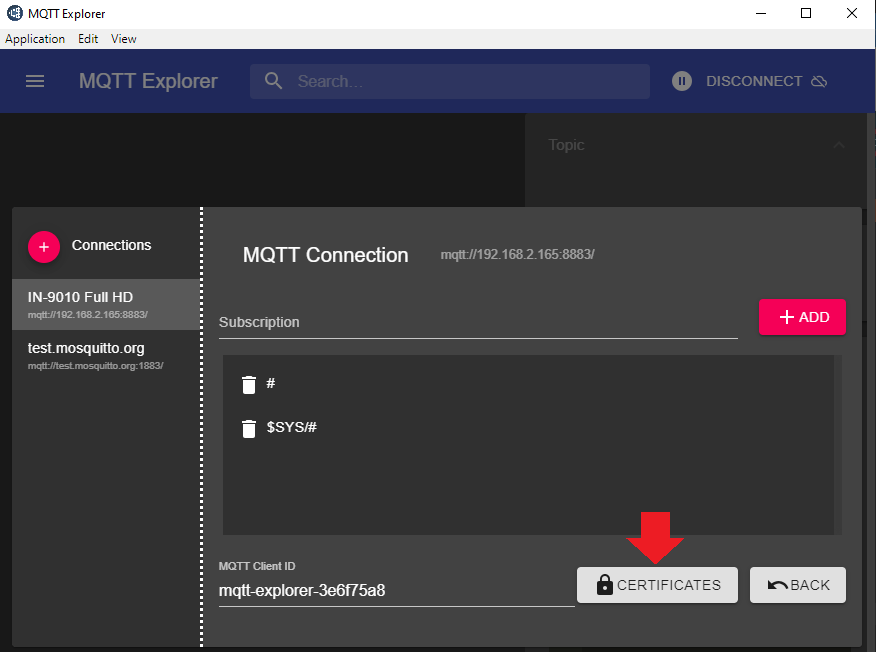
In the screenshot above you can see that we already have a wildcard (#) subscription by default. That means that once we connect to our MQTT Broker we will receive updates for every MQTT Topic that has been registered with the Broker.
In the following window click on Client Certificate and select the INSTAR Trusted Client Certificate that you can download from your cameras WebUI:
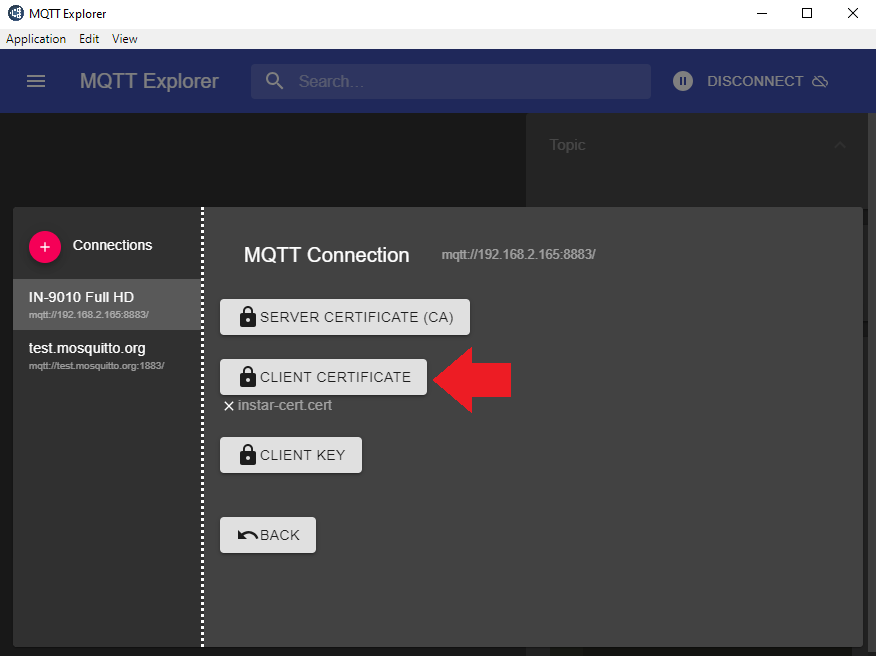
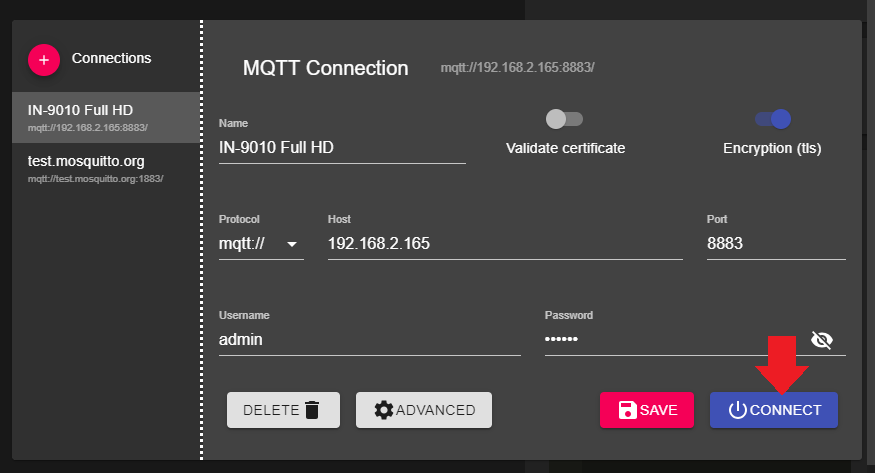
Once you uploaded the certificate you are able to connect to your MQTT broker. Click on Back twice and then Connect:
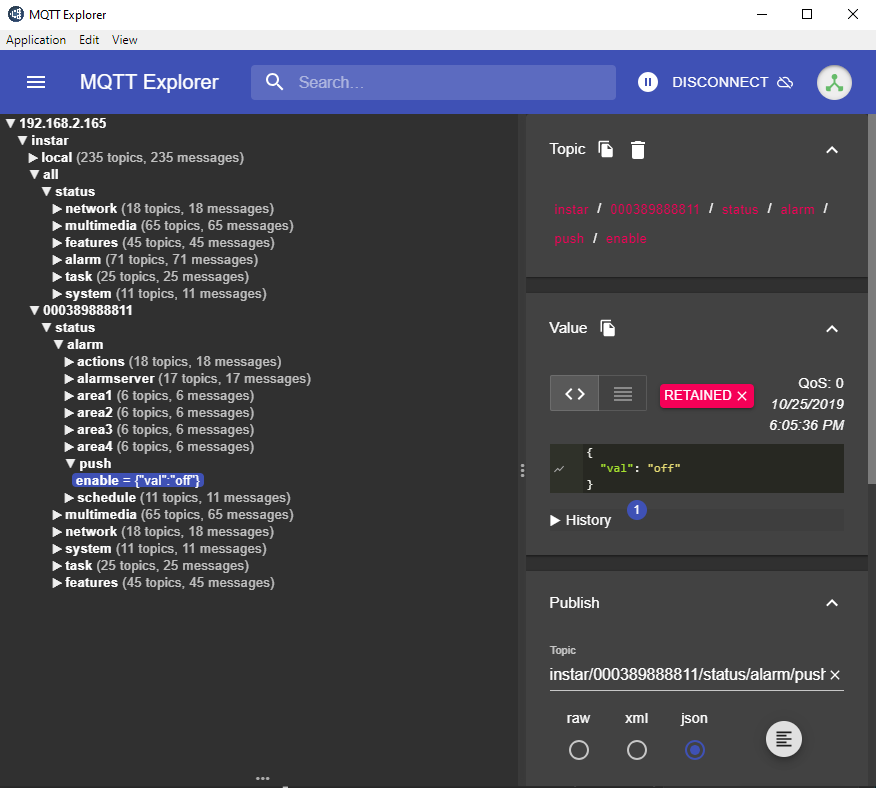
Once connected you are able to see all MQTT Topics that are registered with the server. The important once are instar/all and instar/000389888811, where the number 000389888811 represents the MAC address of our camera and will be different on every camera you connect to.
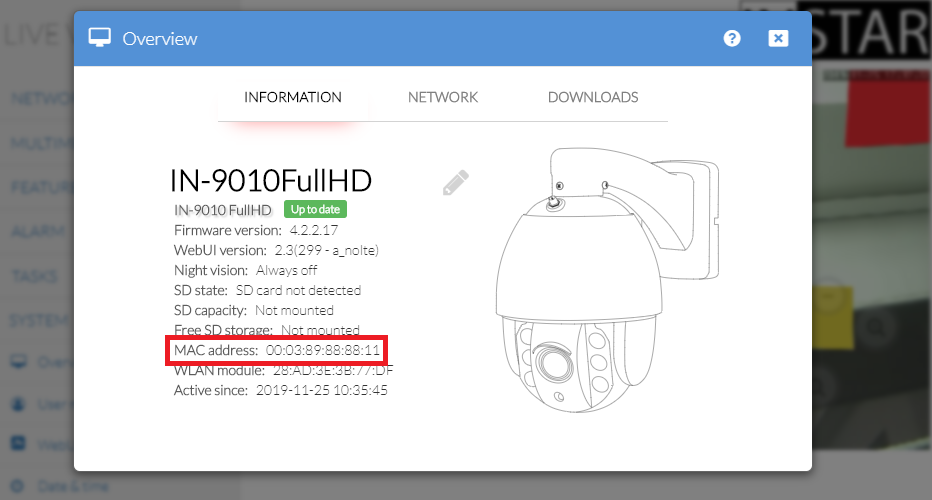
You can find your cameras MAC address by opening the web user interface and going to System / Overview:
All topics under instar/all will affect all INSTAR Full HD cameras that are connected to your MQTT broker - if an topic is updated here all cameras will be switched accordingly.
All topics under instar/000389888811 only affect the camera with the MAC address corresponding with the number 000389888811. If you want to send a command to the camera that is running the active MQTT broker, you can either use the MAC address, or simply use the instar/local prefix instead.
Controlling your Camera
To control your camera select a topic you want to update:
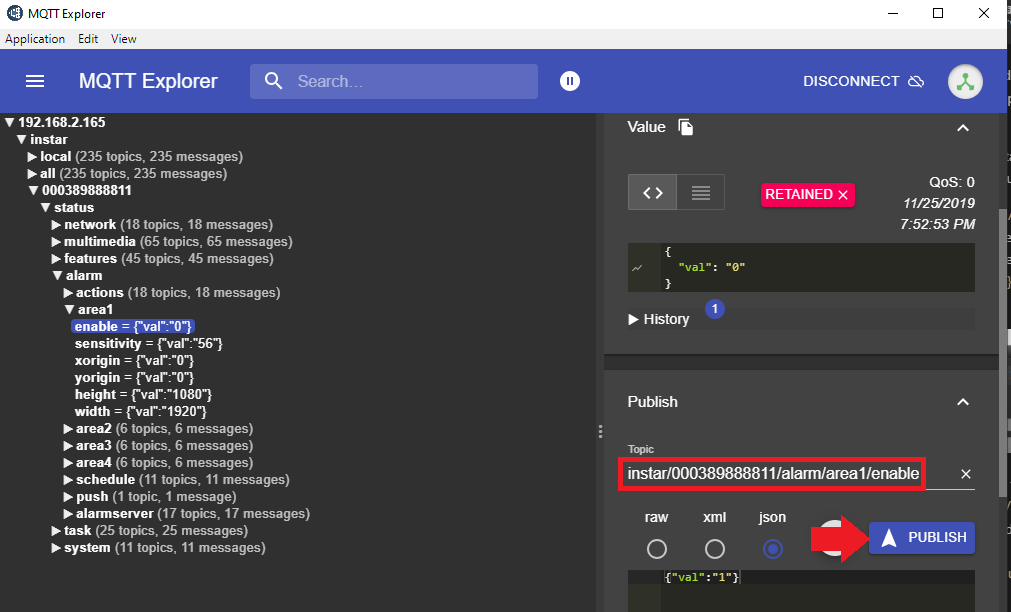
In this case we choose the topic alarm/area1/enable to activate the motion detection area 1 on our camera. Note that the topics that are listed on the left are the STATUS topics that display the current status on our camera. In our example the topic is instar/000389888811/status/alarm/area1/enable and it's current value is {'val':'0'}. To update this status topic and activate our detection area we have to send an update to the COMMAND Topic. This is identical to the status topic minus the word status: instar/000389888811/alarm/area1/enable. Copy this command into the topic field and add the payload {'val':'1'} and hit PUBLISH:
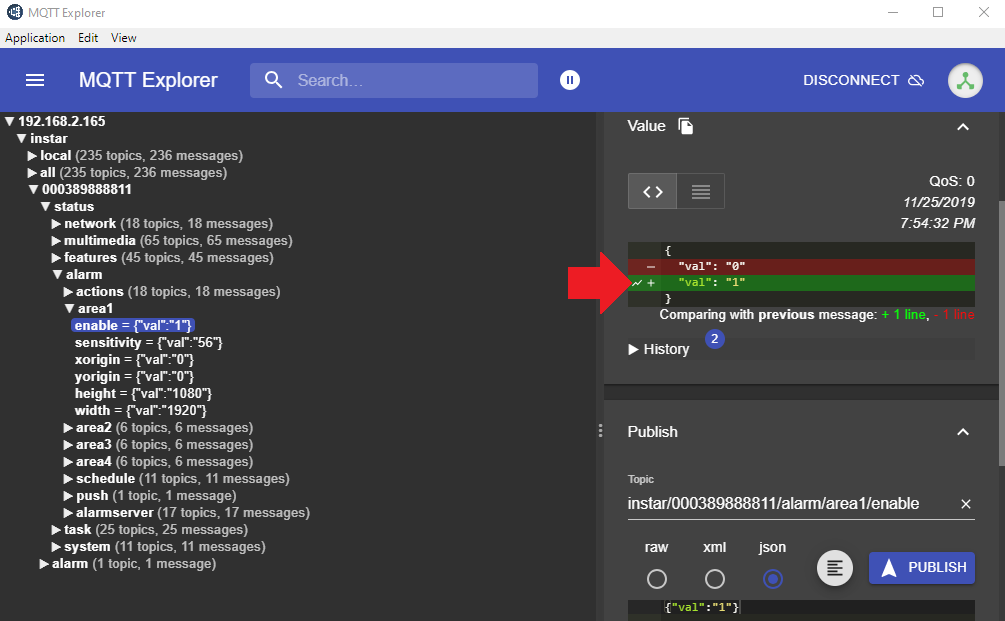
You can see that the STATUS topic was updated to the value 1. When you open your cameras webUI you will also find that the detection area 1 is now active! Congratulations, you have successfully taken control over your camera using the MQTT interface.
MQTT.fx
Once you downloaded, installed and started the app click on the Cog Wheel icon in the top center to add your MQTT broker - in our case, our INSTAR Full HD camera.

Choose the MQTT Broker as Profile Type and type in your cameras local IP address as Broker Address, e.g. 192.168.2.165, with the Broker Port 8883 (with Encryption (SSL/TLS) enabled) or 1883 (without encryption).
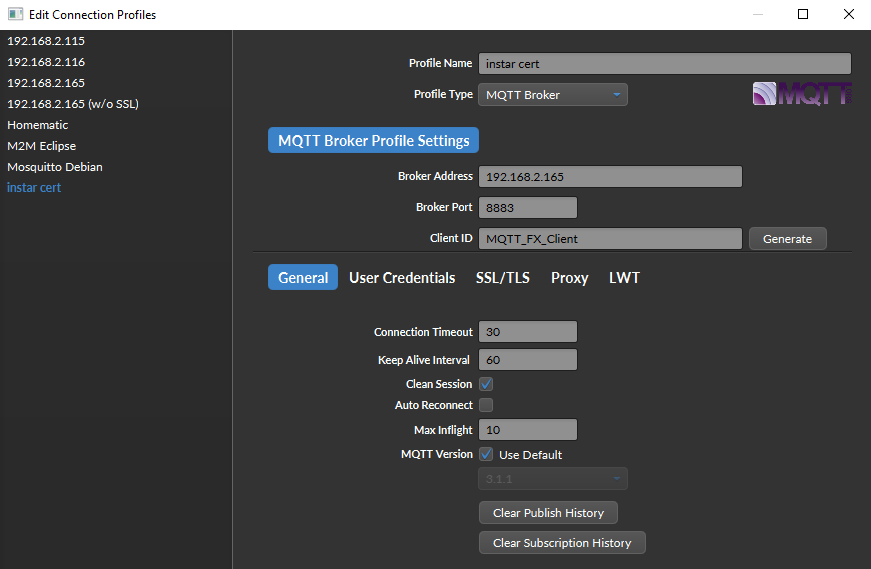
Under User Credentials type in your MQTT broker login that you have set in your cameras WebUI:
If you have chosen to use the TLS Encryption via Broker Port 8883 you now have to switch to the SSL/TLS tab:

Enable SSL/TLS and click on CA Certificate file and select the INSTAR Trusted Client Certificate that you can download from your cameras WebUI:

Click on Ok and back on the main Window select the broker you just set up and click on Connect:
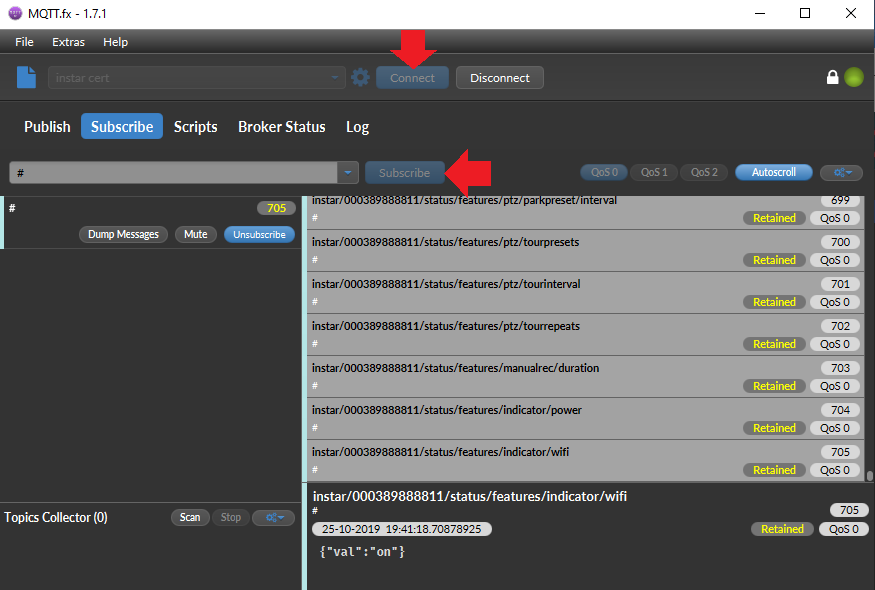
By typing # into the input field and clicking on Subscribe inside the Subscribe tab you get a wildcard subscription for all MQTT topics that are registered on your MQTT broker.
You can also use the Publish tab to update a MQTT topic and switching the corresponding function on your camera.
For example the topic instar/000389888811/alarm/area1/enable, where the number 000389888811 represents the MAC address of our camera and will be different on every camera you connect to, can have the payload {'val':'1'} or {'val':'0'} to either switch the alarm detection area 1 on or off.

Switching back the Subscribe tab shows you that your MQTT broker received your topic update for instar/000389888811/alarm/area1/enable, your camera received the command to switch on the alarm detection area on and in turn updated the topic instar/000389888811/status/alarm/area1/enable with the new status the camera is now in:
