MQTT Networks with Athom Homey

In this tutorial we want to connect an INSTAR Full HD camera through it's MQTT Interface with the Athom Homey Smarthome.
Adding the Homey MQTT Client
Homey is a modular - that means that it is only set up with a limited amount of functionality out of the box. You can use the Homey App Store to load all kinds of kinds apps onto your gateway to personalize it's functionality. For the following we are going to need an MQTT client to be able to connect to the MQTT server on our camera.
-
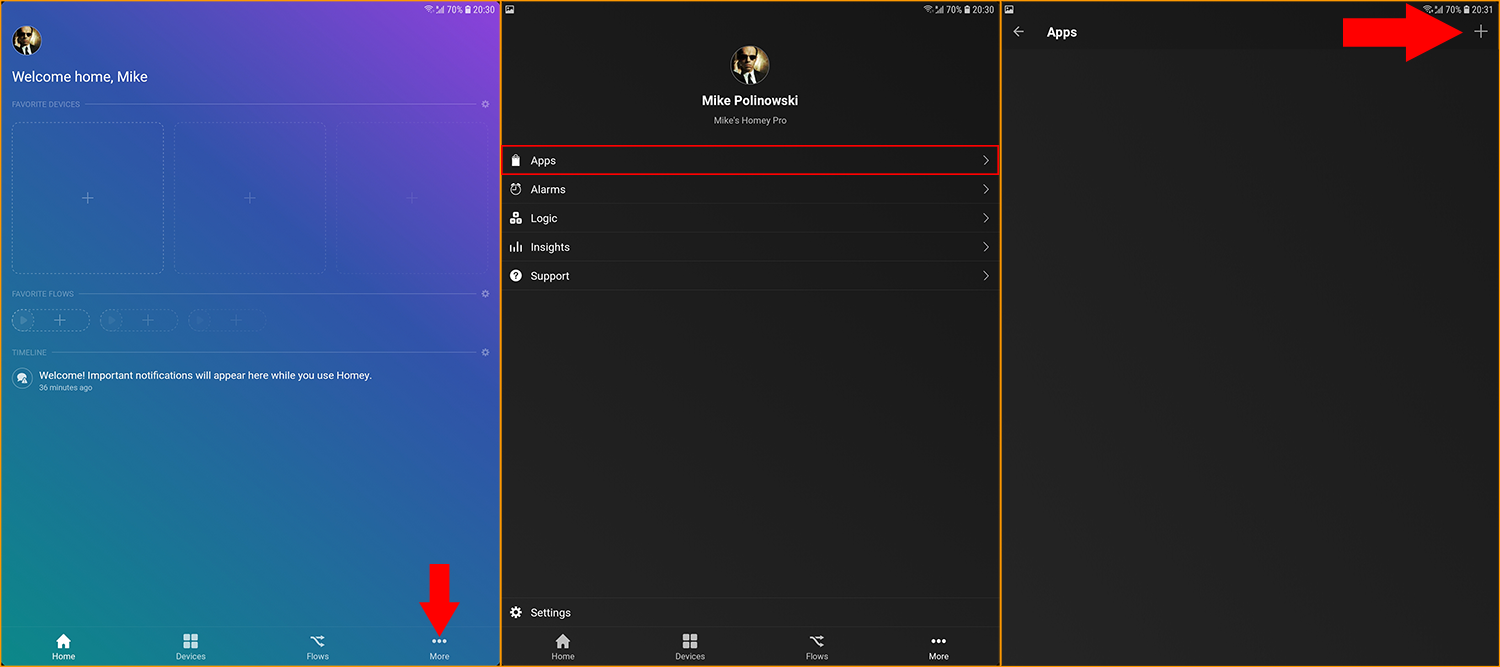
Start by launching your Homey App for iOS or Android and switch to the More App.
-
Open the Apps category.
-
And click on the + icon in the top right to add a new app.
-
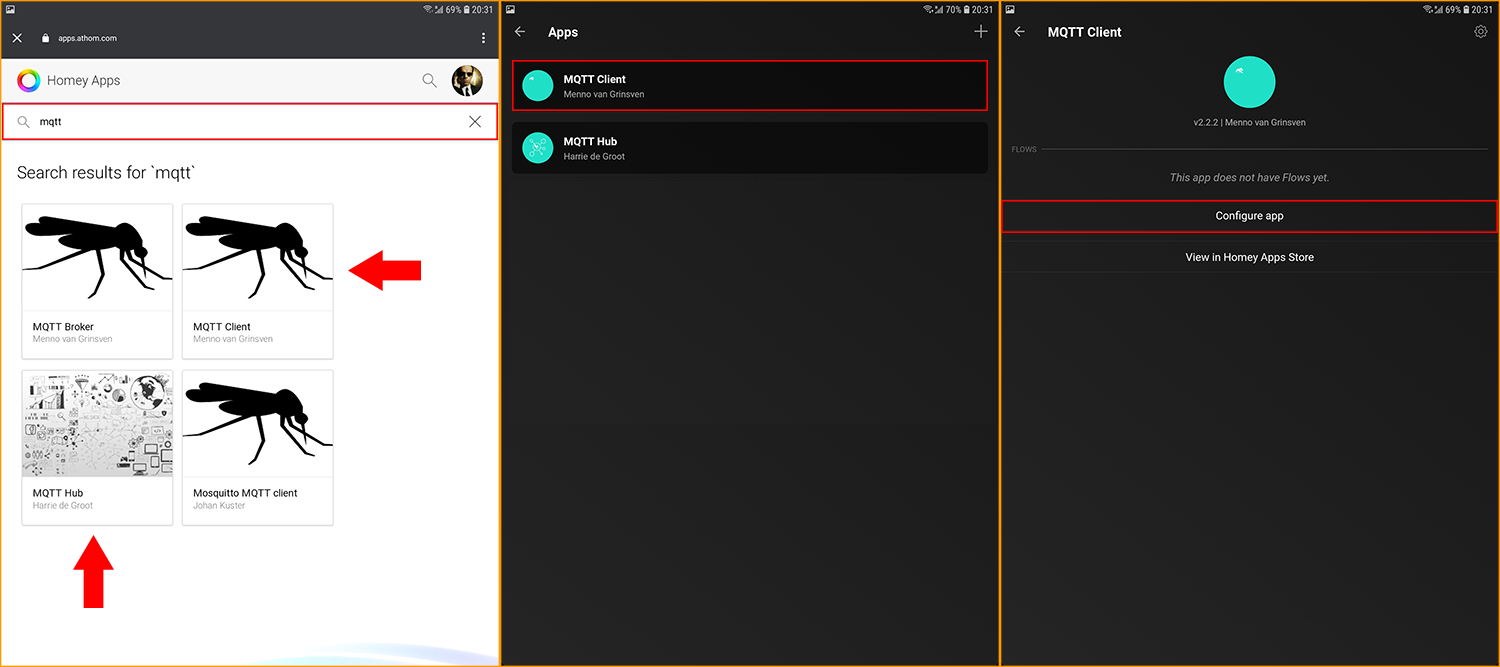
Type
mqttinto the search field and select the MQTT Client. I am also installing the MQTT Hub - this is optional. The Hub App publishes Homey state variables through MQTT which comes in handy if you also use another smarthome solution that you want to interconnect with your Homey. -
Once installed, click on the MQTT Client inside the Apps category.
-
Click on Configure App to connect the client to the INSTAR MQTT Server.
-
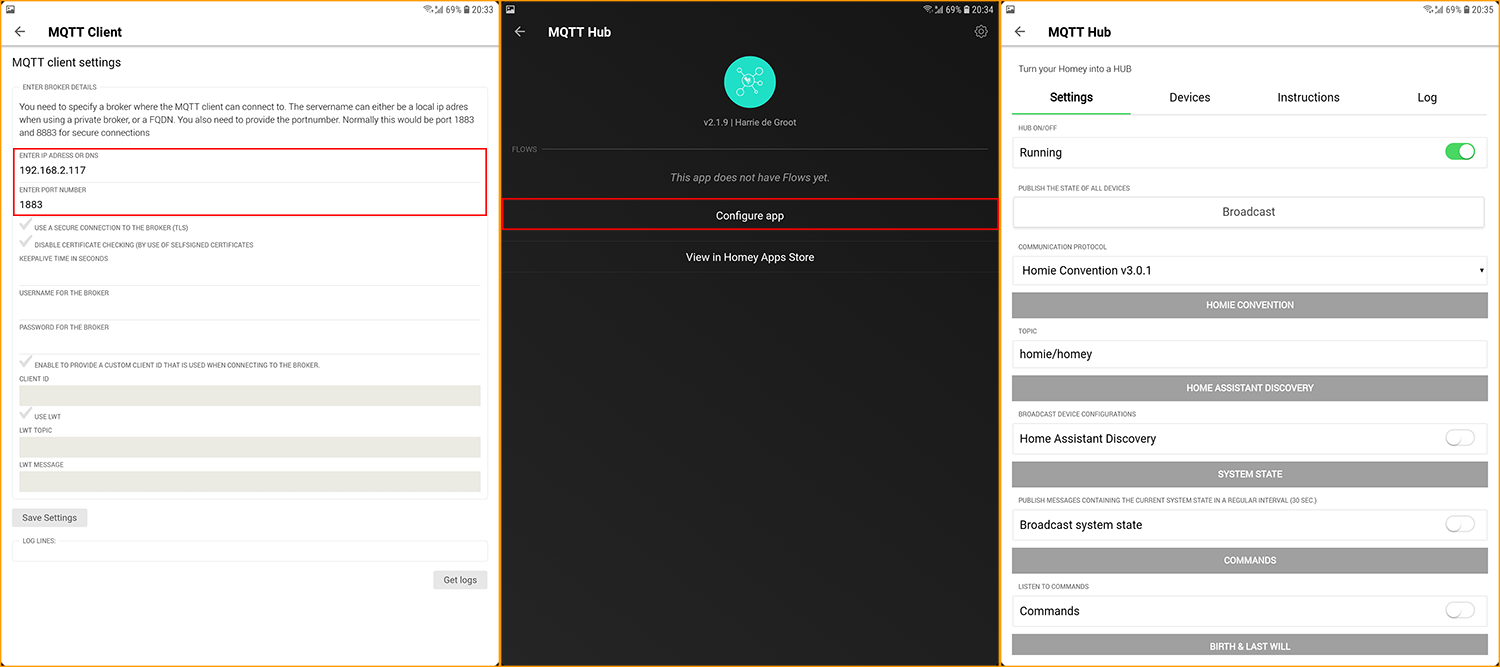
Start by entering the IP address of your camera (that is running your MQTT broker) - e.g.
192.168.2.116. We are going to use the Port1883that allows us to connect to the MQTT broker without the SSL encryption (an encrypted connection can be established via the port8883but requires a custom SSL certificate which I could not find out how to upload). The username and password for the MQTT broker is the one you set in the MQTT Menu. -
If you installed the MQTT Hub earlier - which is optional - enter it and click on Configure app.
-
Here you can set which information Homey should publish to our MQTT broker for use with other smarthome components.
Sending a MQTT Command to your Camera
-
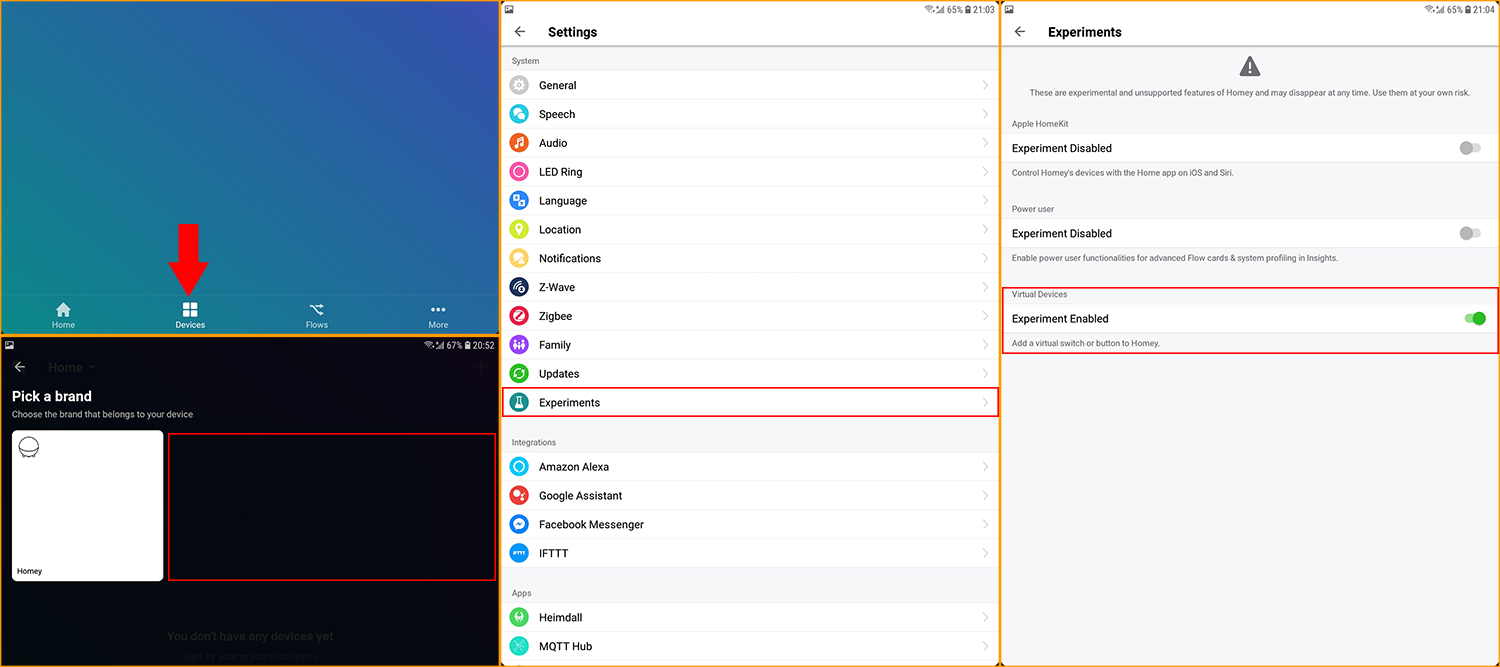
Now switch to the Devices tab and check if you are able to add virtual devices. If you can't find them, the are still hidden as experimental features.
-
Switch to the More tab and enter the Settings menu. Click on Experiments.
-
Activate Virtual Devices.
-
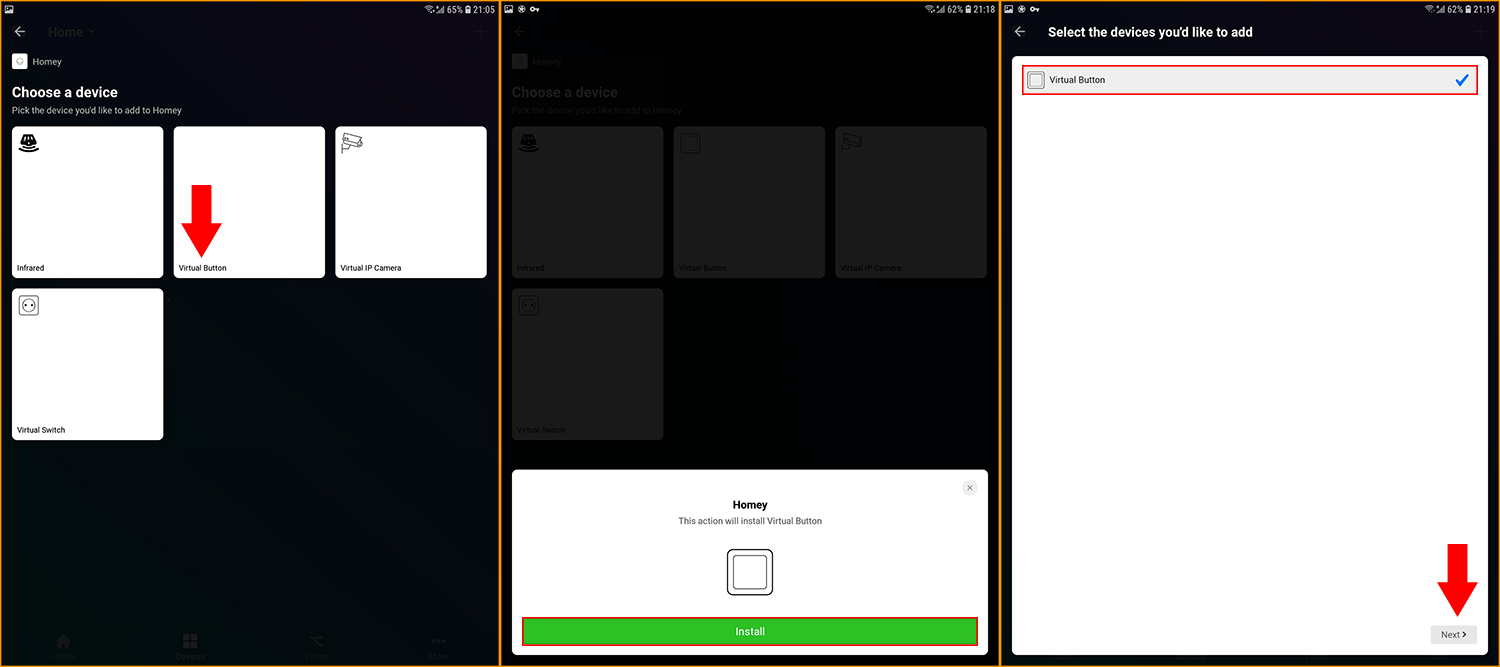
Back to Devices you should now be able to add a Virtual Button.
-
Click on Install to add the button to your devices.
-
Click Next to finish the installation.
-
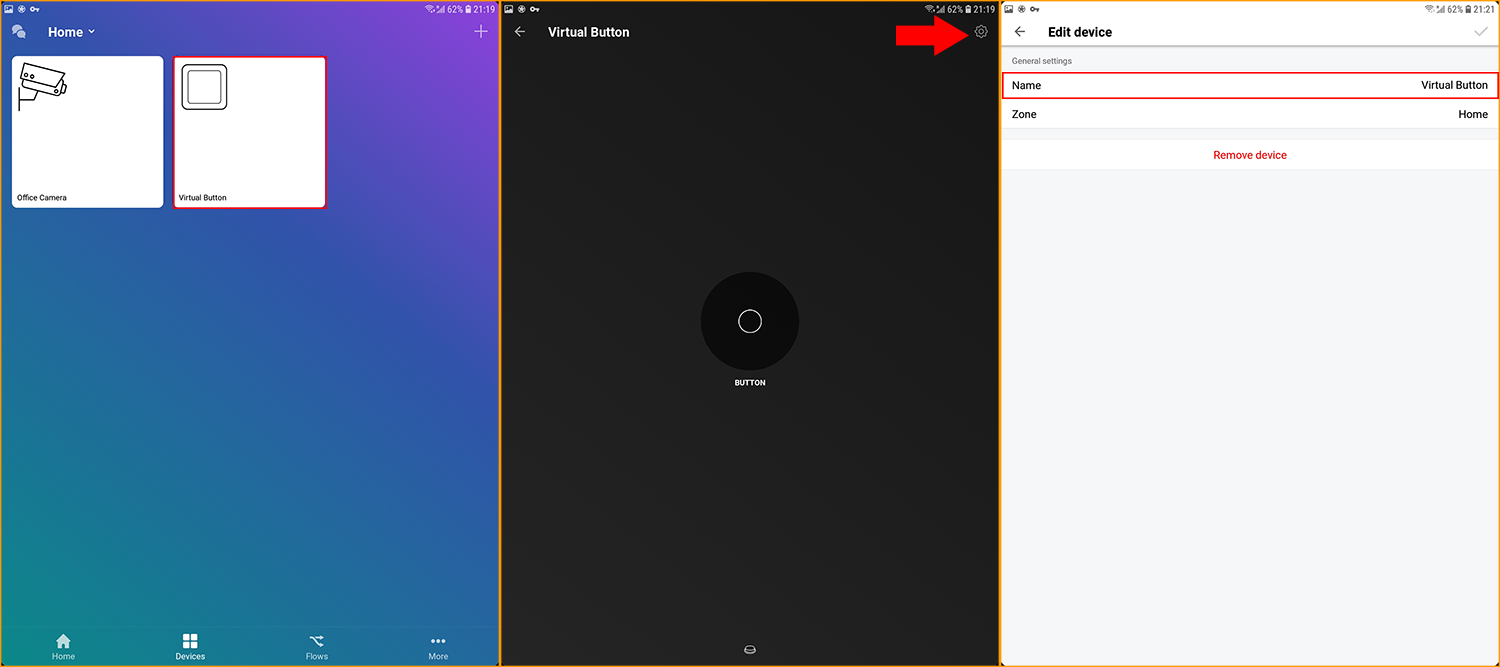
You can click and hold the virtual button to rename it.
-
Click on the cog wheel icon to enter the settings menu.
-
Add a name for your virtual button and add it to a zone.
-
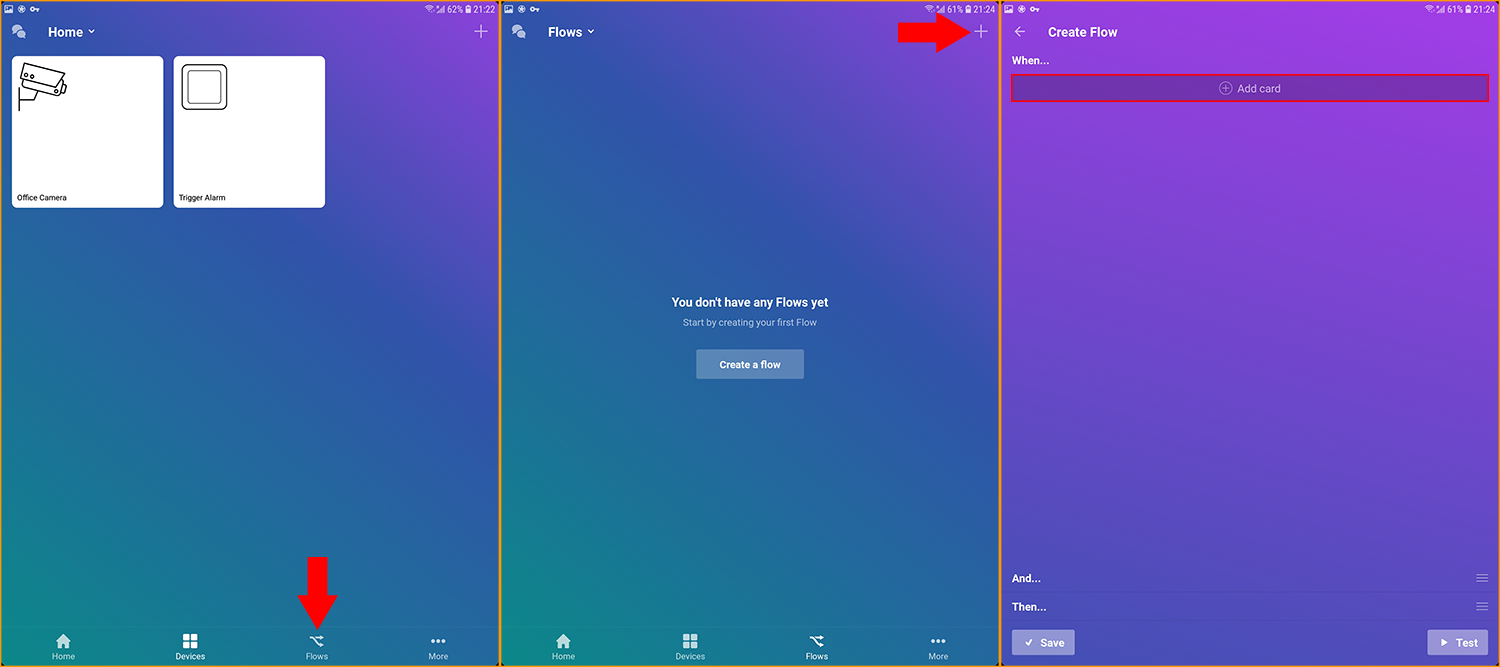
Now we need to add some logic to made this button work. This can be done in the Flows tab.
-
Click on the + icon in the top right to add a new flow.
-
In the Create Flow menu click on Add card in the When condition to assign an event that should trigger your flow.
-
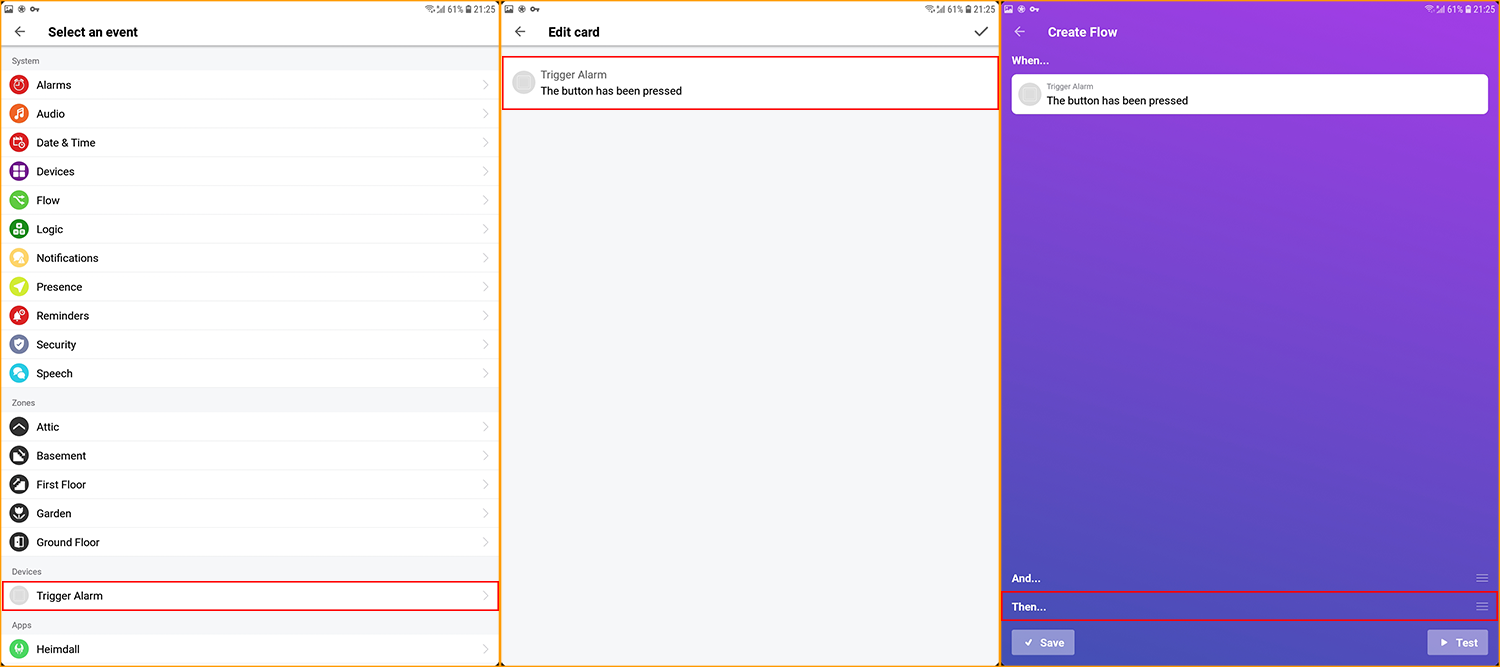
Search for your virtual button under Devices and select it.
-
The button only has this one trigger - When button has bee pressed. Select it and confirm.
-
Now swipe up the Then section of our flow to define what Homey should do when the flow was triggered.
-
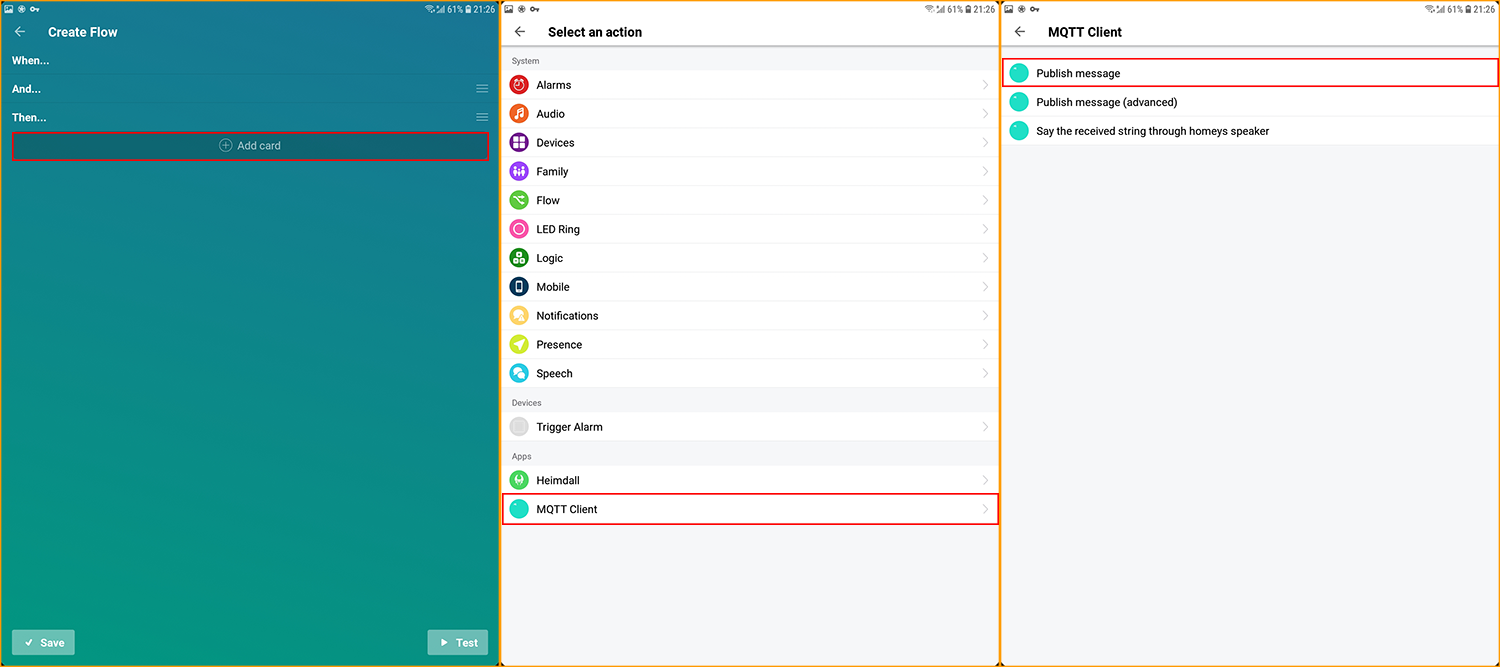
Now click on Add card to add the Then condition for our flow.
-
Scroll down to the Apps section and select the MQTT Client.
-
And choose to Publish a message to the INSTAR MQTT server.
-
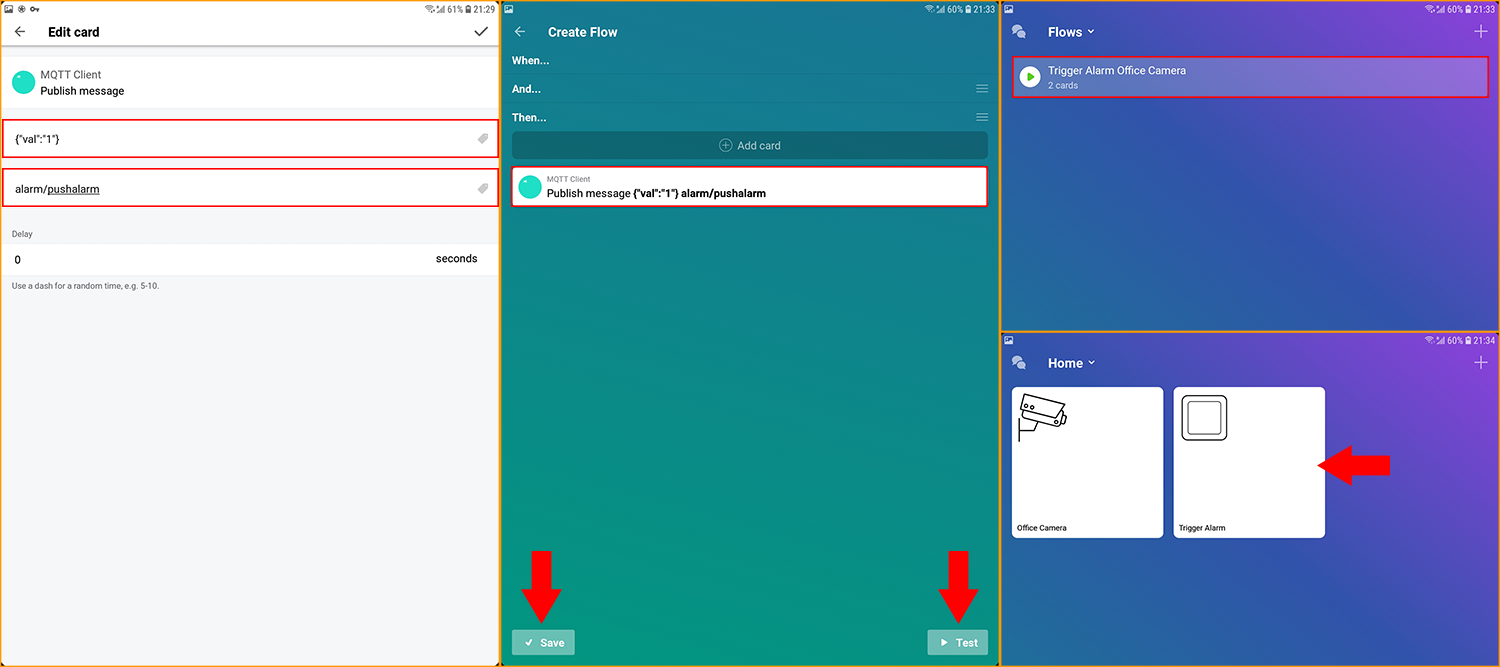
Now you can select a MQTT Topic from the INSTAR MQTT API that you want to update every time the button is pressed. Here I choose
alarm/pushalarmwith a value of{'val':'1'}to trigger an alarm on my camera. Note that if you have more than 1 camera connected to the MQTT server, you either have to add the MAC address in front of the MQTT topic to address a specific camera. Or addall-all/alarm/pushalarm- to address all connected cameras. By adding prefixlocal, you only address the camera that is running the MQTT broker. -
After you confirmed your edit click Test to verify that everything is working - your cameras System Log should show an Audio Alarm (Note that the Audio Alarm has a cool-down of 60s - so even if you hit the virtual button serveral times, you only get 1 alarm per minute). Now you can click on save to exit the setup window.
-
You now have a working button in the Devices window that can trigger an alarm on your camera. Try to add another button with the MQTT topic
features/ptz/presetand a value of{'val':'0'}-{'val':'7'}to have your camera pan&tilt between its preset positions.