Home Automation and IP Cameras

The following instructions will guide you through the process of setting up OpenHAB 2 to automate an IP camera via the MQTT protocol.
- openHAB 2 on Windows
- nodeRED on Windows
- Mosquitto on Windows
- OpenHAB2 Configuration
- Access your SmartHome Remotely
- Configuring nodeRed
openHAB 2 on Windows
The following instructions will guide you through the process of setting up openHAB 2.
Prerequisites
First we need to Download and install the JAVA Development Kit (JDK or openJDK). Then add the JAVA_HOME System Environment Variable in Windows in the Control Panel:
System and Security ➡️ System ➡️ Advanced System Settings ➡️ Environment Variables ➡️ System Variables
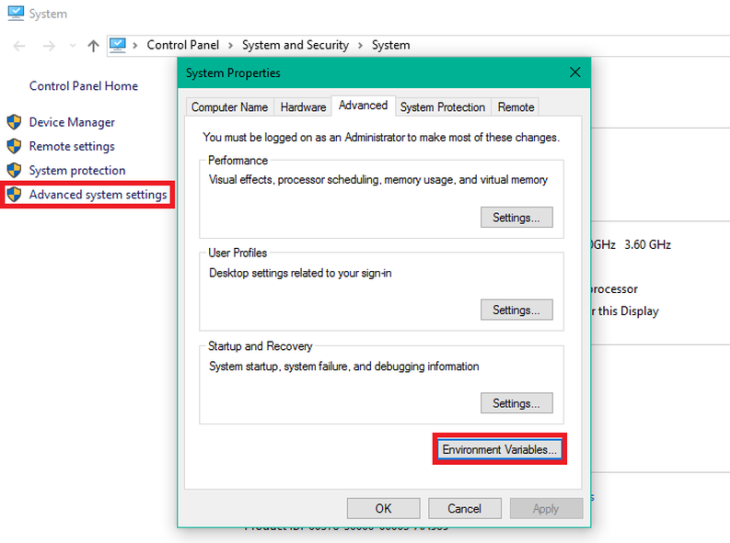
Open the Windows Control Panel, go to the Advanced System Settings and open the Environment Variables.
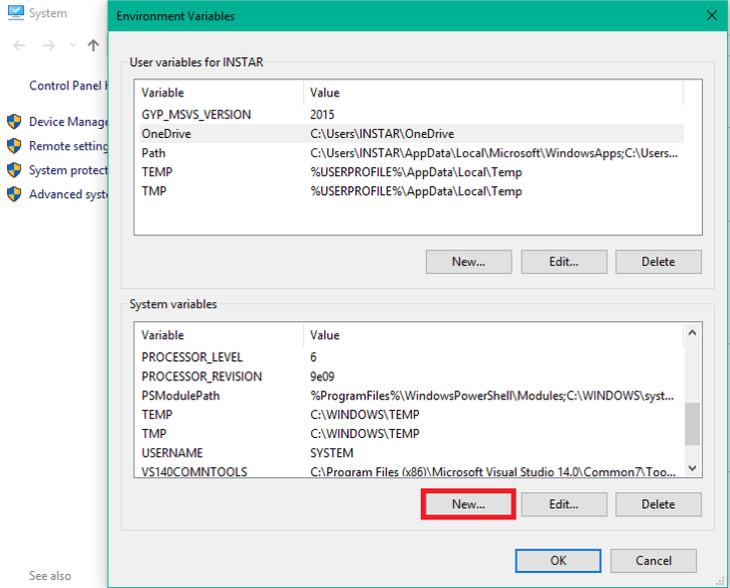
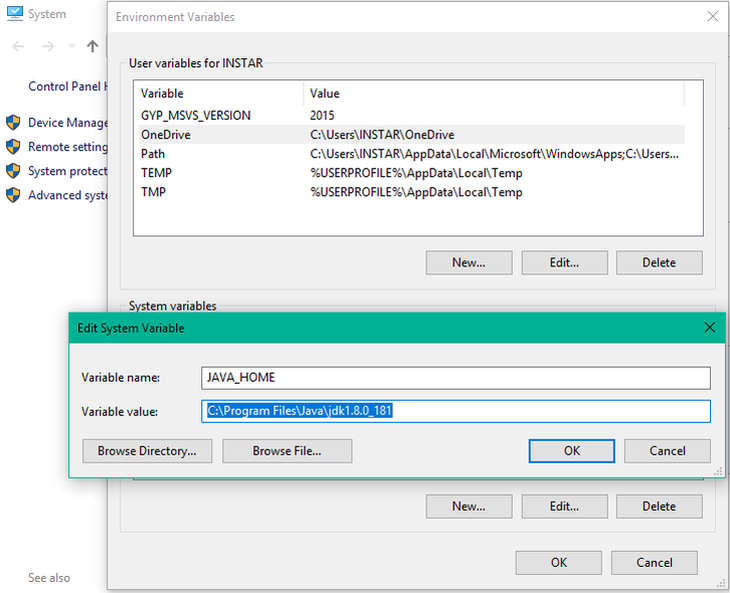
Select to set a new System variable JAVA_HOME and point to your JAVA installation path (that might differ from the one shown below):
Installation
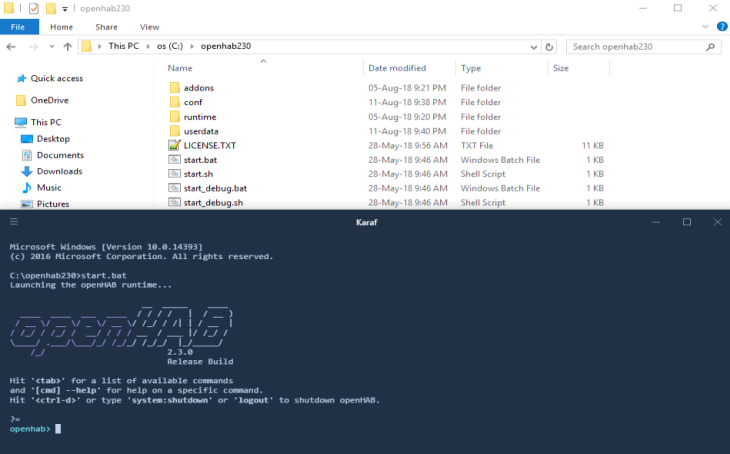
Download the latest Windows Stable or Snapshot ZIP archive file for manual installation and unzip the file in your chosen directory (e.g. C:\openHAB2).
To start the server launch the runtime by executing the script C:\openhab230\start.bat:
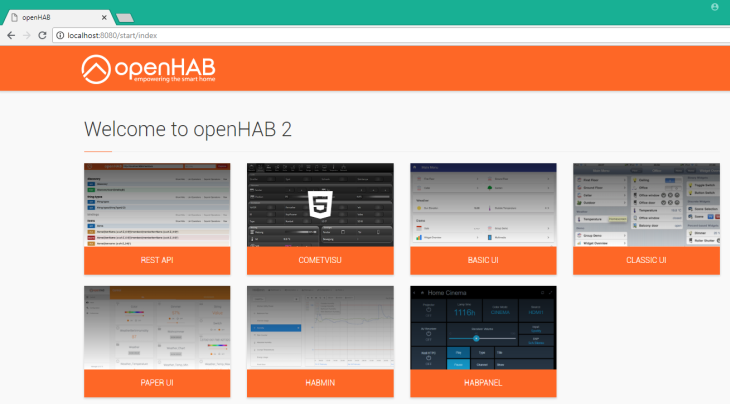
Point your browser to http://localhost:8080. You should be looking at the openHAB package selection page:
nodeRED on Windows
Setting up nodeRED in a Microsoft Windows environment. The instructions are specific to Windows 10 but should also work for Windows 7 and Windows Server from 2008R2.
Installing Node.js
Download the latest version of Node.js from the official Node.js home page. Run the downloaded MSI file. Installing Node.js requires local administrator rights. Once installed, open a command prompt and run the following command to ensure Node.js and npm are installed correctly:
node -v && npm -v

Installing nodeRED
Installing nodeRED as a global module adds the command node-red to your system path. Execute the following at the command prompt:
npm install -g --unsafe-perm node-red
Run nodeRED
Once installed, the simple way to run Node-RED is to use the node-red command in a command prompt: If you have installed Node-RED as a global npm package, you can use the node-red command:
node-red
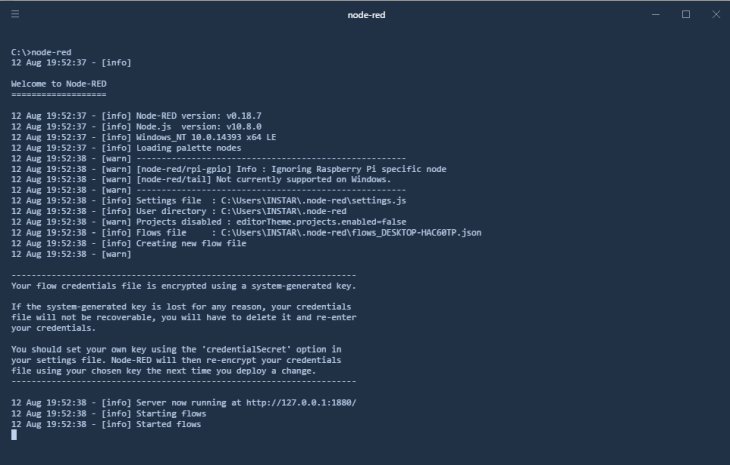
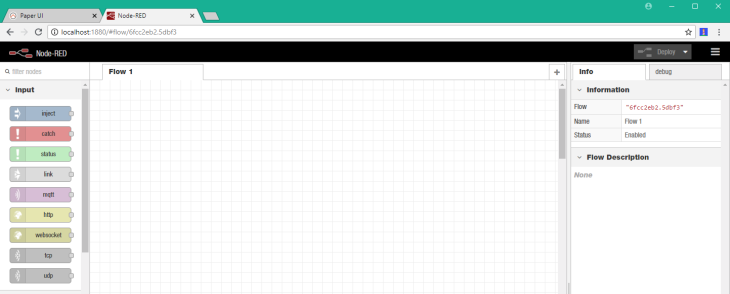
Point your browser to http://localhost:1880/. You should be looking at the nodeRED interface:
For more information check out our Node-RED Guide
Mosquitto on Windows
Eclipse Mosquitto is an open source (EPL/EDL licensed) message broker that implements the MQTT protocol versions 3.1 and 3.1.1. Mosquitto is lightweight and is suitable for use on all devices from low power single board computers to full servers.
The MQTT protocol provides a lightweight method of carrying out messaging using a publish/subscribe model. This makes it suitable for Internet of Things messaging such as with low power sensors or mobile devices such as phones, embedded computers or microcontrollers.
Installing Mosquitto
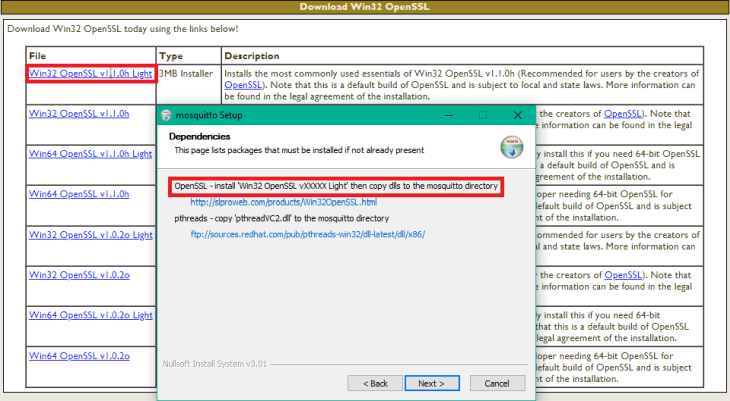
First we need to Download the latest binary and execute it:
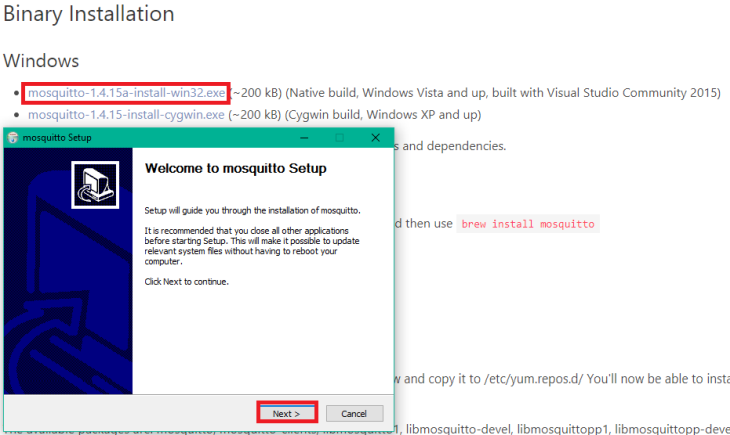
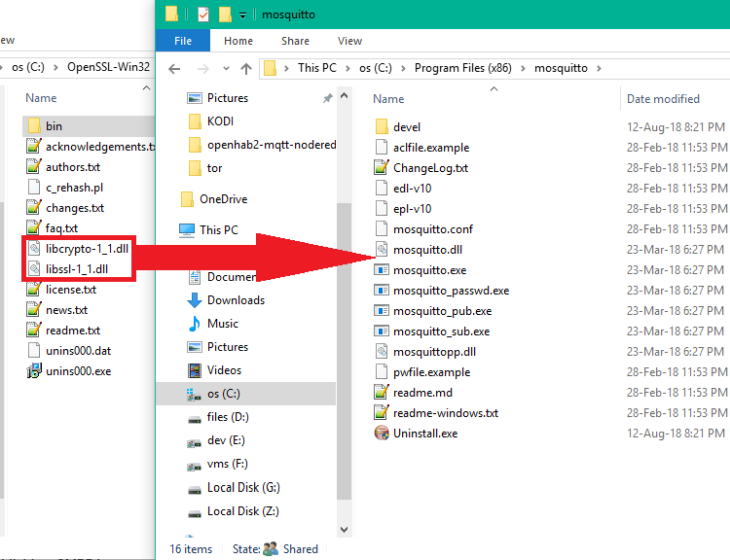
The Installer will ask to download and install the latest version of Win32OpenSSL and copy all .dll's to the Mosquitto install directory:
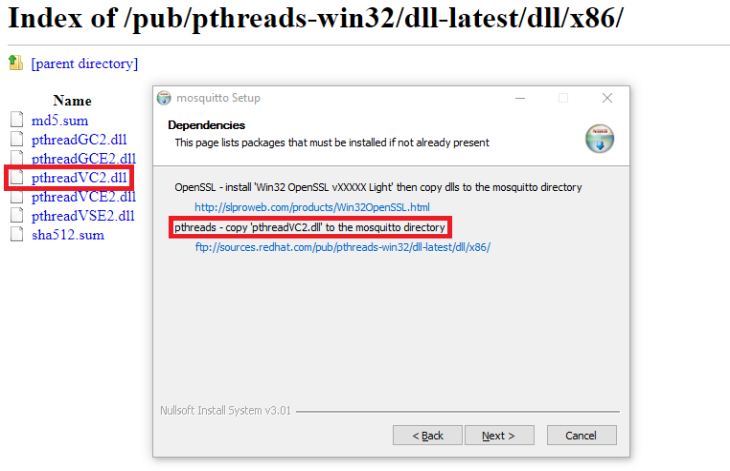
And the same with this pthread.dll:
Testing the MQTT Server with MQTT.fx
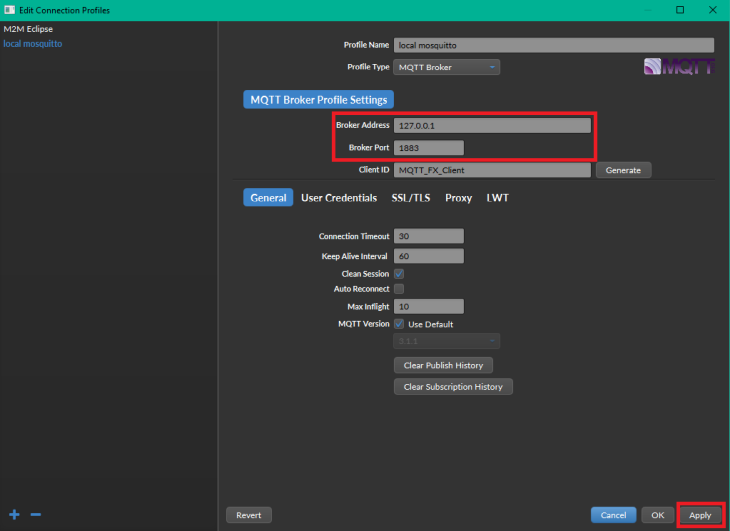
Download MQTT.fx as a MQTT Client for MQTT testing/debugging. Install and start the program and connect it to our local MQTT server:


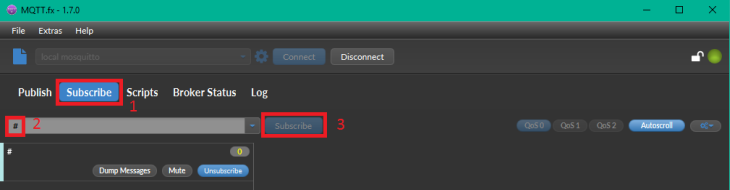
We can test the MQTT Service by subscribing:
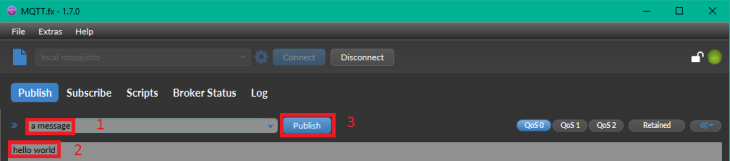
Going back to the Publish tab and sending a message:
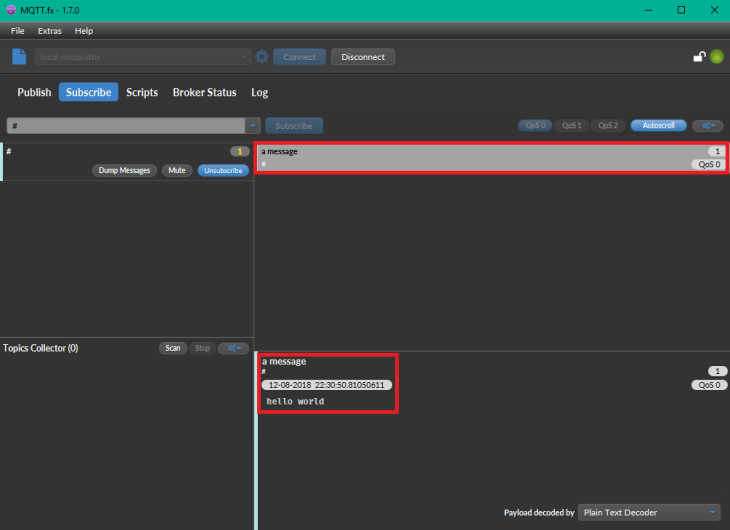
The message should show up in the Subscribe tab:
OpenHAB2 Configuration
The configuration files for open hub can be found in the ./conf directory of the installation dir. First we want to configure the MQTT service to connect to our MQTT Server.
Connect the MQTT Server to openHab2
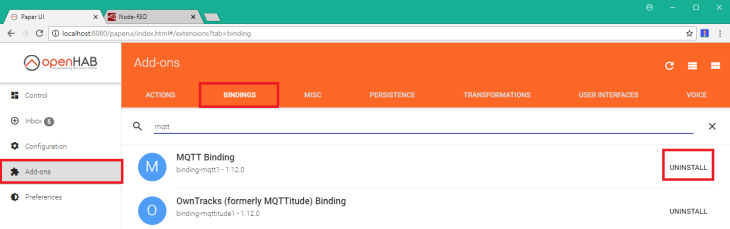
Go back to http://localhost:8080 and select the PaperUI, go to Add-ons and search for MQTT-bindings inside the Bindings tab - in my case this was already installed, if not, hit install:
Now go to the openHAB2 install dir - if you followed this guide, this will be C:\openhab230\conf\services and open the mqtt.cfg:
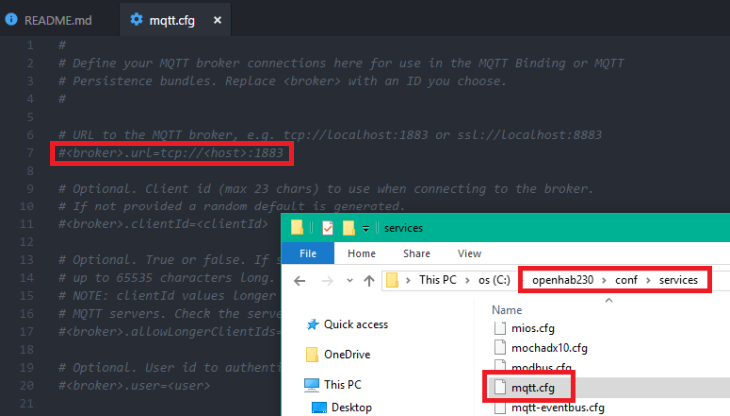
Add the MQTT URL as follows: mosquitto.url=tcp://localhost:1883 (The broker name - in our case we choose mosquitto - can be choosen freely). Make sure that you set all MQTT Server variables according to your MQTT Server configuration in Node-RED - e.g.:
mosquitto.url=tcp://localhost:1883
mosquitto.clientId=openhab2
mosquitto.user=mosquitto
mosquitto.pwd=asolidpassword
mosquitto.qos=1
mosquitto.retain=false
mosquitto.async=true
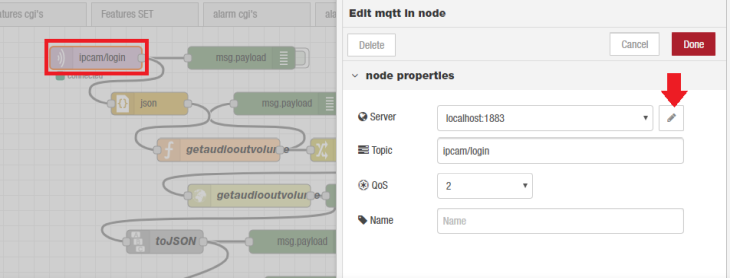
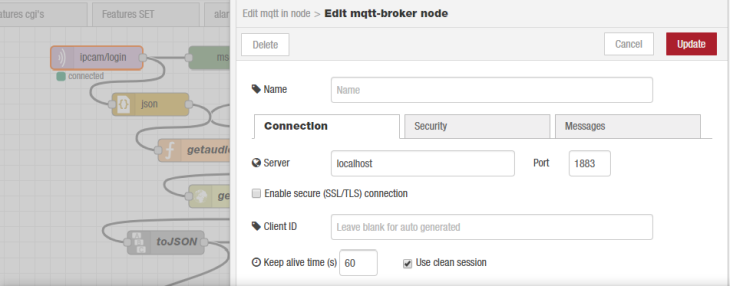
You can double-click a MQTT-Node in your Node-RED flows to check and edit your configuration:

Add Things
Go to C:\openhab230\conf\services to create a configuration file named office.things and add the following declaration //This is the Things file. Eventually we will populate this file with devices that require a thing declaration, keep in mind that not all devices need it.
To be able to access things - such as a light switch - we need to add them to an items file office.items in C:\openhab230\conf\items. For demo purposes we can add a Switch Item:
// This is the Items File

//Demo items
Switch MyFirstSwitch 'Demo Switch'
In this case Switch will be the type of item we add, MyFirstSwitch is it's name and Demo Switch will be used as it's lable.
Now we have to add the switch to our user interface, by adding a office.sitemap file in C:\openhab230\conf\sitemap. The sitemap file is how you interact with the devices or the user interface:
sitemap home label='INSTAR - SmartOffice'
{
       Frame label='Demo'
       {
               Switch item=__MyFirstSwitch__
       }
}
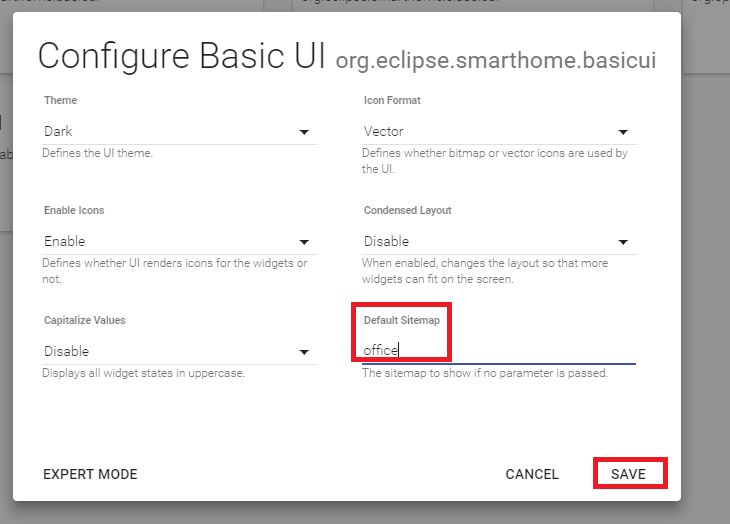
To activate the sitemap go to Configuration and Services, choose UI and select to configure the Basic UI:
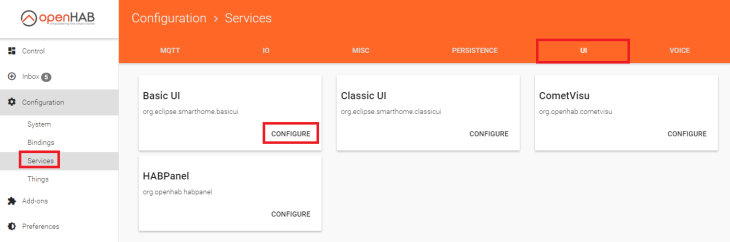
Type in the name of your sitemap - we used office - and click Save. You can then repeat this step with the CLassic UI:
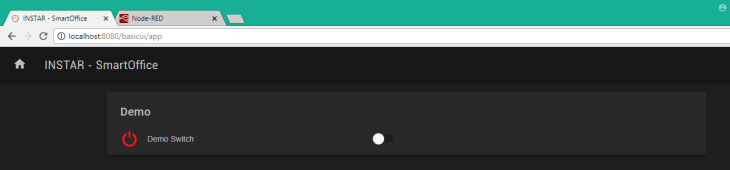
You can now open the Basic UI in a new tab http://localhost:8080/basicui/app and see the switch we just created:
To add functionality to our switch, we need to add a office.rules file in C:\openhab230\conf\rules. This is the file that does all the automation.
Access your SmartHome Remotely
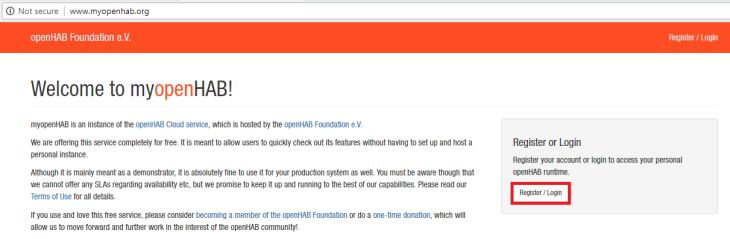
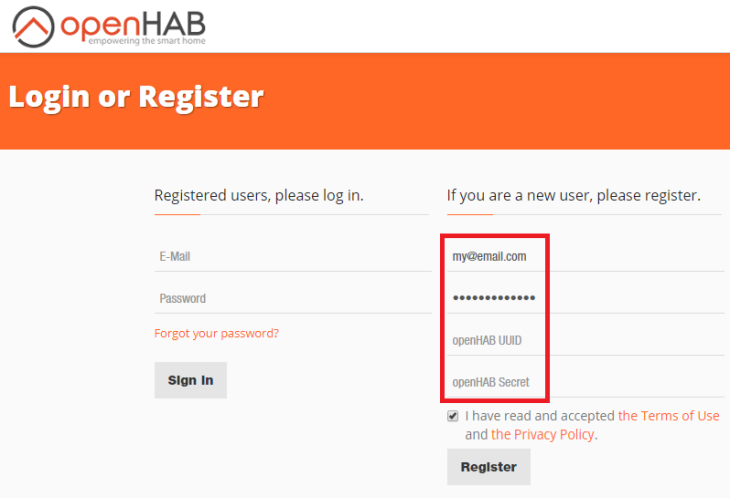
You can use the OpenHAB Cloud to access your Smarthome over the internet. Just use your Email Address and Password + UUID and Secret of your OpenHAB installation - the latter can be found under ./userdata/uuid and ./userdata/openhabcloud/secret
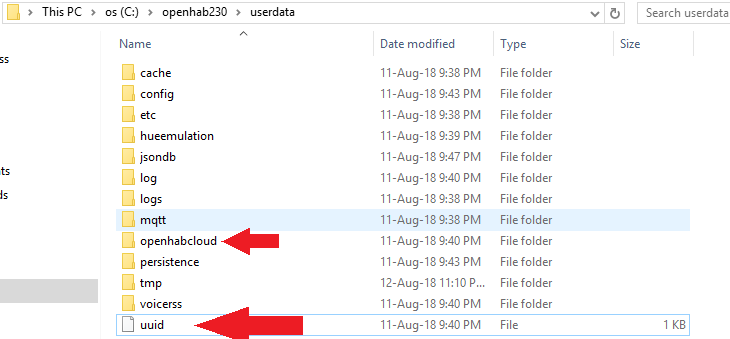
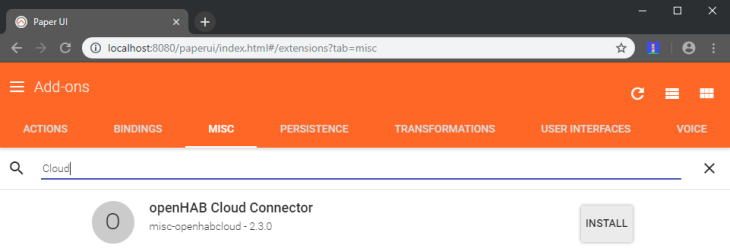
If you cannot find those files, make sure that the openHAB CLoud Connector is installed by going to http://localhost:8080/paperui, choose Addons and Misc. Search for Cloud to find the Addon and install it:
Go back to to MyOpenHAB, make sure that you are logged in, and you will see a Online notification on the top right - if not, stop and restart the OpenHAB service from your console and refresh the webpage.

You will see the familiar UI when you navigate to https://home.myopenhab.org/start/index. You can use this login on the web, on Android, iOS and Window Phone / Metro.
Configuring nodeRed
Create a Static directory
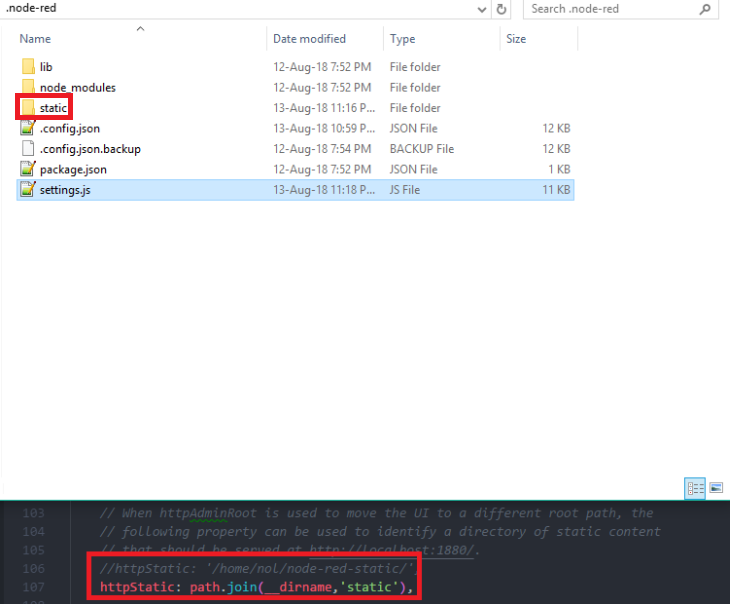
TO work with static files directly in nodeRed, open the settings.js in \Users\<Username>\.node-red. Add the following line to the top of the document:
var path = require('path');
Add a folder named static to .node-red and change the default staticHTTP path to the following:
//httpStatic: '/home/nol/node-red-static/',
httpStatic: path.join(__dirname,'static'),
Restart nodeRed and test if everything is working, by adding an image file to the newly created static folder (e.g. test.png) and open it via the nodeRed URL on port 1880 - the image should be displayed in your browser window:
http://127.0.0.1:1880/test.png