
The abstracted version to:
- Home Assistant - MQTT Auto-Discovery :: Configuration
- Home Assistant - MQTT Auto-Discovery :: Automation
- Home Assistant - Python Scripts as Service
(Re) Introduction to Home Assistant Auto-discovery
Docker
docker pull homeassistant/home-assistant:stable
mkdir -p /opt/homeassistant/{config}
chmod -R 775 /opt/homeassistant
docker run -d --rm --privileged --net=host --name='home-assistant' -e 'TZ=Europe/Berlin' -v /opt/homeassistant/config:/config homeassistant/home-assistant:stable
http://localhost:8123
MQTT Autodiscovery
Last-Will Trigger
Add the Last-Will Topic as an MQTT Sensor to your HA configuration file, e.g. /opt/homeassistant/config/configuration.yaml:
mqtt:
  sensor:
    - device:
        identifiers: in8401_office
        manufacturer: INSTAR Deutschland GmbH
        model: INSTAR 2k+ IN-8401 WLAN
        name: IN-8401 2k+ Garden
        configuration_url: "http://192.168.2.120:80"
      availability:
        topic: "cameras/120/status/connection"
        payload_available: '{"val":"online"}'
        payload_not_available: '{"val":"offline"}'
      object_id: in8401_office_testament
      unique_id: in8401_office_testament
      name: "LWT Office Camera"
      state_topic: "cameras/120/status/connection"
      value_template: "{{ value_json.val }}"
      icon: mdi:coffin
      qos: 1
The entity will show up once you reload the configuration:
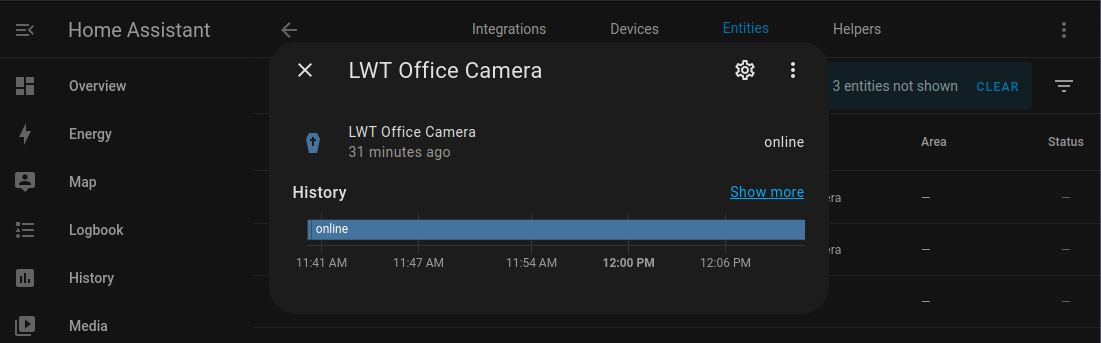
This entity will change it's value from offline to online when the camera connects. This event can be used in an Automation to trigger a script that automatically adds your camera as an Home Assistant Entity.
Shell Script
To be able to use the before mentioned Python script we need to create a tiny shell script that can be used in the Home Assistant Automation. Enter your Home Assistant config directory, e.g. /opt/homeassistant/config and create a sub-directory shell:
mkdir shell
nano ./shell/mqtt_autodiscover_8401_office.sh
The shell script only needs to direct the Python binary to the location you used for the Python Script (that we will create in the last step):
mqtt_autodiscover_8401_office.sh
#!/bin/bash
python /config/python_scripts/mqtt5_client.py -f config_topics_8401.json
To activate the Shell Extension and expose our script to HA we need to add the following lines to the config/configuration.yml:
# Auto configure 8401 office with mqtt
shell_command:
  mqtt_autodiscover_8401_office: /bin/ash /config/shell/mqtt_autodiscover_8401_office.sh
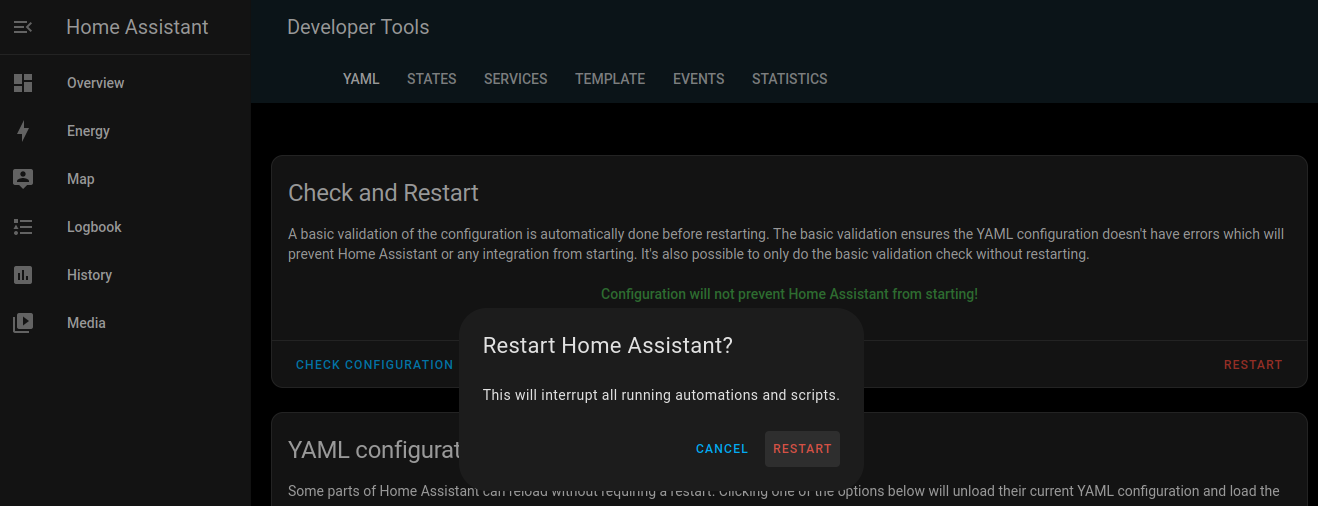
Reload the configuration or restart Home Assistant:
Automation
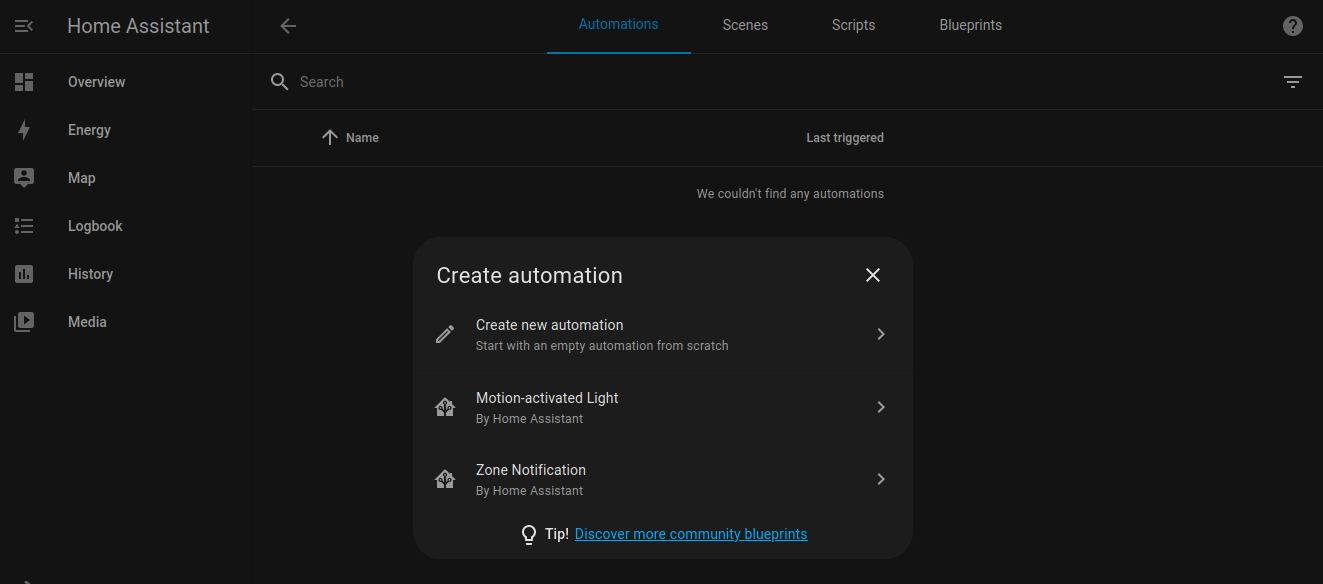
We can now add a new Automation:
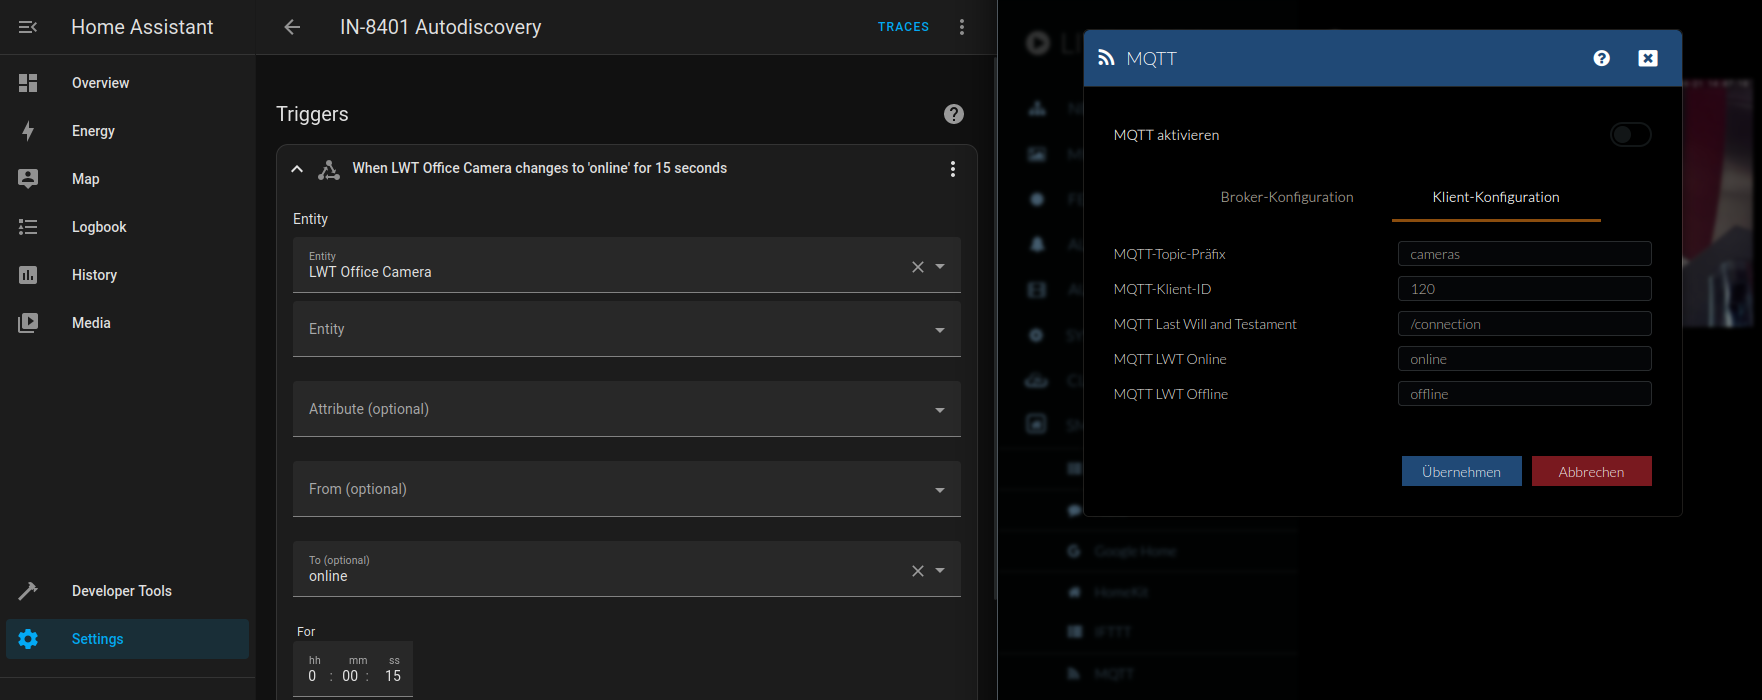
The Automation should be triggered every time the Last-Will Entity created in the first step changes it's value from offline to online (Note these values can be configured in your camera's webUI - see below right):
As Action select Call Service and to execute the Python script with the Shell Script option:
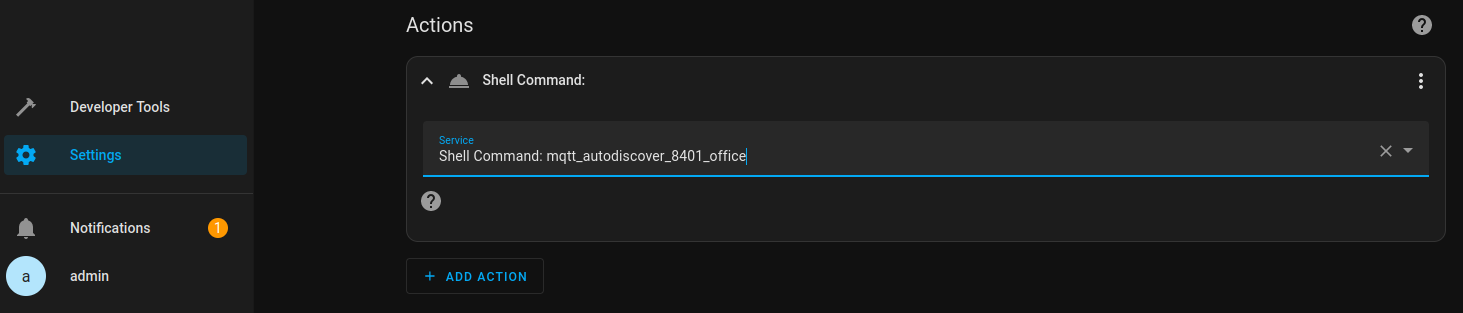
If the option does not show up in drop down menu verify that you added the shell script and restarted Home Assistant as described in the previous step.
Python Script
The Python Script provides an MQTT5 Client that will help us auto-registering our camera. All necessary files can be cloned from this repository. Those are the MQTT Client Script, a Configuration File that contains your MQTT Broker configuration and a JSON File that contains all the MQTT Entities you want to add to Home Assistant that allow you to control your camera:
Take those files and place them inside a folder called python_scripts inside the Home Assistant configuration directory, e.g. /opt/homeassistant/config:
mkdir python_scripts
Your configuration directory should now contain the following sub dirs and files:
/opt/homeassistant/config
├── automations.yaml
├── blueprints
│   ├── automation
│   └── script
├── configuration.yaml
├── deps
├── home-assistant.log
├── home-assistant_v2.db
├── python_scripts
│   ├── config.py
│   ├── config_topics_8401.json
│   └── mqtt5_client.py
├── scenes.yaml
├── scripts.yaml
├── secrets.yaml
├── shell
│   └── mqtt_autodiscover_8401_office.sh
└── tts
Broker Configuration
Now add your broker configuration to config.py, e.g. :
mqtt_server_host = "192.168.2.112"
mqtt_server_port = 1883
mqtt_bind_address = ""
mqtt_bind_port = 0
mqtt_username = "admin"
mqtt_password = "instar"
mqtt_transport = "tcp"
mqtt_keepalive = 60
mqtt_client_id = "mqtt5_client"
This is the configuration that the Python MQTT Client is going to use to connect to your broker when it is triggered by our Home Assistant Automation.