OpenThread Border Router with Docker with Docker

I tried to prepare a Raspberry Pi and installed Docker but I keep running into issues that are most likely based on me getting past the countries firewall (TLS errors on downloads). The bootstrap and setup script run through without to the end. But there are still parts missing. So now I simply use Docker to setup the router on my desktop Linux PC.
You still need to prepare the Pitaya Go and plug it into a free USB port on your PC.
Run OTBR Docker
Attach the Pitaya Go to the Raspberry Pi 3B via USB and determine the serial port name for the NCP device by checking /dev - e.g. ttyACM0:
ls /dev/tty*
Get the Docker image:
docker pull openthread/otbr
In a new terminal window, start OTBR Docker, referencing the Pitaya Go's serial port. For example, if the Pitaya Go is mounted at /dev/ttyACM0:
docker run --sysctl "net.ipv6.conf.all.disable_ipv6=0 net.ipv4.conf.all.forwarding=1 net.ipv6.conf.all.forwarding=1" -p 8888:80 --dns=127.0.0.1 -it --volume /dev/ttyACM0:/dev/ttyACM0 --privileged openthread/otbr --radio-url spinel+hdlc+uart:///dev/ttyACM0
ERROR:
ip6tables v1.6.1: can't initialize ip6tables tablefilter': Table does not exist (do you need to insmod?). ERROR: Failed to start firewall service`:
sudo apt-get install rpi-update
sudo chmod +x /sbin/depmod
sudo sudo rpi-update
sudo modprobe ip_tables
sudo modprobe ip6table_filter
Use the Web GUI
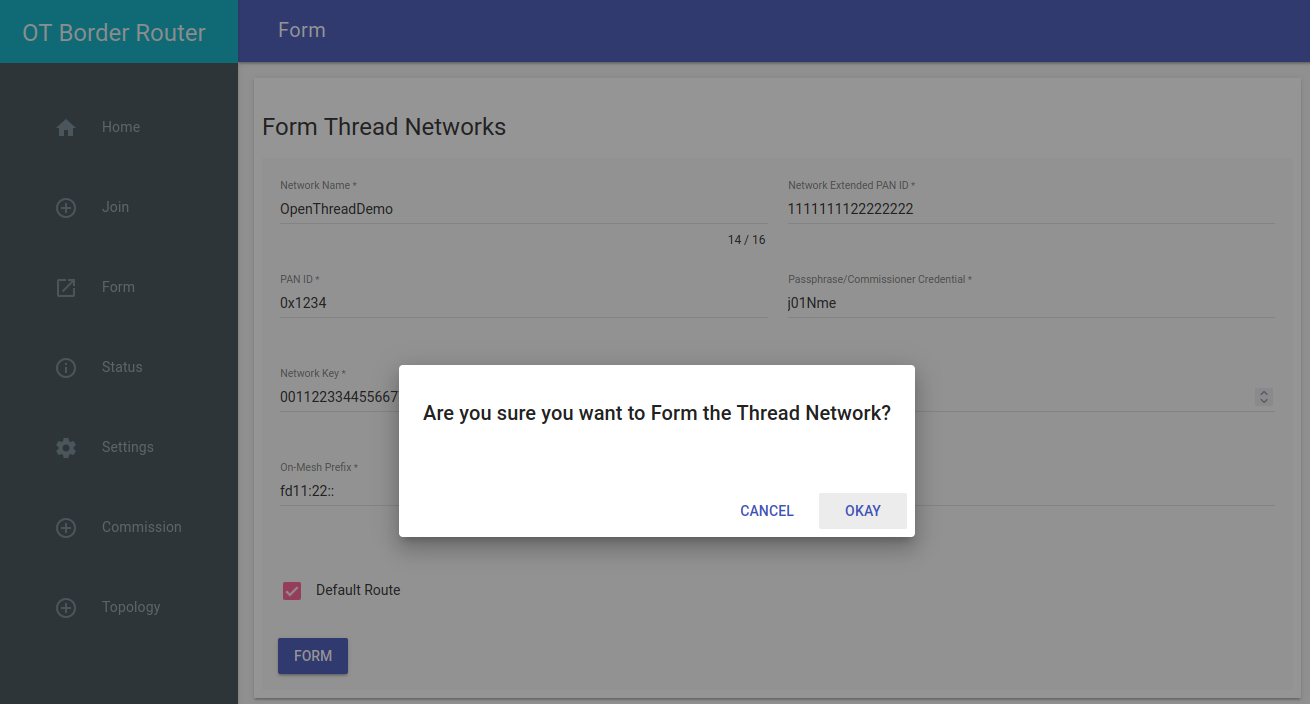
Now, you can use the OpenThread Border Router (OTBR) Web GUI to configure and form, join, or check the status of a Thread network.
Visit the WebUI on http://localhost:8888:
Form a Thread Network
Use the Form menu option to create a new Thread network. Observe that GREEN LED on Pitaya Go is lit. Confirm by checking the Status menu option: