OpenThread Border Router

- Hardware Requirements
- Preparing the RaspberryPI
- Preparing the Pitaya Go
- Set up the Border Router
- Configure the Pitaya Go
A Thread Border Router serves as a gateway between the Internet and the Thread network. OpenThread's implementation of a Border Router is called OpenThread Border Router (OTBR). OTBR is a Thread Certified Component on the Raspberry Pi 3B with a Nordic nRF52840 NCP.
A Thread Border Router minimally supports the following functions:
-
End-to-end IP connectivity via routing between Thread devices and other external IP networks
-
External Thread Commissioning (for example, a mobile phone) to authenticate and join a Thread device to a Thread network
For more technical details, openthread.io is the best place for you.
Hardware Requirements
- 1x Raspberry Pi 3B
- 1x Pitaya Go
- 1x 4 GB (or larger) microSD card
- 1x microSD card reader
- 1x microUSB power supply for Raspberry Pi 3B
Preparing the RaspberryPI
I am downloading a Raspberry Pi 3B+ compatible Debian Bullseye Image and bring it onto an SD card. To activate the SSH service you are have to add an empty file ssh to the boot directory - though remote logins are deactivated by default and need to be configured by attaching a keyboard and monitor. There should be a way to do this by a post-install script, but I could not find it on a quick skim:
cd /run/media/myuser/RASPIROOT/boot/
touch ssh

To activate the login first generate a password for the root account by running:
passwd
And edit the following line in /etc/ssh/sshd_config:
# FROM:
# PermitRootLogin without-password
# TO:
PermitRootLogin yes
Now restart the SSH daemon with:
systemctl sshd restart
systemctl sshd status
Preparing the Pitaya Go
The pre-built firmware is located in the following folder: pitaya-go/firmware/openthread/ncp with the name thread_ncp_ftd_usb_pitaya_go_vx.x.x:
wget https://github.com/makerdiary/pitaya-go/archive/refs/heads/master.zip
unzip master.zip && rm master.zip
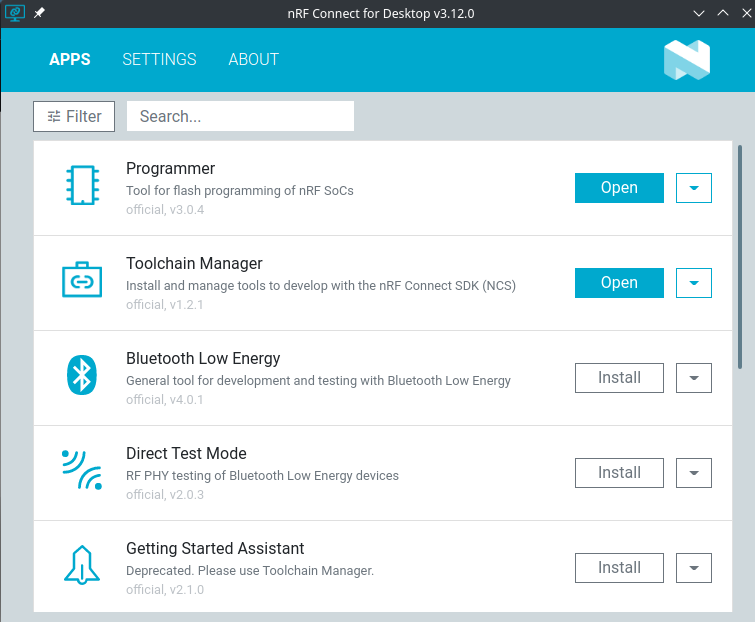
Download the nRF Connect Tool to Flash the NCP firmware:
wget https://www.nordicsemi.com/-/media/Software-and-other-downloads/Desktop-software/nRF-Connect-for-Desktop/3-12-0/nrfconnect-3.12.0-x86_64.AppImage
chmod +x ./nrfconnect-3.12.0-x86_64.AppImage
./nrfconnect-3.12.0-x86_64.AppImage
While pushing the USER button, press the RESET button to enter the DFU mode. Then program the NCP firmware using the nRF Connect for Desktop tool.
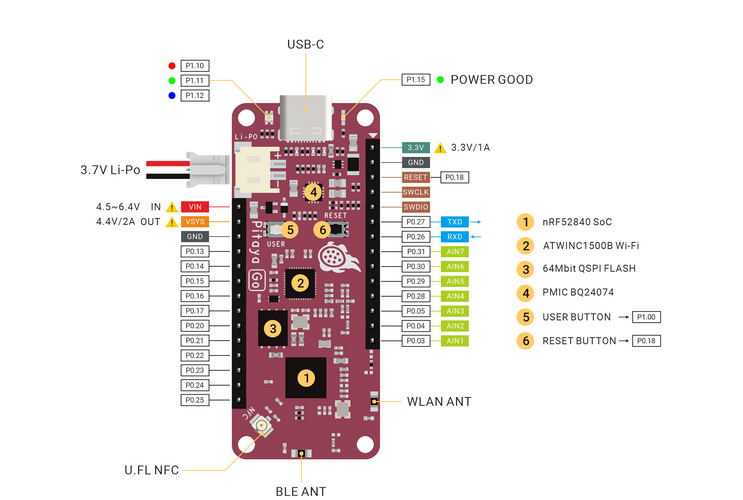
- Plug in your Pitaya Go to an USB Port on your computer.
- While holding the USER button, press the RESET button. Observe that the RGB LED pulses RED (
DFU mode). - In
nRF Connect for Desktoplaunch theProgrammerapp. - Select the device in the dropdown in the upper left corner if it is shown. Observe that the memory layout of the device will be displayed.
ERROR:
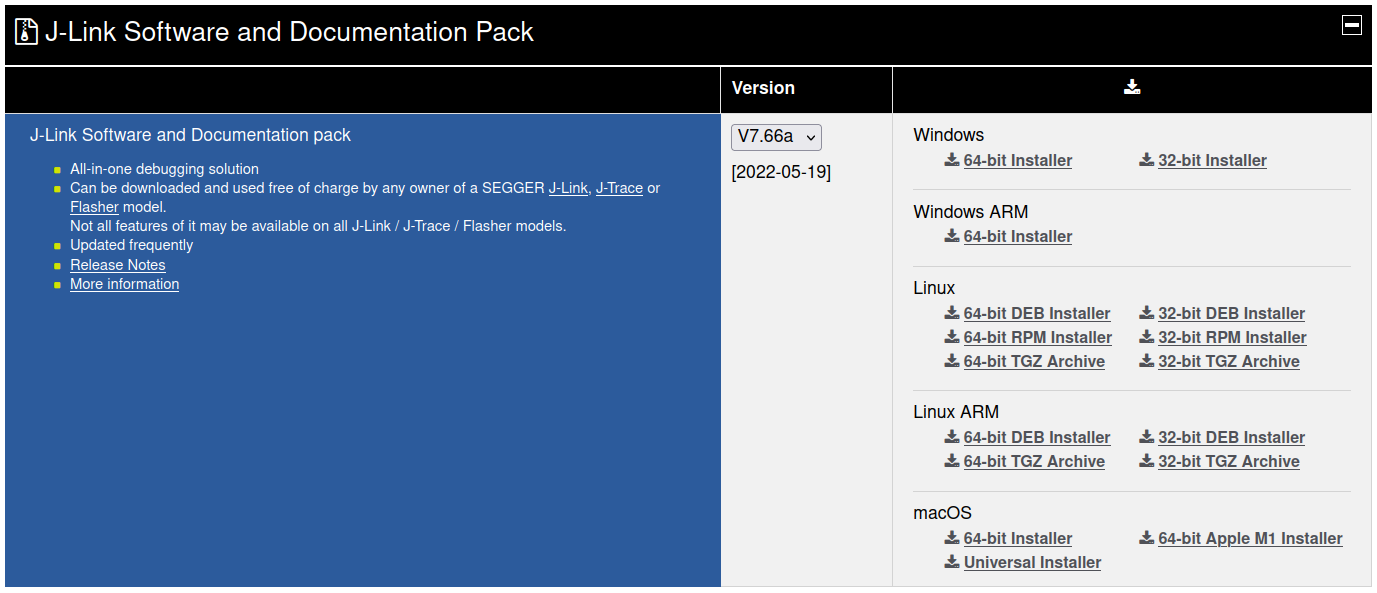
Unable to detect version of nrfjprog DLL. Unable to detect version of JLink. Installed JLink version does not match the provided version (V7.66a):

The needed version of J-Link can be downloaded here:
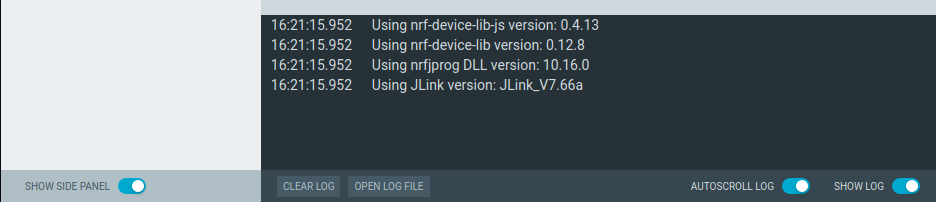
Now the software starts up correctly:
Flash the NCP firmware
The pre-built firmware is located in the following folder: pitaya-go/firmware/openthread/ncp with the name e.g. thread_ncp_ftd_usb_pitaya_go_v1.3.1.zip.
Be careful to use the ncp and not cli version - otherwise you will end up with the error message: OpenThread daemon is not running. Wpan service error: 13
While pushing the USER button, press the RESET button to enter the DFU mode. Then program the NCP firmware using the nRF Connect for Desktop tool.
ERROR Message:
Error when running nrfdl_fw_read_infowhen trying to access the dongle.
I followed the advice on the Nordic Forum and downgraded the Desktop and Programmer app from v3.12 to v3.7. Now the Pitaya is recognized:
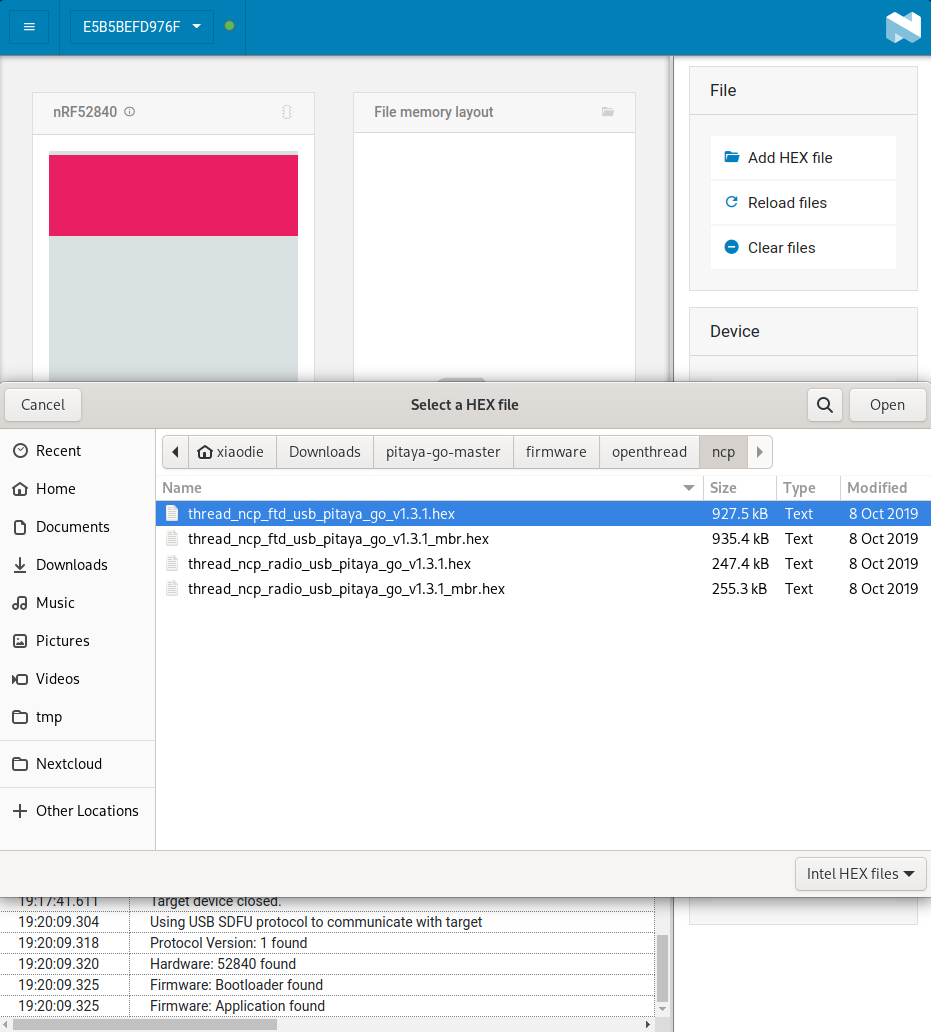
And I am able to flash the .hex file:

Set up the Border Router
Before you continue, make sure your Raspberry Pi 3B is connected to the internet using Ethernet. The bootstrap script disables the platform's Wi-Fi interface and the setup script requires internet connectivity to download and install
wpantund.
OTBR communicates with the Pitaya Go(serves as NCP) via wpantund. On Raspberry Pi 3B+:
- Clone the OTBR repository:
apt install git
git clone https://github.com/openthread/ot-br-posix
- Install dependencies:
cd ot-br-posix
./script/bootstrap
ERROR:
./script/bootstrap: line 40: sudo: command not foundI am currently running everything as root. So I need to removesudofrom all shell commands. The script will work when you create another user in Debian that is able to use thesudocommand (And don't tell me the world is going to end when you userootin a test system... it is not =.=)
- Compile and install OTBR and
wpantund. Note that this setup script uses Network Manager to automatically set up the Wi-Fi access point (AP):
./script/setup
ERROR:
-- Checking for module 'libsystemd' -- No package 'libsystemd' found -- Configuring incomplete, errors occurred!
ERROR:
fatal error: systemd/sd-daemon.h: No such file or directory
apt install libsystemd-dev
Configure the Pitaya Go
Attach the Pitaya Go to the Raspberry Pi 3B via USB. Configure the NCP device's serial port in wpantund. Determine the serial port name for the NCP device by checking /dev:
ls /dev/tty*
Add the serial port name to /etc/wpantund.conf. For example, for a serial port name of ttyACM0:
Config:NCP:SocketPath "/dev/ttyACM0"
- Restart the Border Router. The OTBR service should start on boot.
sudo reboot