Setting up KVM on RedHat Enterprise Linux

Preparing RHEL
Check if your CPU supports virtualization:
lscpu | grep Virtualization

> Virtualization: VT-x
Install and Enable KVM
sudo yum update
sudo yum install @virt
Verify that Kernel modules are loaded:
$ lsmod | grep kvm

> kvm_intel 315392 0
> kvm 847872 1 kvm_intel
> irgqbypass 16384 1 kvm
Now we can install a few tools for virtual machine management:
sudo dnf -y install libvirt-devel virt-top libguestfs-tools
By default, KVM daemon libvirtd is not started, start the service using the command:
sudo systemctl enable --now libvirtd
service libvirtd status
Open TCP port 5901 if your server has a firewall set up:
firewall-cmd --permanent --add-port=5901/tcp
firewall-cmd --reload
Create a VM instance on KVM
First, start by creating a network bridge to be attached to your instances. In Linux networking, a bridge is used to connect two or more network segments. It is commonly used in Virtualization to pass Virtual Machines traffic through a hypervisor network card. All guest machines connected to a network bridge will treat it transparently as a physical network interface.
Linux Bridges behave like a virtual network switch and any physical or virtual device can be connected to the bridge.
Create a Linux Bridge
sudo nmcli connection show

NAME     UUID                                  TYPE      DEVICE
enp3s0   27ff1bfd-3ec2-4300-bc71-06e9e9a7457c  ethernet  enp3s0
docker0  dc5707f4-ae30-481e-8866-d08dfe7e6400  bridge    docker0
virbr0   91177751-4bcf-45a5-bba9-b1ec99f44887  bridge    virbr0
I only have one Ethernet interface enp3s0. I will copy the configuration file and change the device type to Bridge:
sudo cp /etc/sysconfig/network-scripts/ifcfg-enp3s0 /etc/sysconfig/network-scripts/ifcfg-br1

cat /etc/sysconfig/network-scripts/ifcfg-br1
TYPE=Bridge
DEVICE=br1
DELAY=0
STP=off
IPV4_FAILURE_FATAL=no
IPV6INIT=no
NAME=br1
ONBOOT=yes
IPADDR=192.168.2.110
PREFIX=24
GATEWAY=192.168.2.5
DNS1=192.168.2.5
DNS2=8.8.8.8
IPV6_PRIVACY=no
Interface configuration file.
sudo nano /etc/sysconfig/network-scripts/ifcfg-enp3s0
DEVICE=enp3s0
TYPE=Ethernet
ONBOOT=yes
BRIDGE=br1
Now reboot your system and check if the bridge was created:
sudo nmcli connection show

NAME           UUID                                  TYPE      DEVICE
br1            2ee981ca-5ff4-4f9b-03fe-32879aa3dc85  bridge    br1
docker0        d25f4cc0-d675-4338-b758-455df4c8f30d  bridge    docker0
virbr0         c2e570e7-415b-4c86-af86-aaf9c5a1e0fc  bridge    virbr0
System enp3s0  63aa2036-8665-f54d-9a92-c3035bad03f7  ethernet  enp3s0
Start your VM
You an check all available operating systems with:
osinfo-query os
The list was outdated for me - I first checked if the latest version of osinfo-db-tools was installed, downloaded the latest list and imported it:
sudo yum install osinfo-db-tools
wget -O "/tmp/osinfo-db.tar.xz" "https://releases.pagure.org/libosinfo/osinfo-db-20210621.tar.xz"
sudo osinfo-db-import --local "/tmp/osinfo-db.tar.xz"
After the update the list included the latest version of Operating System and I was able to create a Fedora 34 VM with the following command:
sudo virt-install \
--name fed34 \
--ram 2048 \
--vcpus 2 \
--disk path=/var/lib/libvirt/images/fed34.img,size=20 \
--os-variant fedora34 \
--os-type linux \
--network bridge=br1 \
--graphics none \
--console pty,target_type=serial \
--location 'https://mirror.arizona.edu/fedora/linux/releases/34/Server/x86_64/os/' \
--extra-args 'console=ttyS0,115200n8 serial'
ERROR:
[FAILED] Failed to start Switch Root.
Warning: /dev/root does not exist

Generating "/run/initramfs/rdsosreport.txt"


Entering emergency mode. Exit the shell to continue.
Type "journalctl" to view system logs.
You might want to save "/run/initramfs/rdsosreport.txt" to a USB stick or /boot
after mounting them and attach it to a bug report.


Press Enter for maintenance
(or press Control-D to continue):
After running into the Error message above I tried downloading the image myself and switched to CentOS 8 - Download Page. Make sure to move the image to a public directory like /opt:
sudo virt-install \
--name CentOS \
--location=/opt/CentOS-Stream-8-x86_64-20210706-dvd1.iso \
--ram 2048 \
--vcpus 2 \
--disk path=/var/lib/libvirt/images/centos.img,size=20 \
--os-variant rhel6.0 \
--os-type linux \
--network bridge=br1 \
--graphics none \
--console pty,target_type=serial \
--extra-args 'console=ttyS0,115200n8 serial' \
--check path_in_use=off
And this time it worked:
Performing post-installation setup tasks
.
Configuring installed system
...................
Writing network configuration
.
Creating users
Configuring addons
Executing org_fedora_oscap addon
Executing com_redhat_kdump addon
..
Generating initramfs
...
Running post-installation scripts
.
Storing configuration files and kickstarts
.
Installation complete

Use of this product is subject to the license agreement found at:
/usr/share/redhat-release/EULA

Installation complete. Press ENTER to quit:


...


CentOS Stream 8
Kernel 4.18.0-315.el8.x86_64 on an x86_64

Activate the web console with: systemctl enable --now cockpit.socket

centos login: myuser
Password: mypassword

cat /etc/os-release

NAME="CentOS Stream"
VERSION="8"
ID="centos"
ID_LIKE="rhel fedora"
VERSION_ID="8"
PLATFORM_ID="platform:el8"
PRETTY_NAME="CentOS Stream 8"
ANSI_COLOR="0;31"
CPE_NAME="cpe:/o:centos:centos:8"
HOME_URL="https://centos.org/"
BUG_REPORT_URL="https://bugzilla.redhat.com/"
REDHAT_SUPPORT_PRODUCT="Red Hat Enterprise Linux 8"
REDHAT_SUPPORT_PRODUCT_VERSION="CentOS Stream"
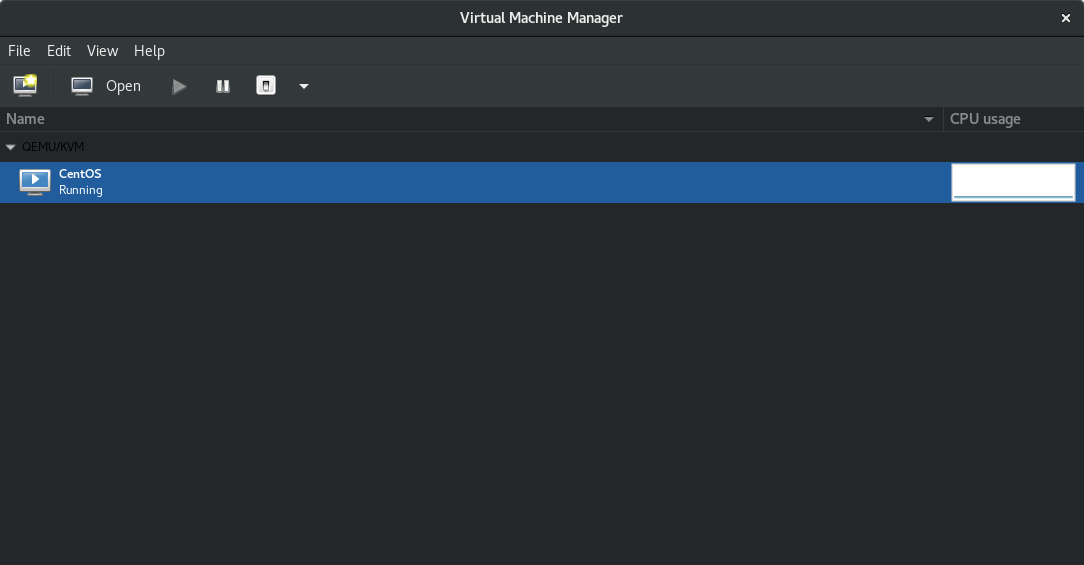
Install Virtual machine Manager GUI
If you have a Desktop Environment on your RHEL 8, you can install the virt-manager tool which allows you to manage Virtual Machines from a GUI.
sudo yum -y install virt-manager
We can now use the Virtual Machine Manager to take control of our virtual environment.
At this point I hit another problem - somehow my virtual machine was not connected to a network. It was not assigned an IP address after boot. I will have to dive a bit deeper into this at a later point.