IFTTT IP Camera

Basic Setup
If This Then That, also known as IFTTT is a free web-based service to create chains of simple conditional statements, called applets. Build your own applets to connect web services with your INSTAR IP Camera.
IFTTT
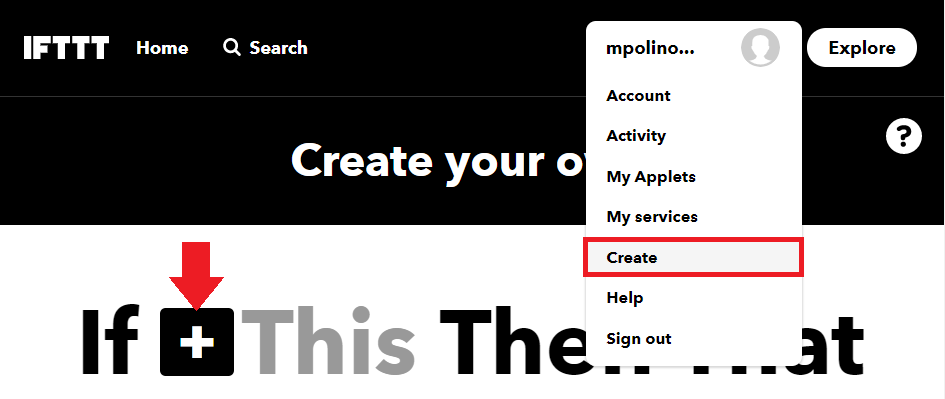
- First you need to create an account on IFTTT and login to your account. Then go to the Create and click on IF + This:
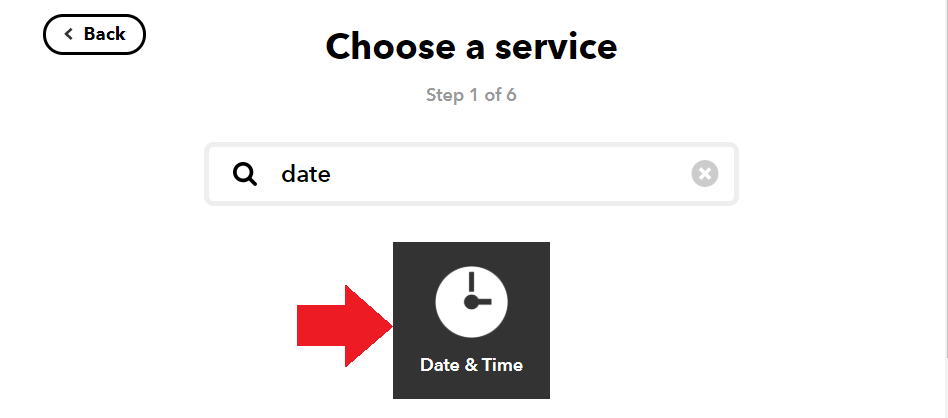
- We now want to set up the Date & Time service to send scheduled commands to our camera. Search for date and select the Date & Time:
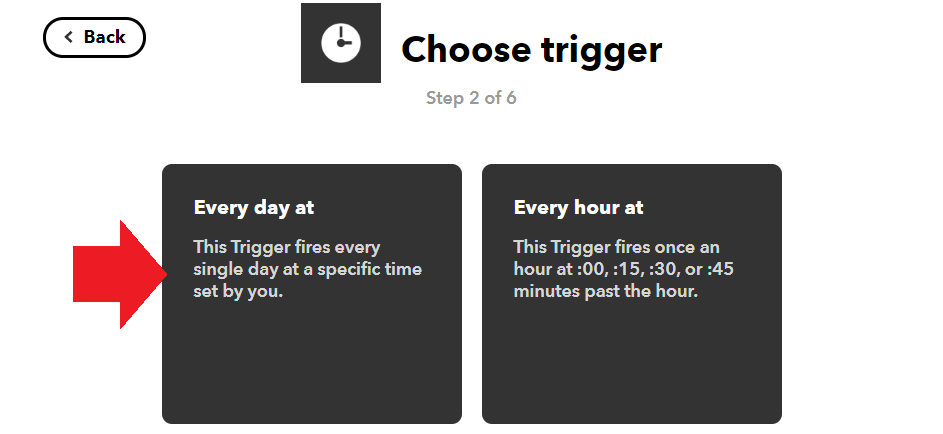
- We want to automate a daily camera function, for this we have to choose Every day at as a trigger for our applet.
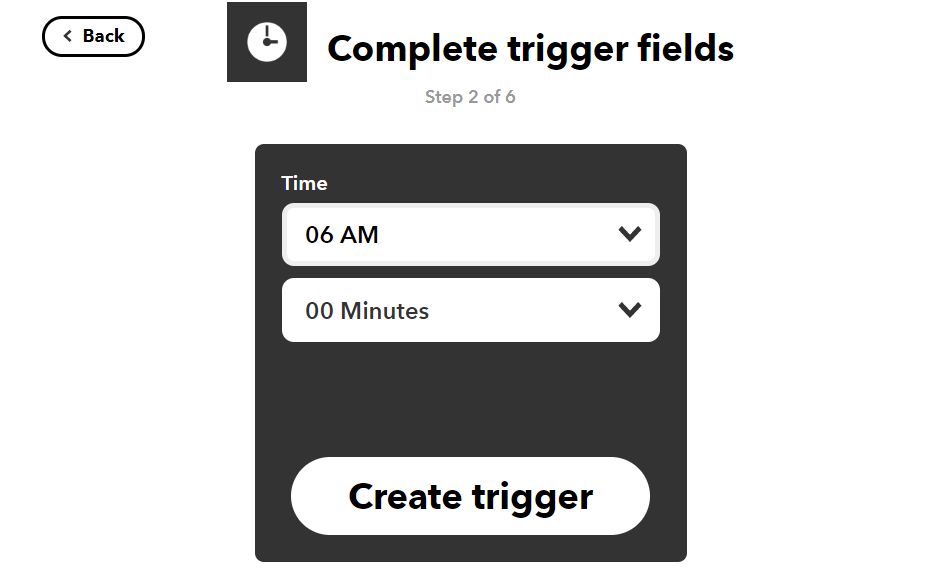
- For example we set the trigger to every day at 6am:
- Now we can add an action that is triggered by our schedule:

- We now want to add a webhook service - which is basically a service that contacts a web address when triggered. That address will be the INSTAR DDNS address of our INSTAR Full HD camera and carry a CGI Command to activate/deactivate functions on our camera. (Note that the camera has to be available via the internet for this to work - this means you will have to set up a port forwarding rule inside your router).
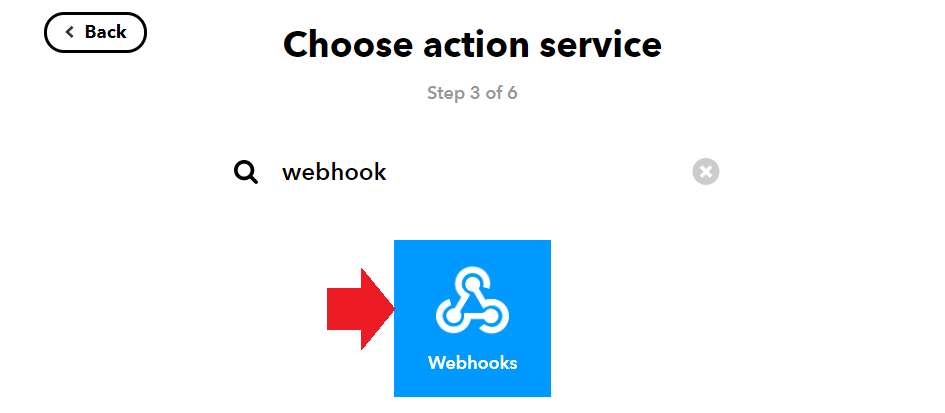
Search for web and select the Webhooks Service:
- We now need to add our cameras DDNS address, e.g.
myaddress.ddns3-instar.dewith thehttps://prefix followed by the HTTPS Port (that has to be forwarded inside your router), e.g.8081.
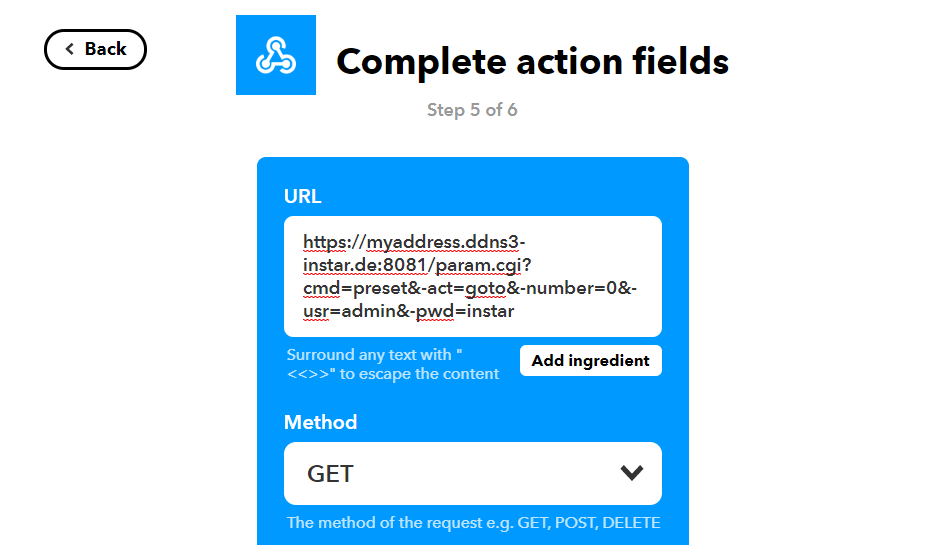
We now want that our camera moves to the Preset Position 1 when our applet is triggered. The CGI Command to do this is /param.cgi?cmd=preset&-act=goto&-number=0 followed by your camera login &-usr=admin&-pwd=instar.
https://myaddress.ddns3-instar.de:8081/param.cgi?cmd=preset&-act=goto&-number=0&-usr=admin&-pwd=instar
Save your settings and you are done.
