Slack Notifications in DevOps

Gitlab
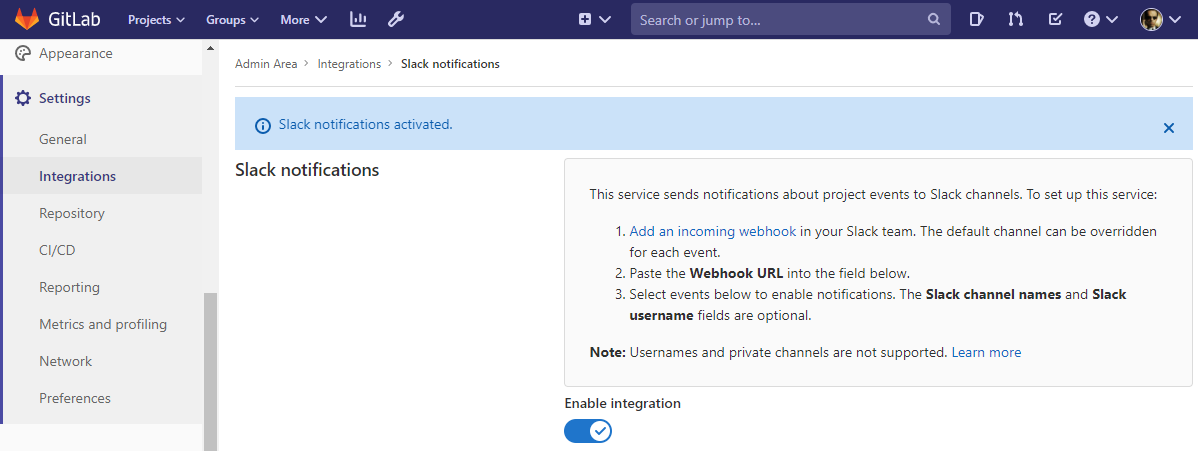
Start by activating Slack Notifications in the Gitlab Admin Area under Settings/Integrations/Slack notifications, e.g. https://gitlab.mydomain.com/admin/application_settings/integrations/slack/edit:
You can activate all triggers that you need in the same menu scrolling down, as well as designating the Slack channel you want the Gitlab bot to post into for each trigger. On the bottom of the menu you will be asked to add the Slack webhook:
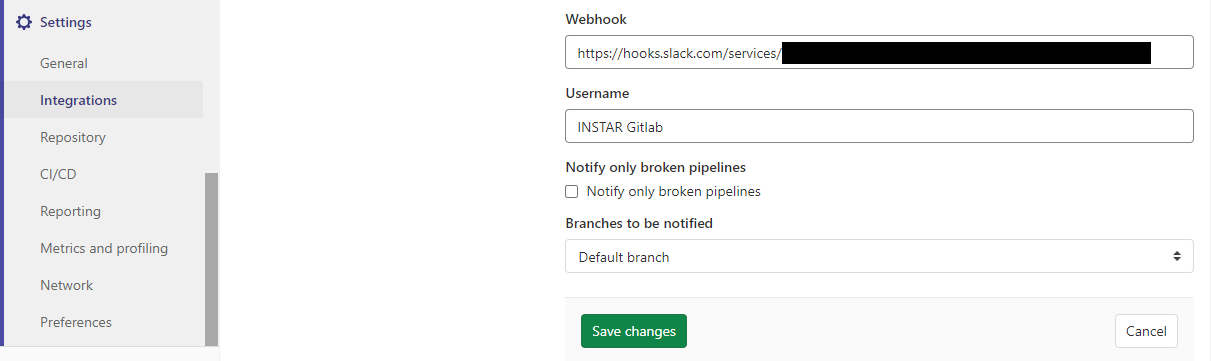
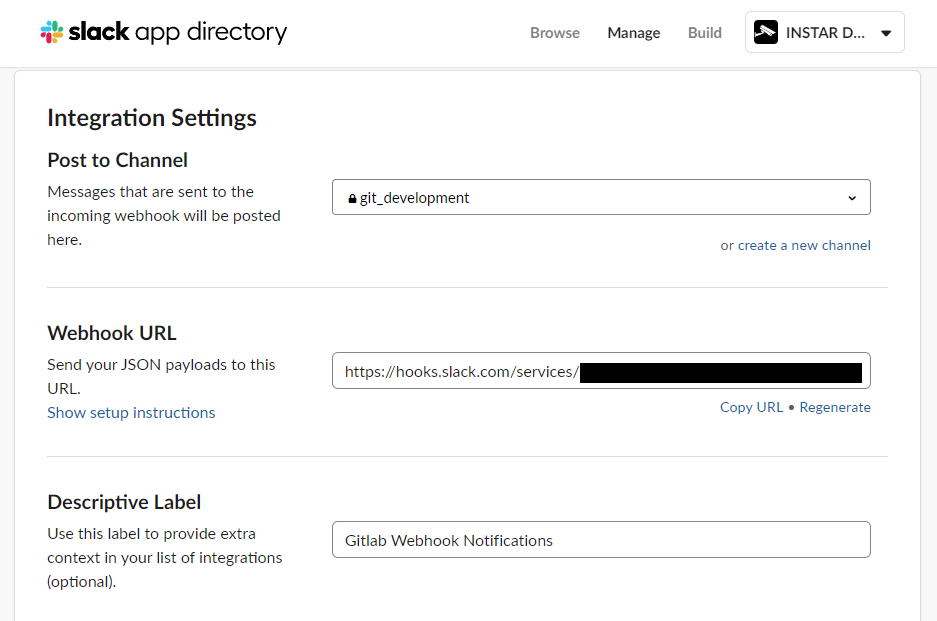
This URL is provided by the Slack App Incoming WebHooks and will can be copied from the configuration page of the web app:
Zabbix
Preparing Slack
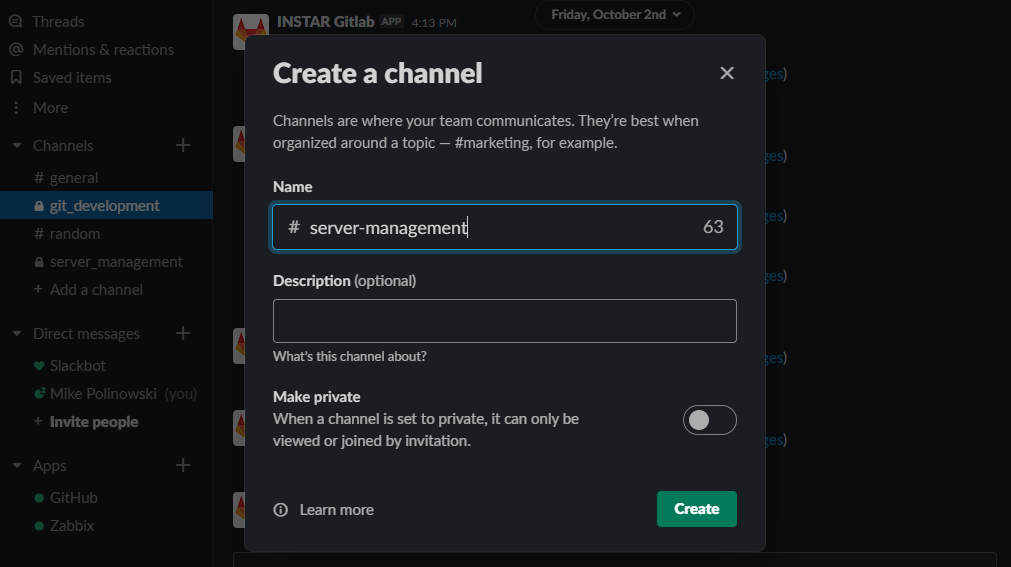
Start by creating a Channel for the Zabbix bot:
Now click to add a new app and click on the link in the top right that leads you to the App Directory that will open the Slack webpage inside your default browser. In the top right click on the Build tab and then on the big Start Building button.
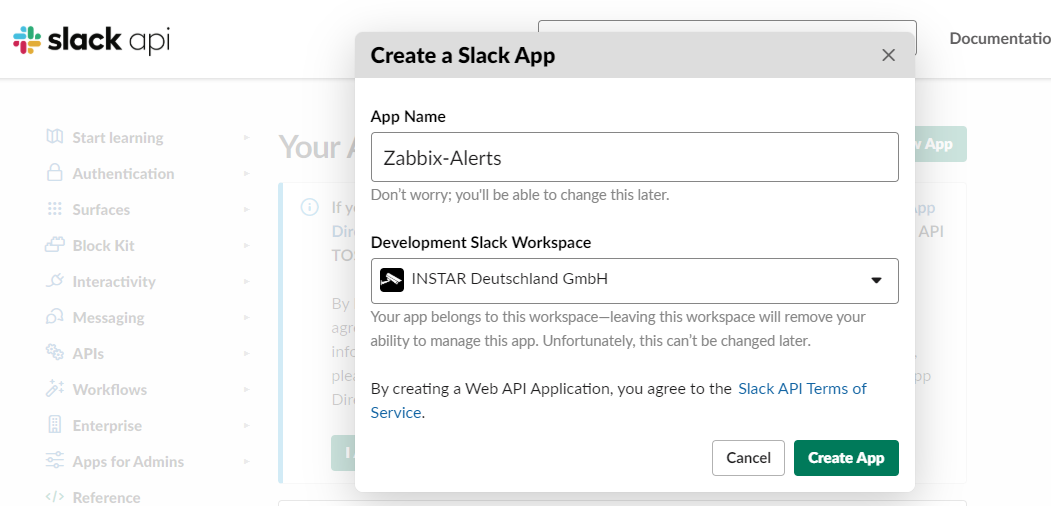
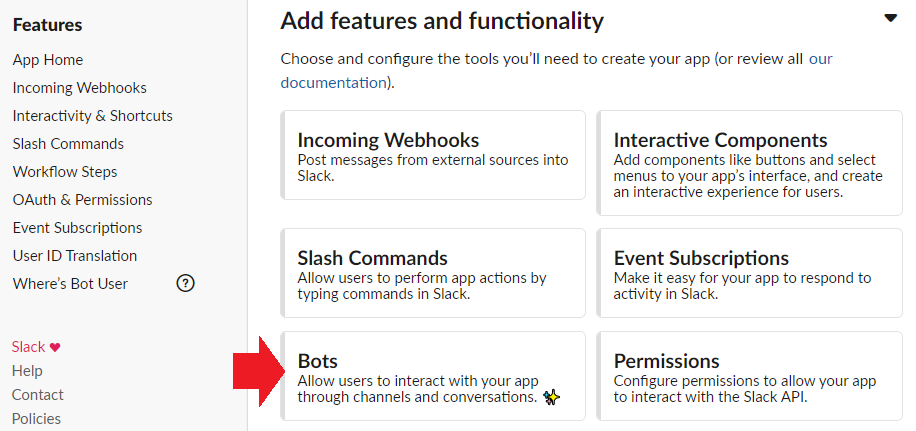
Give your app a name and assign a workspace then click on Create App. In the following list select Bots:
There we need to assign a scope to your bot token. Click on Review Scopes to Add:
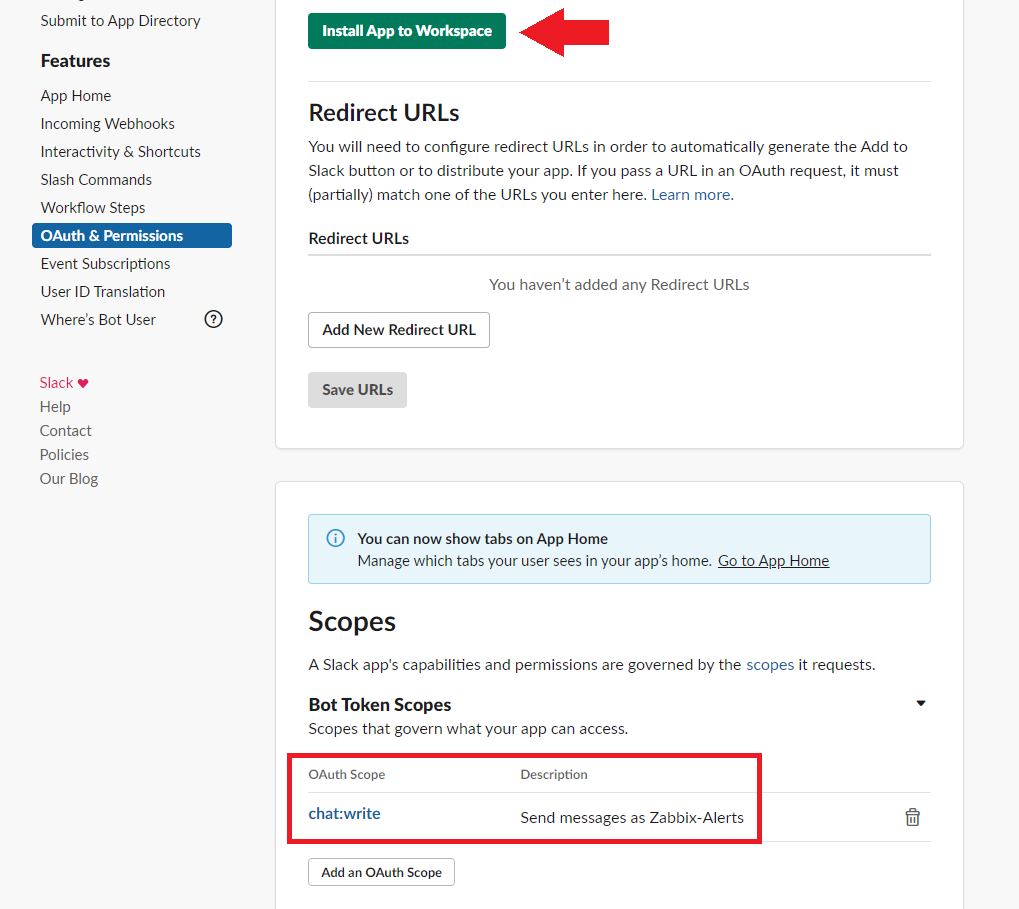
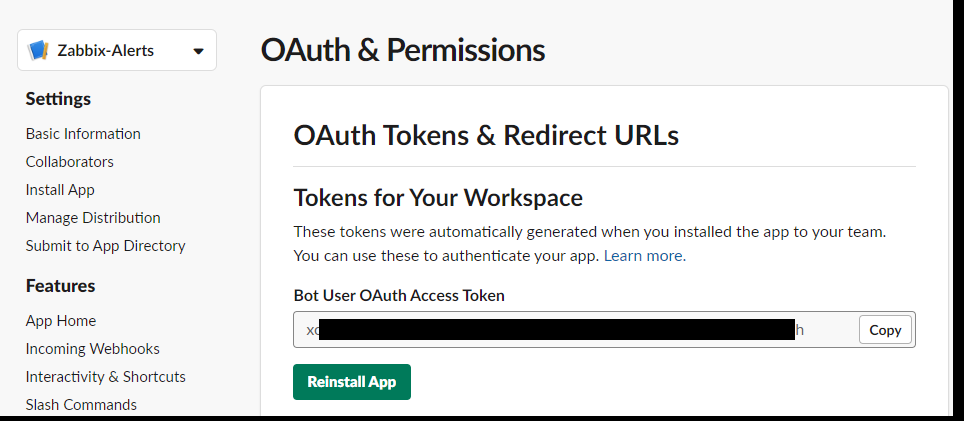
Add the chat.write scope and click on Install App to Workspace and give permission to your bot to access your workspace. You will now be given a token that you have to copy into the Zabbix interface so that Zabbix will be able to use the bot to send messages to your workspace:
Configure Zabbix
Open the Zabbix dashboard, enter the Media types configuration and select the Slack media type:
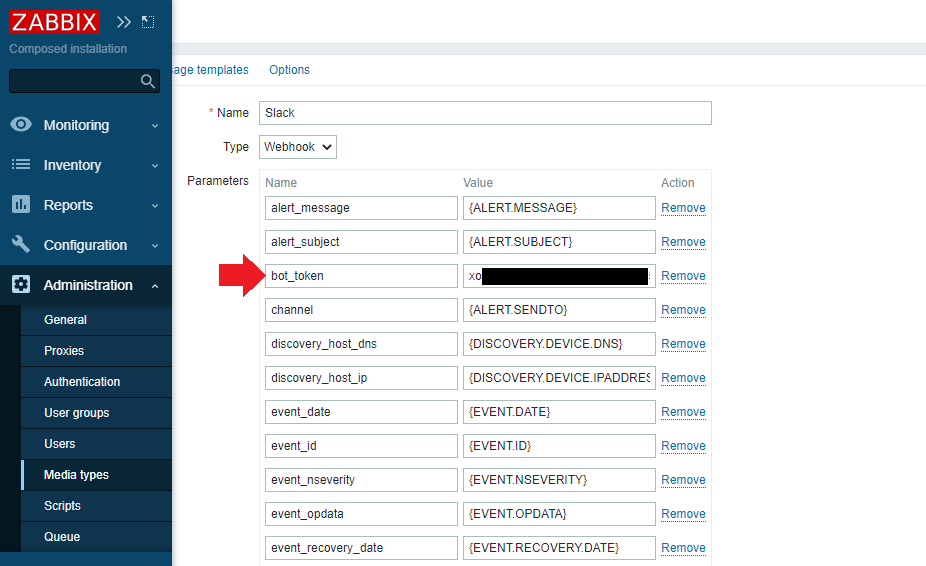
Copy your bot token in to the bot_token field and click on Update. To Test the bot we need to set the channel we want to bot to post into. Choose the channel you created in Slack earlier. And add your Zabbix bot to the channel in Slack! And you can copy your Zabbix dashboard URL into the zabbix_url or create a global variable for it.
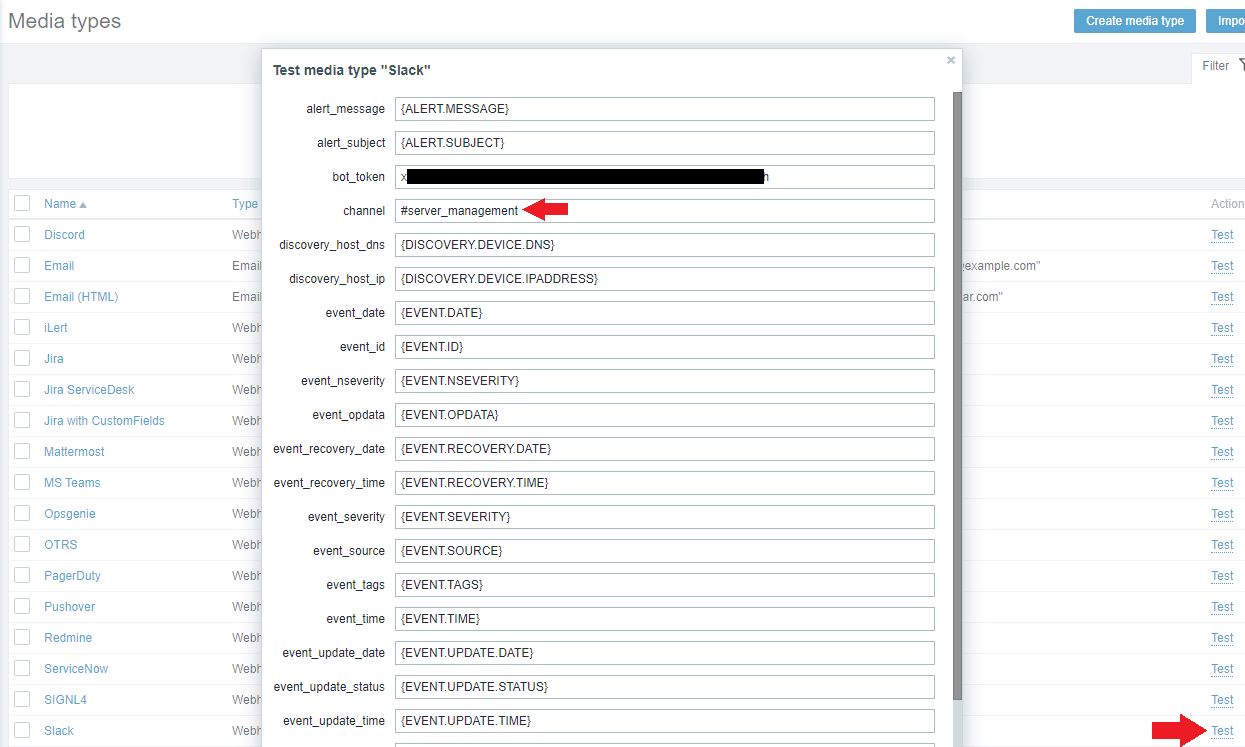
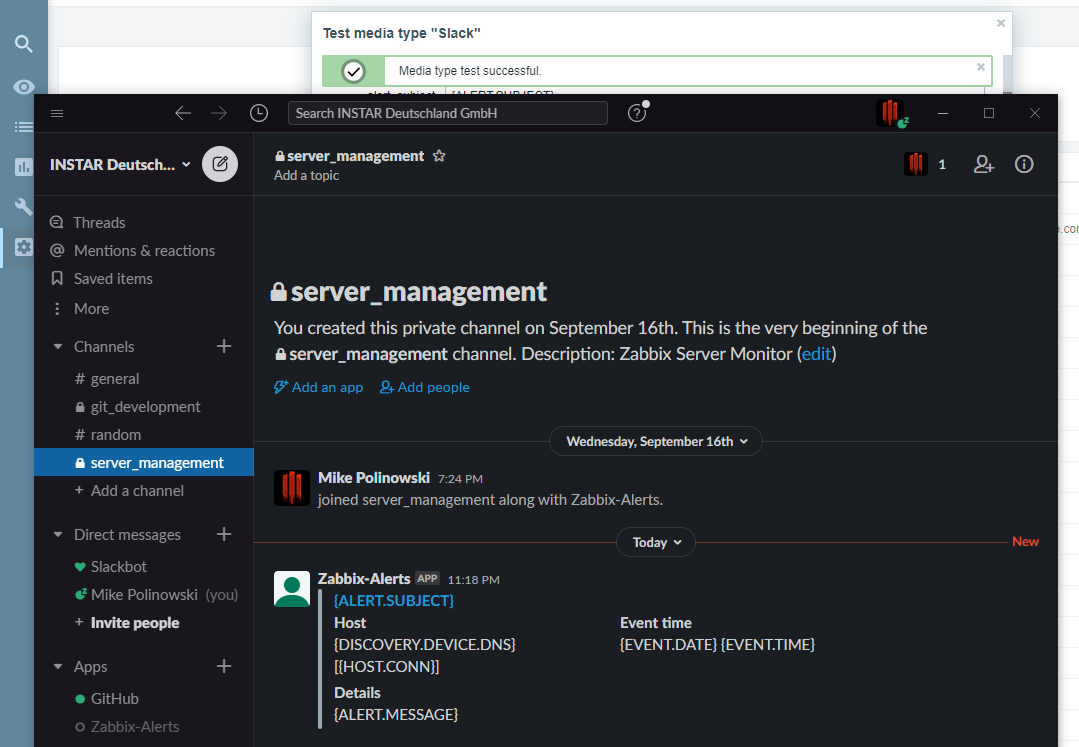
When you click on Test - back in the Zabbix dashboard - you will be asked to fill out a few more of the fields. Just type the number 1 into all of them except the zabbix_url that should be the URL to your Zabbix dashboard.
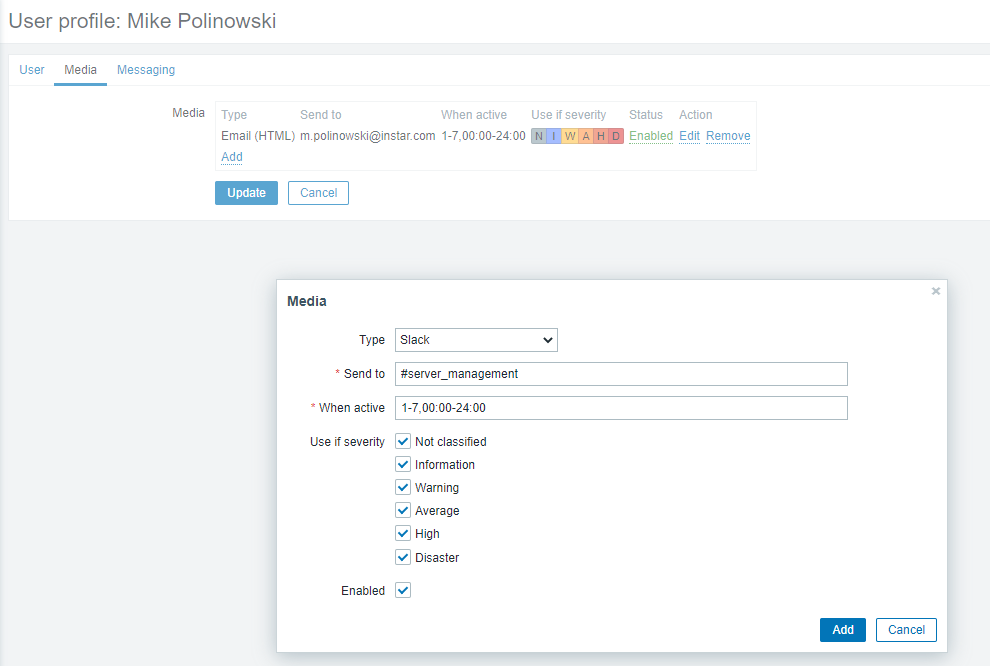
Great! Now we can add the Slack notification as a Media Type inside our user notification settings:
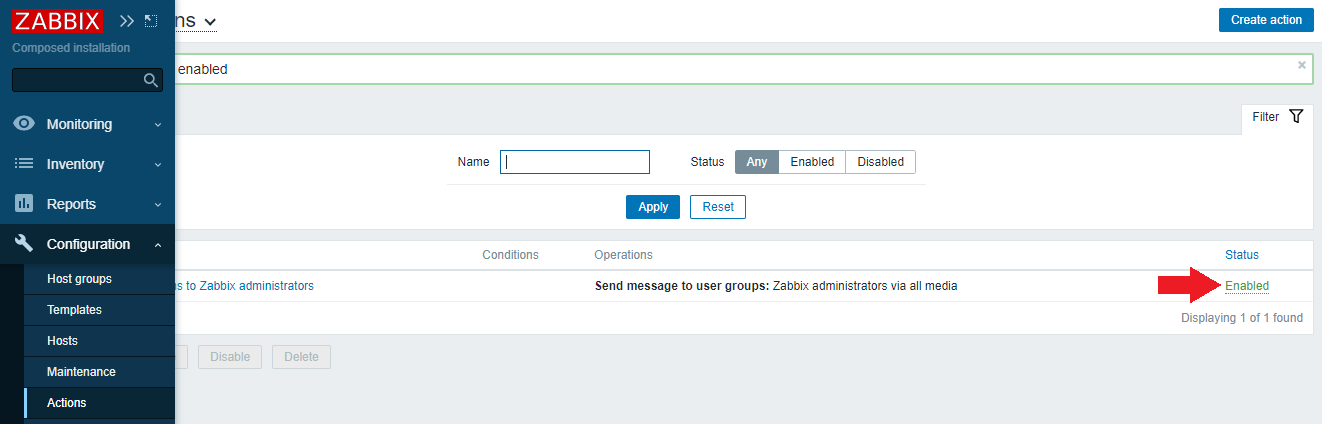
Make sure that reporting problems to Zabbix Administrators is activated: