Proxima Centauri

Setting up a Squid Proxy Server
How To Install Squid Proxy on CentOS 7:
yum -y install squid
chkconfig squid on
Setup Access Restrictions
Since this Squid proxy would allow anyone using it to make connections from your servers's IP address, you would want to restrict access to it.
We will use the free service from NoIP.com to create a DDNS address for our proxy service. We can then later configure squid to only accept traffic coming from this address.
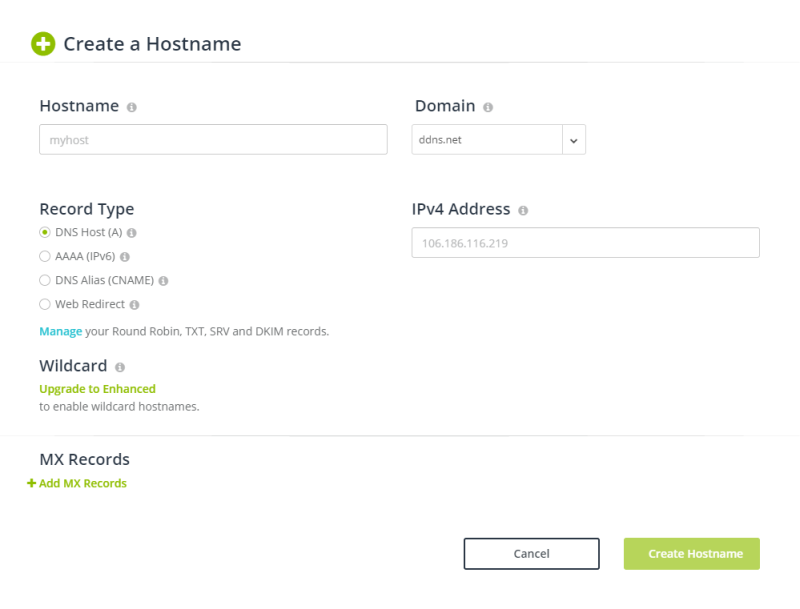
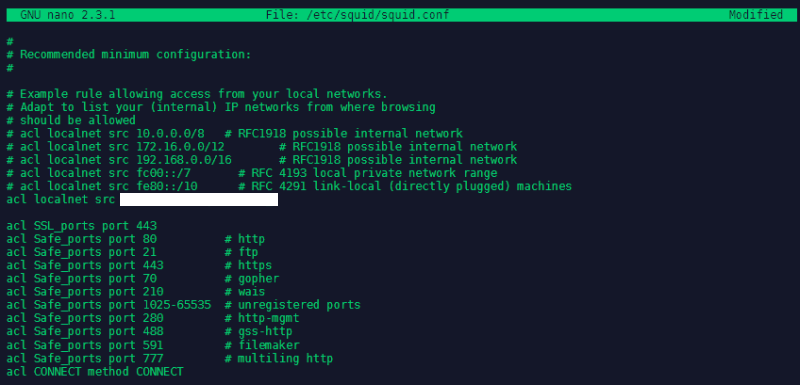
This hostname should be added to /etc/squid/squid.conf. Edit the file and add your hostname, e.g. acl localnet src myproxy.no-ip.org:
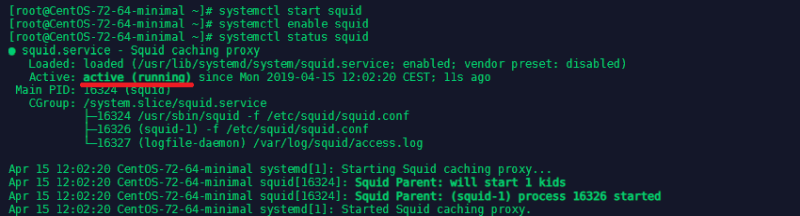
We can now start squid and enable it as a system service:
systemctl start squid
systemctl enable squid
systemctl status squid
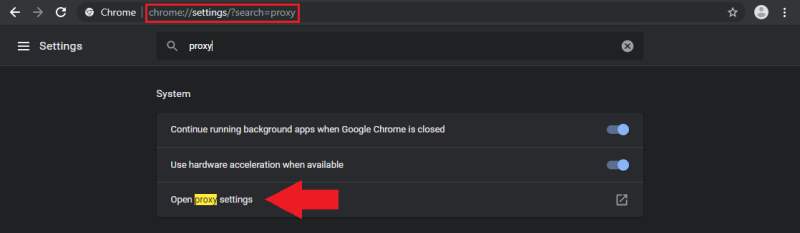
You now can test your Proxy by adding it to your network configuration, e.g. in Chrome (s. below) and navigate to a website like whatismyip.com. It should now show you that you are actually accessing the web site from your proxies IP address.
Squid Proxy Client Authentication
You will most probably want your users to authenticate before using the proxy. For that purpose, you can enable basic http authentication. It is easy and fast to configure.
First you will need httpd-tools installed:
yum -y install httpd-tools
Now lets create a file that will later store the username for the authentication. Squid runs with user squid so the file should be owned by that user:
touch /etc/squid/passwd
chown squid: /etc/squid/passwd
Now we will create a new user called proxyclient and setup its password:
htpasswd /etc/squid/passwd proxyclient
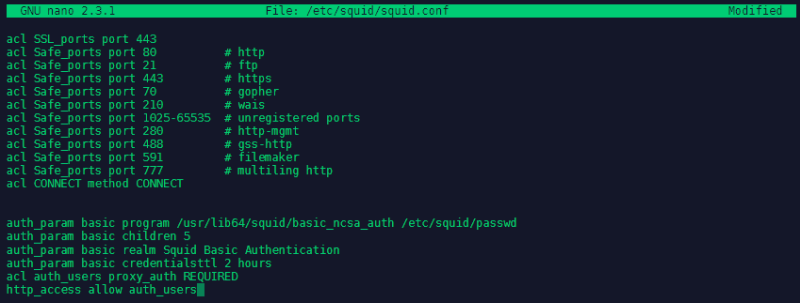
Now to configure the authentication open the configuration file with nano /etc/squid/squid.conf and after the ports ACLs add the following lines:
auth_param basic program /usr/lib64/squid/basic_ncsa_auth /etc/squid/passwd
auth_param basic children 5
auth_param basic realm Squid Basic Authentication
auth_param basic credentialsttl 2 hours
acl auth_users proxy_auth REQUIRED
http_access allow auth_users
Save the file and restart squid so that the new changes can take effect systemctl restart squid.
Configuring FirewallD
And make sure that your firewall allows traffic on your proxy port (default 3128):
firewall-cmd --zone=public --add-port=3128/tcp

firewall-cmd --permanent --zone=public --add-port=3128/tcp
Adding the Proxy Server to your Raspberry Pi
You will need to set up three environment variables http_proxy, https_proxy, and no_proxy so your Raspberry Pi knows how to access the proxy server.
sudo nano /etc/environment
Add the following to the /etc/environment file to create the http_proxy variable:
export http_proxy='http://proxyclient:password@proxyipaddress:proxyport'
Replace proxyipaddress and proxyport with the IP address and port (Squid default 3128) of your proxy. And password with the password you used for the proxyclient.
Enter the same information for the environment variable https_proxy:
export https_proxy='http://username:password@proxyipaddress:proxyport'
Create the no_proxy environment variable, which is a comma-separated list of addresses your Pi should not use the proxy for:
export no_proxy='localhost, 127.0.0.1'
Your /etc/environment file should now look like this:

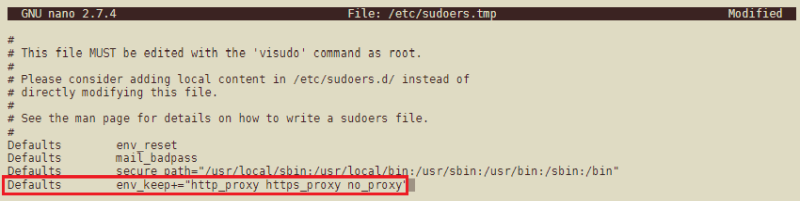
In order for operations that run as sudo (e.g. downloading and installing software) to use the new environment variables, you'll need to update sudoers:
sudo visudo
Add the following line to the file so sudo will use the environment variables you just created:
Defaults env_keep+='http_proxy https_proxy no_proxy'
Now add the following line to sudo nano /etc/apt/apt.conf.d/01proxy:
Acquire::http::Proxy 'http://username:password@proxyipaddress:proxyport';
Changing the Nameserver
Unfortunately this isn't enough when you want to access servers by their domain name - e.g. Google CDNs for your libraries. Already the name resolution will be blocked or redirected to places you do not want to go. In some cases it is possible to get around this by the IP address of those servers instead of the domain (Note: you have to flag your curls with --insecure when accessing HTTPS sites, as the certificate will match the domain but not the IP!)
But it makes much more sense to drop the DNS server that your ISP provides and go with an open one instead. At the moment of writing both the secondary Google DNS (8.8.4.4) as well as the OpenDNS server is reachable without a VPN. So I am going to set up those two as primary and secondary DNS for my Dev RaspberryPi.
This can usually be done inside /etc/resolv.conf but Raspbian installs a program called resolvconf that will auto-generate this file every time you restart your Pi. To fix this problem we need to edit the DHCP config instead:
sudo nano /etc/dhcpcd.conf
Add the following line to the bottom of the file:
static domain_name_servers=8.8.4.4 208.67.222.222
And restart your Pi with:
sudo systemctl daemon-reload
sudo service dhcpcd restart
You can afterwards verify that the resolve configuration was generated successfully sudo nano /etc/resolv.conf

Reboot your Raspberry Pi for the changes to take effect. You should now be able to access the internet via your proxy server. You can the curl https://www.wieistmeineip.de - search for wimip.ip to verify that it shows your Proxy IP address:
<script>
  var _SITE_NAME='WIMIP';
  var wimip = wimip || [];
  wimip.ip = 'My Proxy IP';
</script>