nfty
Provision with Docker
Create the work directory:
sudo useradd ntfy
The user ID, e.g. 1002, has to be used inside the docker compose file below:
id ntfy
uid=1002(ntfy) gid=1002(ntfy) groups=1002(ntfy)
sudo mkdir -p /opt/ntfy/{config,log,lib,cache/attachments}
sudo chown -R ntfy:ntfy /opt/ntfy
Add the configuration file - by copying the content of this example configuration
sudo wget https://raw.githubusercontent.com/binwiederhier/ntfy/main/server/server.yml -P /opt/ntfy/config
Now we can add the docker-compose file:
cd /opt/ntfy
sudo nano docker-compose.yml
docker-compose.yml
version: "3"

services:
  ntfy:
    image: binwiederhier/ntfy
    container_name: ntfy
    command:
      - serve
    environment:
      - TZ=UTC    # optional: set desired timezone
    user: 1002:1002 # replace with the user/group or uid/gid
    volumes:
      - ./cache:/var/cache/ntfy
      - ./config:/etc/ntfy
      - ./db:/var/lib/ntfy/
    ports:
      - 8000:80 # exposed on port 8000 (you can change it)
    restart: unless-stopped
docker pull binwiederhier/ntfy:latest
docker-compose up -d
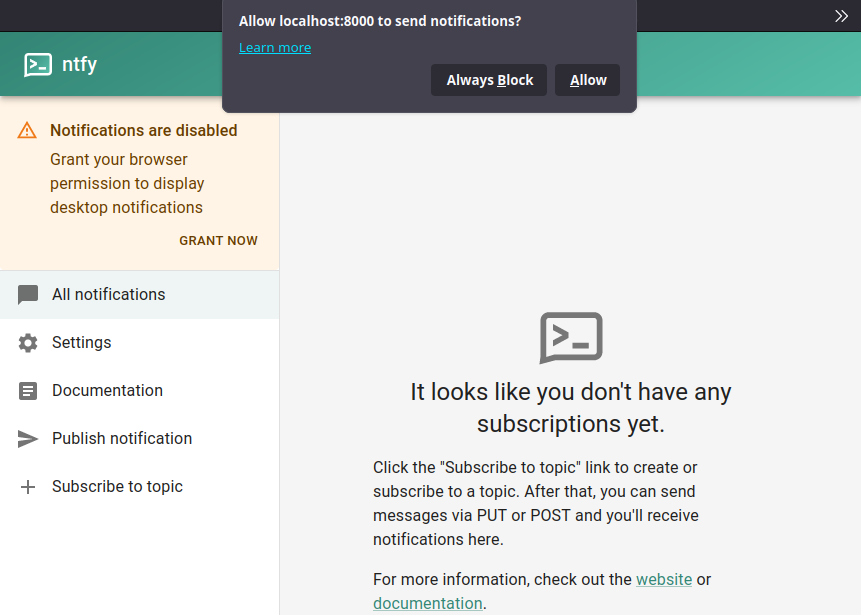
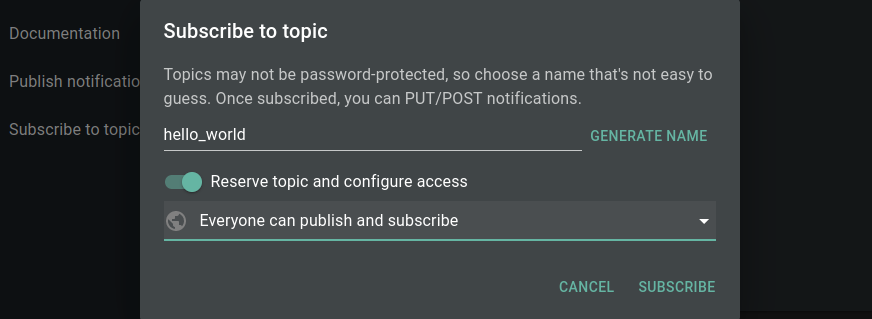
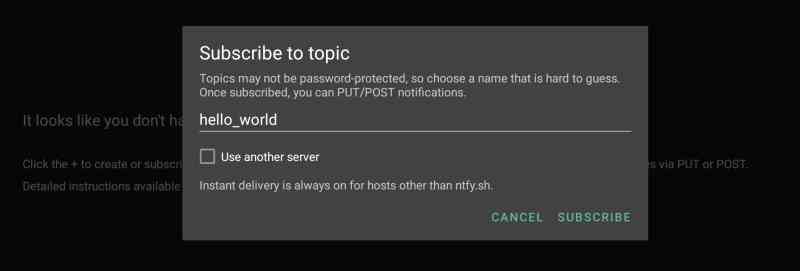
The user interface will now be accessible on localhost:8000 and allows you to subscribe to a notification topic:
For example, we can use hello_world:
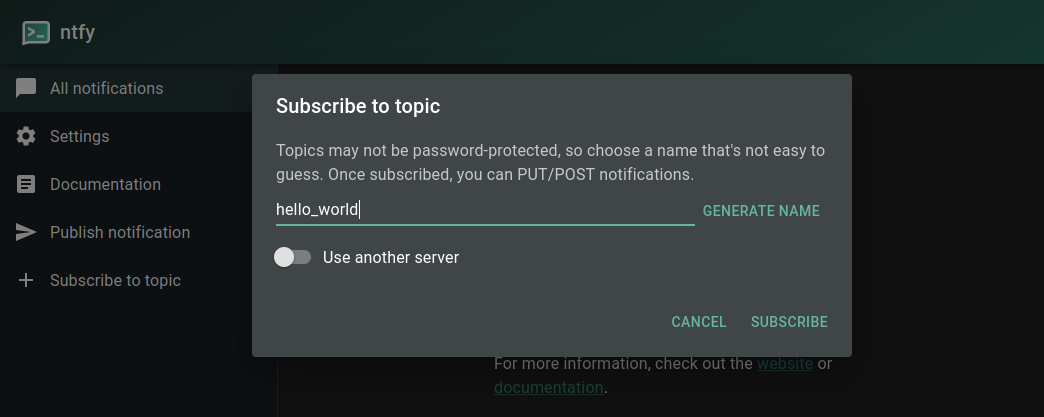
This topic is now publicly available to use. Which brings us to user authentication.
User Management
Start by editing the downloaded ./config/server.yml template - for now I will only use a local IP without encryption:
# ntfy server config file
base-url: "http://192.168.2.112"
listen-http: ":80"
# listen-https: ":443"
# key-file: <filename>
# cert-file: <filename>
cache-file: "/var/cache/ntfy/cache.db"
cache-duration: "12h"
auth-file: /var/lib/ntfy/user.db
auth-default-access: "deny-all"
behind-proxy: false
attachment-cache-dir: "/var/cache/ntfy/attachments"
attachment-total-size-limit: "5G"
attachment-file-size-limit: "15M"
attachment-expiry-duration: "3h"
web-root: /ntfy
enable-signup: false
enable-login: true
enable-reservations: true
log-level: info
log-format: json
log-file: /var/log/ntfy.log
Modify the docker-compose file to add all necessary volumen mount to persist the generated data:
./docker-compose.yml
version: "3"

services:
  ntfy:
    image: binwiederhier/ntfy:latest
    container_name: ntfy
    command:
      - serve
    environment:
      - TZ=UTC    # optional: set desired timezone
    user: 1002:1002 # replace with the user/group or uid/gid
    volumes:
      - ./cache:/var/cache/ntfy
      - ./config:/etc/ntfy
      - ./lib:/var/lib/ntfy/
      - ./log:/var/log
    ports:
      - 8000:80 # exposed on port 8000 (you can change it)
    restart: unless-stopped
ntfy CLI
Having set the default access right to deny-all we are now no longer able to interact with the created topic:
curl -d "Hi" localhost:8000/hello_world
{"code":40301,"http":403,"error":"forbidden","link":"https://ntfy.sh/docs/publish/#authentication"}
Having set the enable-signup option to false we are also unable to create a new user through the UI or the REST interface. So we need to use the CLI inside our docker container to generate an admin and regular user login. Here are a few examples for available CLI commands (that need to be executed inside the docker container!):
ntfy user list                     # Shows list of users (alias: 'ntfy access')
ntfy user add phil                 # Add regular user phil
ntfy user add --role=admin phil    # Add admin user phil
ntfy user del phil                 # Delete user phil
ntfy user change-pass phil         # Change password for user phil
ntfy user change-role phil admin   # Make user phil an admin
ntfy user change-tier phil pro     # Change phil's tier to "pro"
ntfy access                            # Shows access control list (alias: 'ntfy user list')
ntfy access USERNAME                   # Shows access control entries for USERNAME
ntfy access USERNAME TOPIC PERMISSION  # Allow/deny access for USERNAME to TOPIC
ntfy access                        # Shows entire access control list
ntfy access phil                   # Shows access for user phil
ntfy access phil mytopic rw        # Allow read-write access to mytopic for user phil
ntfy access everyone mytopic rw    # Allow anonymous read-write access to mytopic
ntfy access everyone "up*" write   # Allow anonymous write-only access to topics "up..."
ntfy access --reset                # Reset entire access control list
ntfy access --reset phil           # Reset all access for user phil
ntfy access --reset phil mytopic   # Reset access for user phil and topic mytopic
Adding an admin user inside the Docker container:
docker exec -ti ntfy ntfy user add --role=admin admin
~ $ password: mypassword
~ $ confirm: mypassword
~ $ user admin added with role admin
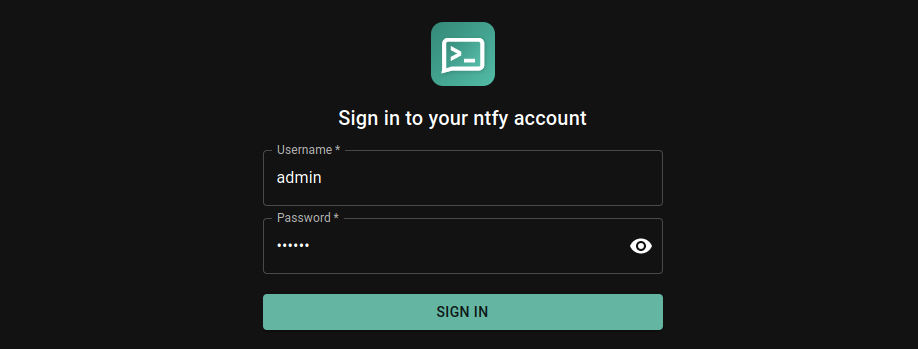
The dashboard is now accessible under http://localhost:8000/ntfy and http://192.168.2.112:8000/ntfy and now has a Sign In button:
We can now add a regular user notifier through the cli:
docker exec -ti ntfy ntfy user add notifier
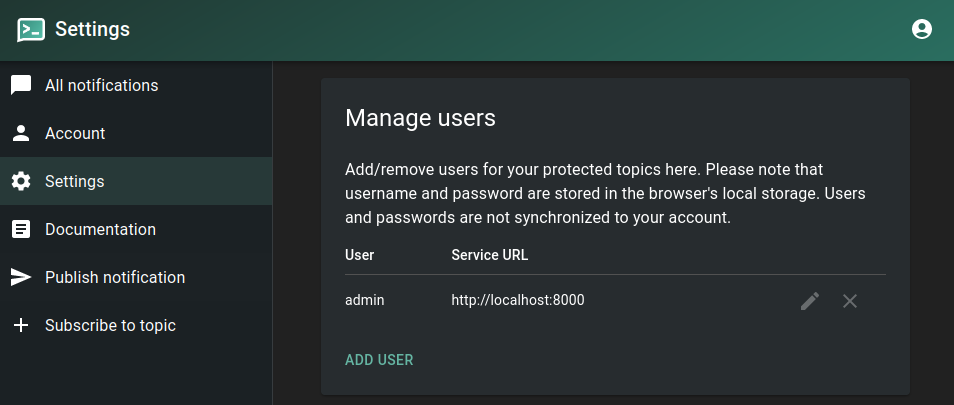
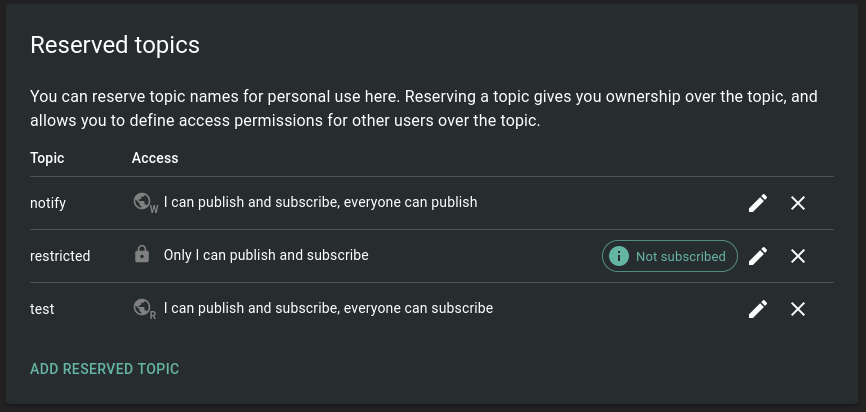
This user is currently not allowed to subscribe to any topics. But logged in as the administrator we can create a notification topic and grant access to it:
Which would open this topic to everyone. To make it more secure we can lock the topic down to subscription only:
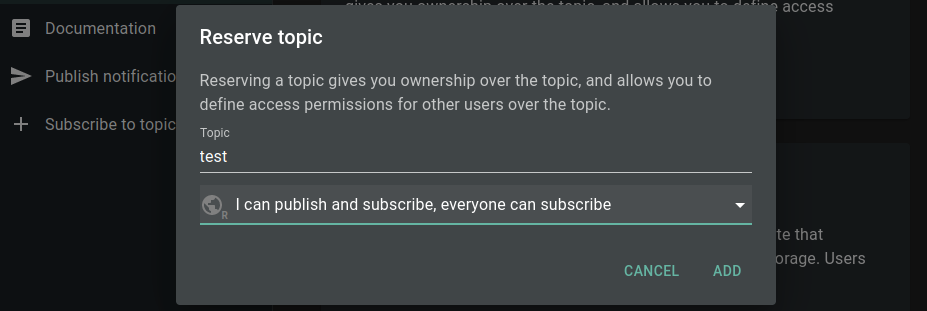
And then change the access permission for the user notifier to read-write, read-only, write-only, or deny for the hello_world topic through the cli:
docker exec -ti ntfy ntfy access notifier test read-only
~ $ granted read-only access to topic test
And for the next tests I am also going to add a topic the notifier user only has publishing rights to:
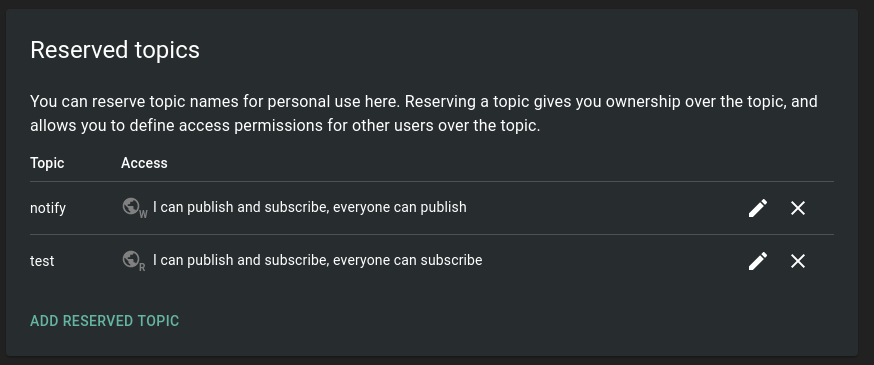
docker exec -ti ntfy ntfy access notifier notify write-only
~ $ granted read-only access to topic test
docker exec -ti ntfy ntfy user list
~ $ user admin (role: admin, tier: none)
~ $ - read-write access to all topics (admin role)
~ $ user notifier (role: user, tier: none)
~ $ - write-only access to topic notify
~ $ - read-only access to topic test
~ $ user * (role: anonymous, tier: none)
~ $ - write-only access to topic notify
~ $ - read-only access to topic test
~ $ - no access to any (other) topics (server config)
~ $ - no access to any (other) topics (server config)
Add the notifier user to your Android app - or log in with notifier login in another browser. You should now be able to subscribe to the test topic, receive notification but be unable to publish updates. Trying to subscribe to notify will fail completely.
What I am not sure about is - why does the anonymous user have the same rights as my basic user? This makes logging in useless - unless you want to use the admin user. So let's see what happens when you created a restricted topic that only the admin user has access to:
And give the basic use access through the CLI:
docker exec -ti ntfy ntfy access notifier restricted write-only
~ $ granted read-only access to topic test
Now this worked - the basic user can now publish updates to the restricted topic - but the anonymous user is locked out:
docker exec -ti ntfy ntfy user list
~ $ user admin (role: admin, tier: none)
~ $ - read-write access to all topics (admin role)
~ $ user notifier (role: user, tier: none)
~ $ - write-only access to topic restricted
~ $ - write-only access to topic notify
~ $ - read-only access to topic test
~ $ user * (role: anonymous, tier: none)
~ $ - no access to topic restricted
~ $ - write-only access to topic notify
~ $ - read-only access to topic test
~ $ - no access to any (other) topics (server config)
We can now trigger an update to this topic by sending a curl HTTP GET request:
curl -d "Test 1,2,3" localhost:8000/hello_world

{"id":"qgoDRDQGpjQw","time":1705662731,"expires":1705705931,"event":"message","topic":"hello_world","message":"Test 1,2,3"}
And the notification should appear inside the nfty dashboard:

Mobile Notification
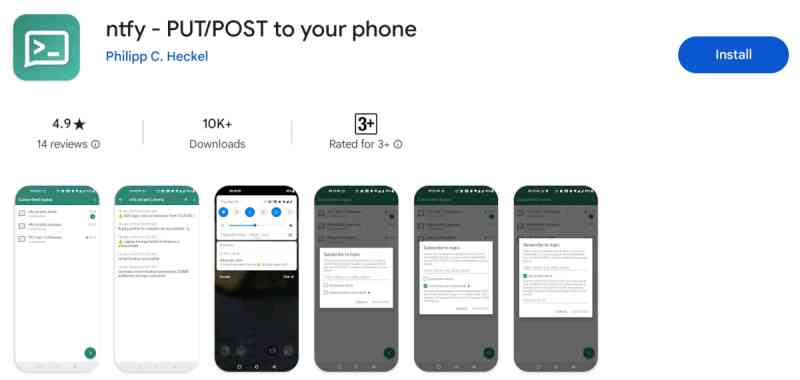
Download the latest version of the Android app:
Set the default server your App should connect to. Note that I am using the local IP of my linux server and this will only work when my phone is connected to the same network - either directly or through an VPN tunnel:

Now I need to create a subscription to the same hello_world topic I created in the server webUI:
Back on the server I can send an update to the hello_world topic:
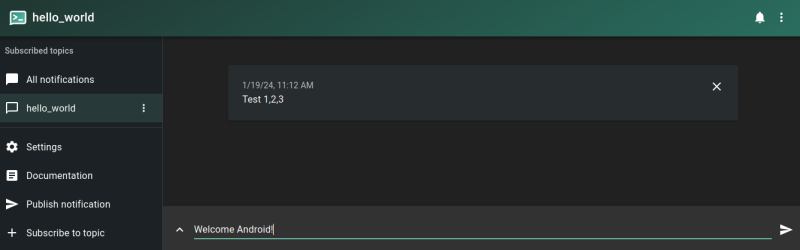
And it should now also pop up on the connected Android phone:

REST API
Trying to publish to an read-only topic returns a 403 - forbidden:
curl -v -u notifier:instar -d "Hello" localhost:8000/test

* Host localhost:8000 was resolved.
* IPv6: ::1
* IPv4: 127.0.0.1
*   Trying [::1]:8000...
* Connected to localhost (::1) port 8000
* Server auth using Basic with user 'notifier'
> POST /test HTTP/1.1
> Host: localhost:8000
> Authorization: Basic bm90aWZpZXI6aW5zdGFy
> User-Agent: curl/8.5.0
> Accept: */*
> Content-Length: 5
> Content-Type: application/x-www-form-urlencoded
>
< HTTP/1.1 403 Forbidden
< Access-Control-Allow-Origin: *
< Content-Type: application/json
< Date: Sat, 27 Jan 2024 10:13:52 GMT
< Content-Length: 100
<
{"code":40301,"http":403,"error":"forbidden","link":"https://ntfy.sh/docs/publish/#authentication"}
* Connection #0 to host localhost left intact
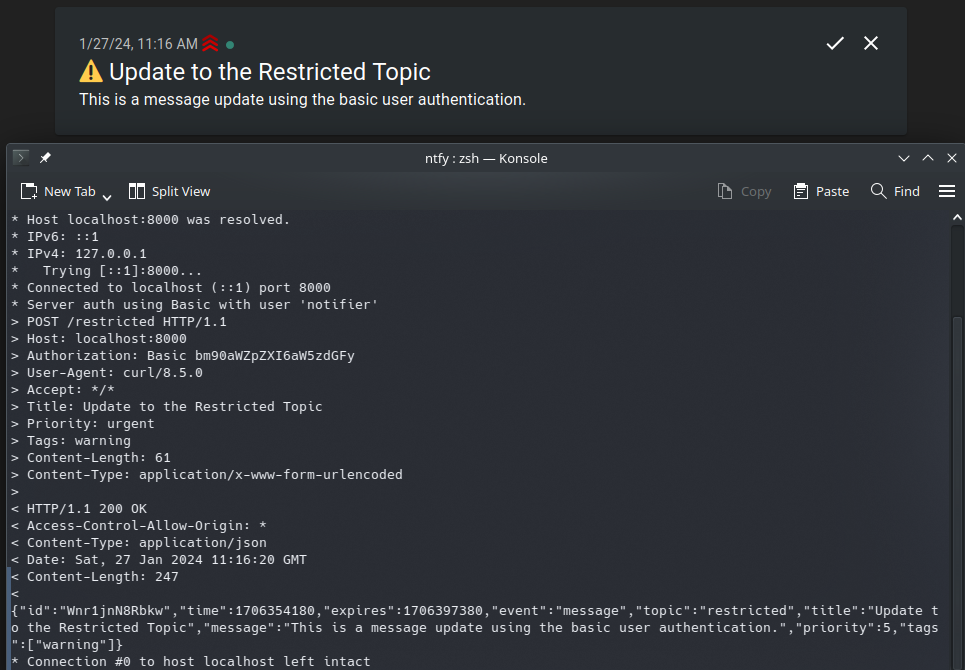
While the write-only topic is open for business. But - as configures above - only if you use the correct user login:
curl -d "Hello" localhost:8000/restricted
{"code":40301,"http":403,"error":"forbidden","link":"https://ntfy.sh/docs/publish/#authentication"}
curl \
  -v -u notifier:instar \
  -H "Title: Update to the Restricted Topic" \
  -H "Priority: urgent" \
  -H "Tags: warning" \
  -d "This is a message update using the basic user authentication." \
  localhost:8000/restricted
INSTAR IP Cameras
I am now interested in connecting my INSTAR 2k+ WQHD IP camera's HTTP alarm service. Let's use curl to find out the request that we can use.
Here I am going to emply custom headers provided by ntfy:
curl -u notifier:instar -d "Hi" -H "X-Attach: http://192.168.2.125/snap.cgi?user=admin&pwd=instar" localhost:8000/test
{"id":"l4Er2pCeCTLP","time":1708428507,"expires":1708471707,"event":"message","topic":"test","message":"Hi","attachment":{"name":"snap.cgi","url":"http://192.168.2.125/snap.cgi?user=admin\u0026pwd=instar"}}
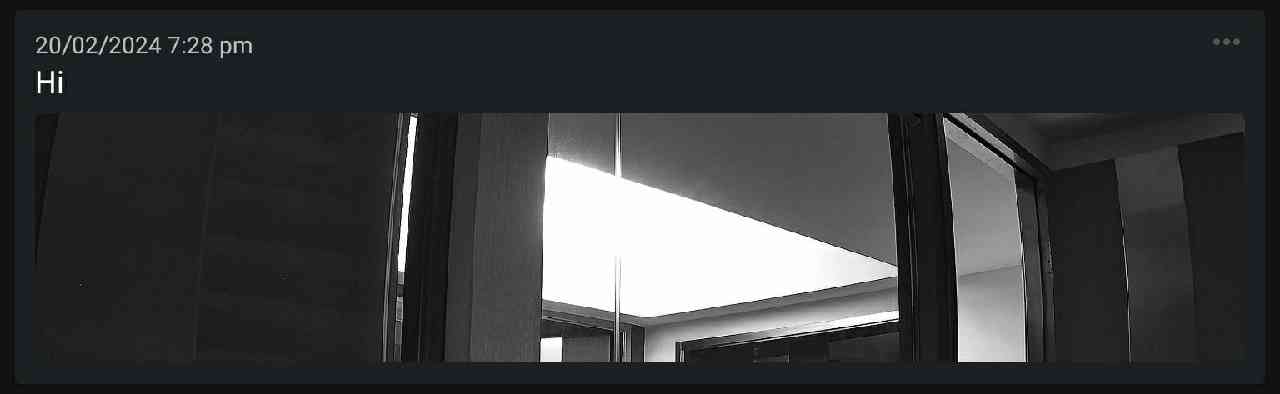
This adds the URL of the current camera snapshot to the notification which results in two issues. The URL as provided above is only accessible on my local network - so I either need to forward the HTTP port of my camera to the internet, only load the image when I am in the same network or use a VPN to always have access to the local IP.
The second issue is, that the URL will always show the latest image - and not the one that was recorded when the alarm was triggered:
The same works with Icon :
curl -u notifier:instar -d "Hi" -H "X-Icon: http://192.168.2.125/snap.cgi?user=admin&pwd=instar" localhost:8000/test
{"id":"OBy1UXYLq5rj","time":1708428665,"expires":1708471865,"event":"message","topic":"test","message":"Hi","icon":"http://192.168.2.125/snap.cgi?user=admin\u0026pwd=instar"}

Using Filename instead of Attach will add the file to the message - which seems to be the better choice. But the service does not download the image from my camera. Instead it just tries to save the string to text:
curl -u notifier:instar -d "Hi" -H "X-Filename: http://192.168.2.125/snap.cgi?user=admin&pwd=instar" localhost:8000/test
{"id":"iFdDVyvhtPSf","time":1708428544,"expires":1708471744,"event":"message","topic":"test","message":"You received a file: http://192.168.2.125/snap.cgi?user=admin\u0026pwd=instar","attachment":{"name":"http://192.168.2.125/snap.cgi?user=admin\u0026pwd=instar","type":"text/plain; charset=utf-8","size":2,"expires":1708439344,"url":"http://192.168.2.112/file/iFdDVyvhtPSf.txt"}}

FTP Upload: The option above should work in combination with the alarm FTP upload provided by the IP camera. Uploading the snapshot to the
ntfyserver and adding a local location above should give us access to the image inside the notification.
Ok, so now let's use the camera UI to reproduce those results to be notified whenever an Alarm is triggered:
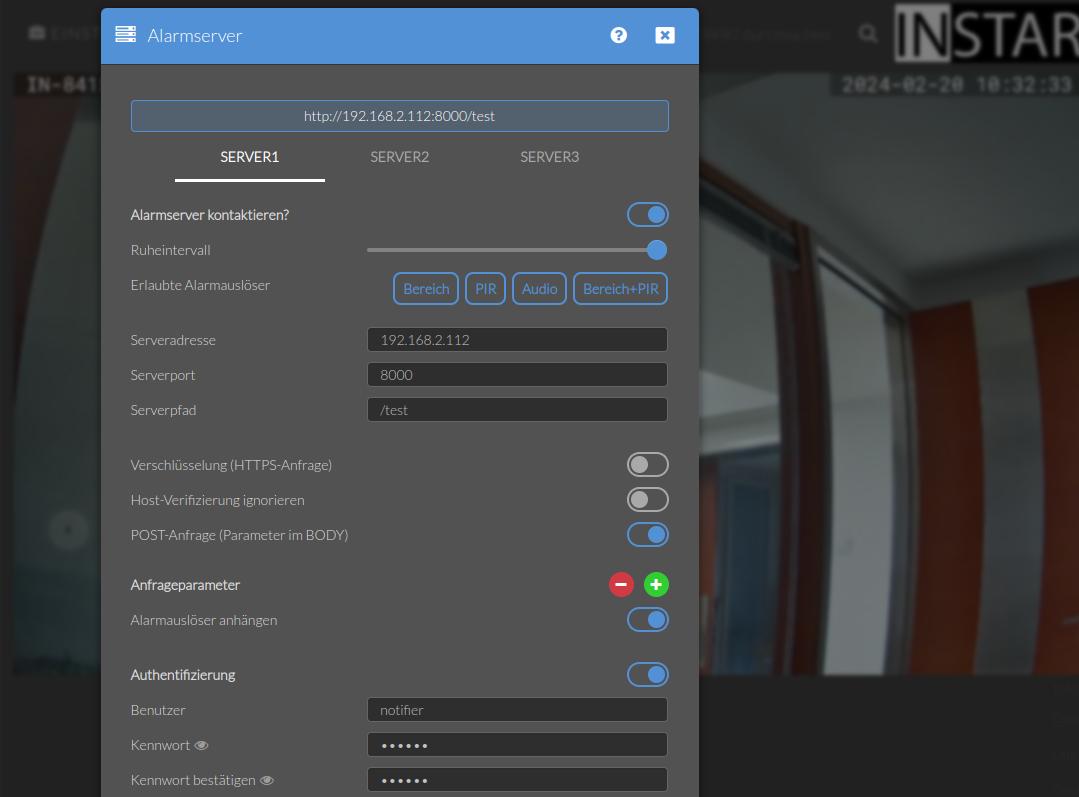
The headers are currently not yet configurable through the UI. But we can already set them using CGI commands:
/param.cgi?cmd=setasattr&as_index=1&as_header1=1&as_headerattr1=X-Title&as_headerval1=Alarm%20125
Testing the configuration will give us the following notification:

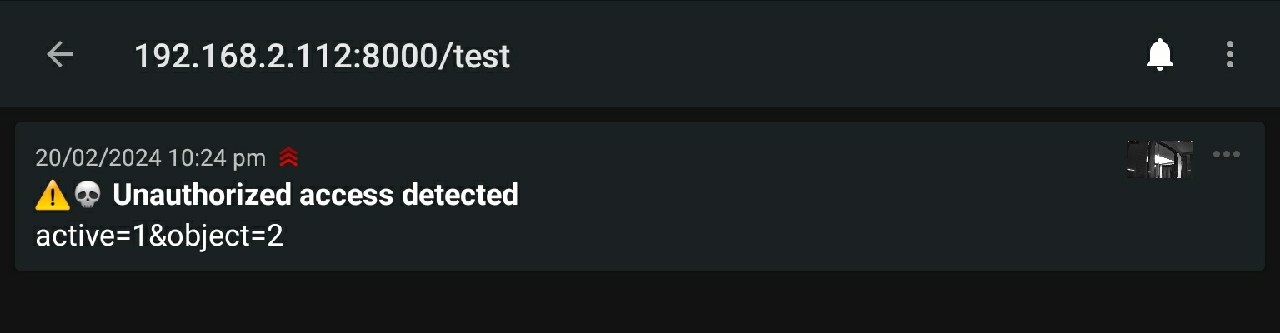
Ok, so le't extend the configuration by adding all the headers to configure a title, tags, a click target (to directly open the camera webUI), an snapshot icon and a priority:
as_headerattr1="X-Title";
as_headerval1="Unauthorized access detected";
as_header1="1";
as_headerattr2="X-Tags";
as_headerval2="warning,skull";
as_header2="1";
as_headerattr3="X-Click";
as_headerval3="http://192.168.2.125/";
as_header3="1";
as_headerattr4="X-Icon";
as_headerval4="http://192.168.2.125/snap.cgi?chn=13&user=admin&pwd=instar";
as_header4="1";
as_headerattr5="X-Priority";
as_headerval5="5";
as_header5="1";
/param.cgi?cmd=setasattr&as_index=1&as_header1=1&as_headerattr1=X-Title&as_headerval1=Unauthorized%20access%20detected&as_header2=1&as_headerattr2=X-Tags&as_headerval2=warning%2Cskull&as_header3=1&as_headerattr3=X-Click&as_headerval3=http://192.168.2.125/&as_header4=1&as_headerattr4=X-Icon&as_headerval4=http://192.168.2.125/snap.cgi%3Fchn=13%26user=admin%26pwd=instar&as_header5=1&as_headerattr5=X-Priority&as_headerval5=5