Securing Elasticsearch with X-Pack

In an earlier project we set up Elasticsearch to only be accessible via localhost to protect our data. This worked well, since we build our static website server side in Node/Express/EJS and send ready HTML to our client - already containing the rendered response from the database. But what if our app runs client-side?
The official solution is part of the Elastic Extension Pack, which contains a lot of functionality that you might not really need - and comes at a prize that isn't quoted anywhere... That isn't very inviting ~ but lets take a look at it before turning to some free open source alternatives:
Install X-Pack
X-Pack is a single extension that integrates handy features — security, alerting, monitoring, reporting, graph exploration, and machine learning — you can trust across the Elastic Stack.
Elasticsearch Security
We need to add a user athentication to our Elasticsearch / Kibana setup. We will do this by installing X-Pack. To get started with installing the Elasticsearch plugin, go to /etc/elasticsearch/ and call the following function:
bin/elasticsearch-plugin install x-pack
Now restart Elasticsearch:
sudo systemctl stop elasticsearch.service
sudo systemctl start elasticsearch.service
You can either use the auto function to generate user passwords for Elasticsearch, Kibana (and the not yet installed Logstash):
bin/x-pack/setup-passwords auto
or swap the auto flag with interactive to use your own user logins. The auto output will look something like this:
Changed password for user kibana
PASSWORD kibana = *&$*(80gfddzg

Changed password for user logstash_system
PASSWORD logstash_system = 58#$)Qljfksh

Changed password for user elastic
PASSWORD elastic = jgfisg)#*%&(@*#)
Now every interaction with Elasticsearch or Kibana will require you to authenticate with username: elastic and password: jgfisg)#%&(@#)
Kibana Security
Now we repeat these steps with Kibana. First navigate to /etc/kibana/ and call the following function:
bin/kibana-plugin install x-pack
And we have to add the login that Kibana has to use to access Elasticsearch (auto generated above) to the kibana.yml file in /etc/kibana/:
elasticsearch.username: 'kibana'
elasticsearch.password:  '*&$*(80gfddzg'
Now restart Kibana:
sudo systemctl stop kibana.service
sudo systemctl start kibana.service
Now navigate your browser http://localhost:5601/ and login with the 'elastic' user we generated above.
Enabling Anonymous Access
Incoming requests are considered to be anonymous if no authentication token can be extracted from the incoming request. By default, anonymous requests are rejected and an authentication error is returned (status code 401). To allow anonymous user to send search queries (Read access to specified indices), we need to add the following lines to the elasticsearch.yml file in /etc/elasticsearch/:
xpack.security.authc:
  anonymous:
    username: anonymous_user
    roles: wiki_reader
    authz_exception: true
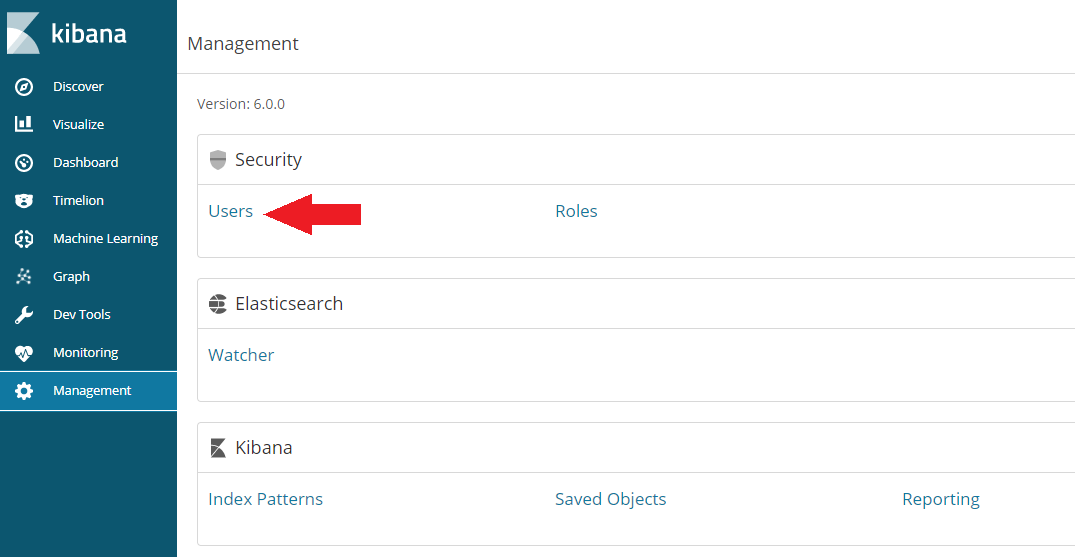
Now we have to switch to the Kibana webUI on http://localhost:5601/ and create the role: wiki_reader to allow read access to the wiki indices. First switch to the Management tab and click on user:
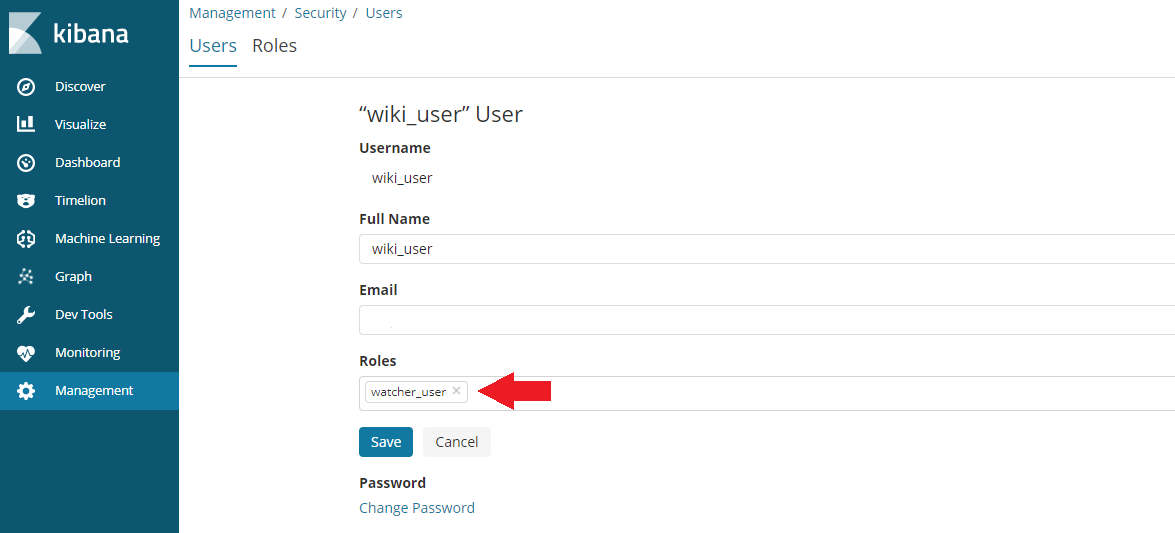
Then click on Add a User and add a user with the watcher_user role:
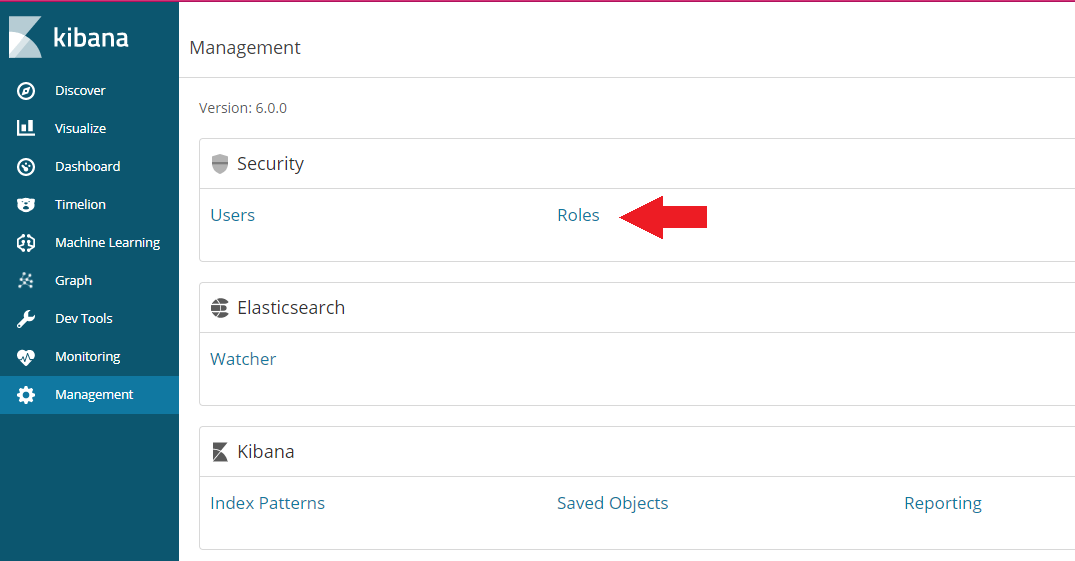
Switch back to the Management tab and click on role:
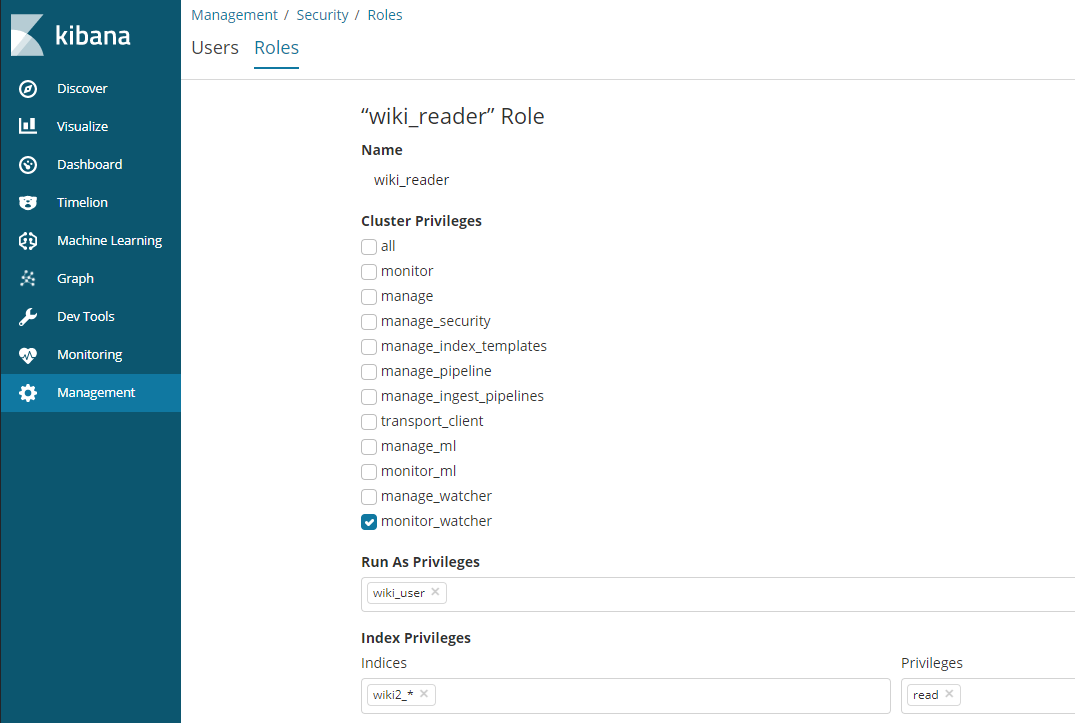
Click on Create Role and add the name wiki_reader that we choose for the role of the anonymous user inside the elasticsearch.yml file, assign the monitor_watcher privilege and choose the indices that you want the anonymous user to have READ access to:
Your configuration will be active after restarting Elasticsearch. Now you can use webservices to read from your ES database. But only the elastic user has the privileg to WRITE and to work in Kibana.