Tensorflow Serving REST API

In the previous step I set up Tensorflow Model server using one of the official toy models that come with the repository. Now we need to apply this to our own models.
Preparing the Model
I am going to use the mnist fashion dataset to train a model. The dataset contains of 60,000 training and 10,000 testing sample 28x28 grayscale images associated with a label from 10 classes:
0: T-Shirt / Top1: Trousers2: Pullover3: Dresses4: Coats5: Sandals6: Shirts7: Sneaker8: Bags9: Ankle Boot
Each pixel 28x28 = 784 has a darkness value assigned ranging from 0-255 with higher number associated with darker areas in the source image.
The desired outcome of this test run will be to train a model to be able to recognize fashion items in images and provide a Tensorflow REST API that accepts input images and outputs predictions based on the trained model.
Preparing the Dataset
We can first download and pre-process the dataset:
# prepare data
## import Fashion MNIST Dataset using Keras
(X_train, y_train), (X_test, y_test) = tf.keras.datasets.fashion_mnist.load_data()

## data normalization -> Between 0 and 1
X_train = X_train / 255.0
X_test = X_test / 255.0

## reshape data to be = (no_of_images, 28, 28, 1) instead of (no_of_images, 28,28)
X_train = X_train.reshape(X_train.shape[0], 28, 28, 1)
X_test = X_test.reshape(X_test.shape[0], 28, 28, 1)

## define images classes
class_names = ['T-shirt/top', 'Trouser', 'Pullover', 'Dress', 'Coat',
               'Sandal', 'Shirt', 'Sneaker', 'Bag', 'Ankle boot']


## inspect data
W_grid = 4
L_grid = 4

fig, axes = plt.subplots(L_grid, W_grid, figsize = (15, 15))
axes = axes.ravel()

n_training = len(X_train)

for i in np.arange(0, L_grid * W_grid):
    index = np.random.randint(0, n_training)
    axes[i].imshow(X_train[index].reshape(28,28))
    axes[i].set_title(y_train[index])
    axes[i].axis('off')

plt.subplots_adjust(hspace = 0.4)
plt.show

Building the Tensorflow Model
# model building
classifier = tf.keras.Sequential([
  tf.keras.layers.Conv2D(32, (3,3), activation = 'relu', input_shape = (28,28,1)),
  tf.keras.layers.MaxPooling2D(2,2),
  tf.keras.layers.Conv2D(64, (3, 3), activation='relu'),
  tf.keras.layers.Flatten(),
  tf.keras.layers.Dense(64, activation = 'relu'),
  tf.keras.layers.Dense(10, activation = 'softmax')
])

classifier.summary()

## compile the model
classifier.compile(optimizer='adam',
              loss=tf.keras.losses.SparseCategoricalCrossentropy(from_logits=True),
              metrics=[tf.keras.metrics.SparseCategoricalAccuracy()])
Training the Tensorflow Model
# model training
EPOCHS = 5
classifier.fit(X_train, y_train, epochs=EPOCHS)

test_loss, test_acc = classifier.evaluate(X_test, y_test)
print('\nINFO :: Test accuracy: {}'.format(test_acc))
After 5 Epochs I get INFO :: Test accuracy: 0.919700026512146 - so the model is already ~ 92% accurate.
Saving the Trained Model
We now need to save our trained model as SavedModel - a format that combines a GraphDef with checkpoint files that store weights, all collected in a folder. tf.keras.models.save_model is a function used to build a saved model that is suitable for serving using Tensorflow Serving:
# save the model
## join the temp model directory with chosen version number
export_path = os.path.join(MODEL_DIR, str(MODEL_VERSION))

## save the model using `save_model`
tf.keras.models.save_model(
    classifier,
    export_path,
    overwrite=True,
    include_optimizer=True,
    save_format=None,
    signatures=None,
    options=None
)

print('\nINFO :: Trained Model Saved!')
Inspecting the Saved Model
We'll use the command line utility saved_model_cli to look at the models and SignatureDefs (the methods you can call) in our SavedModel:
saved_model_cli show --dir models/1 --all


...

signature_def['serving_default']:
  The given SavedModel SignatureDef contains the following input(s):
    inputs['conv2d_input'] tensor_info:
        dtype: DT_FLOAT
        shape: (-1, 28, 28, 1)
        name: serving_default_conv2d_input:0
  The given SavedModel SignatureDef contains the following output(s):
    outputs['dense_1'] tensor_info:
        dtype: DT_FLOAT
        shape: (-1, 10)
        name: StatefulPartitionedCall:0
  Method name is: tensorflow/serving/predict


  ...
This allows us to verify the inputs and outputs of the saved model - for example, here we can see that the model takes in images with 28x28 pixel and outputs one of 10 classes as a prediction.
Tensorflow Serving
Now we can use the Tensorflow Serving Docker Container to server our trained model:
docker run --gpus all -p 8501:8501 \
--mount type=bind,source=$(pwd)/models,target=/models/mnist_fashion \
-e MODEL_NAME=mnist_fashion -t tensorflow/serving:latest-gpu
Load Test Dataset
We can now use the Tensorflow Serving REST API to send images, have them analyzed and return predictions. To get started we first need to load the dataset from Keras and select a random image from the Test Set:
# prepare data
## import Fashion MNIST Dataset using Keras
(X_train, y_train), (X_test, y_test) = tf.keras.datasets.fashion_mnist.load_data()
## data normalization -> Between 0 and 1
X_train = X_train / 255.0
X_test = X_test / 255.0
## reshape data to be = (no_of_images, 28, 28, 1) instead of (no_of_images, 28,28)
X_train = X_train.reshape(X_train.shape[0], 28, 28, 1)
X_test = X_test.reshape(X_test.shape[0], 28, 28, 1)
## define images classes
class_names = ['T-shirt/top', 'Trouser', 'Pullover', 'Dress', 'Coat',
'Sandal', 'Shirt', 'Sneaker', 'Bag', 'Ankle boot']
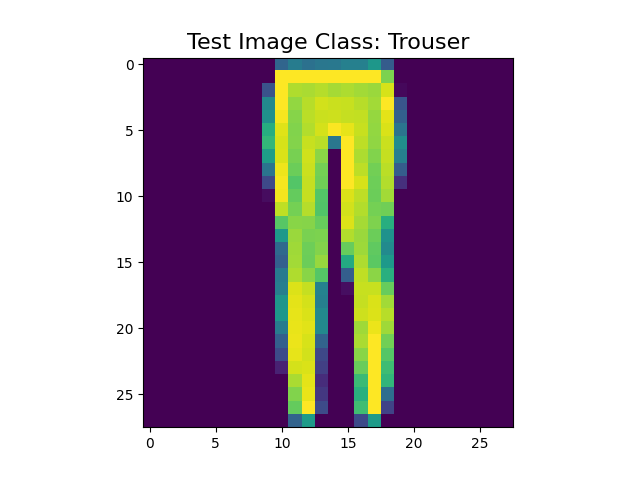
## display an test image selected below
def show(idx, title):
plt.figure()
plt.imshow(X_test[idx].reshape(28,28))
plt.title('\n\n{}'.format(title), fontdict={'size': 16})
plt.show()
## select a random test image and get it's class label
random = np.random.randint(0, len(X_test)-1)
show(random, 'Test Image Class: {}'.format(class_names[y_test[random]]))
Running Predictions
Now that we are able to load images from the Test Dataset we can send them to our Tensorflow REST API to get our predictions. Let's say we have an IP camera that detected something suspicious and uploaded 3 snapshots:
# running predictions
## prepare a list of 3 images to be send to the REST API
data = json.dumps({"signature_name": "serving_default", "instances": X_test[0:3].tolist()})
We now want to take those images and get prediction on them - like "Was the burglar wearing trousers?":
## send request
headers = {"content-type": "application/json"}
json_response = requests.post('http://localhost:8501/v1/models/mnist_fashion:predict', data=data, headers=headers)
predictions = json.loads(json_response.text)['predictions']
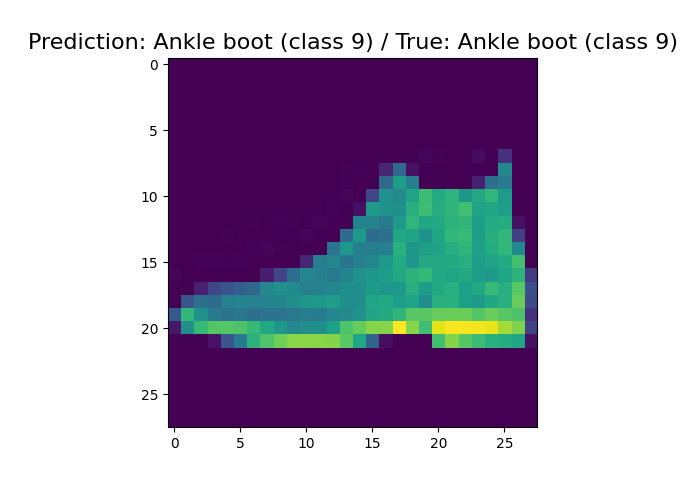
This is using the Python requests library to send the images to Tensorflow Serving. Once we receive the response for our request we can display the results. For a single result we can use:
## display single result
show(0, 'Prediction: {} (class {}) / True: {} (class {})'.format(
  class_names[np.argmax(predictions[0])], y_test[0], class_names[np.argmax(predictions[0])], y_test[0]))
Here we are only taking the first prediction (index 0) (for the first of the 3 images we send) and since we use a softmax output (the prediction is not binary but a list of probabilities) we can use argmax to select the class with the highest probability:
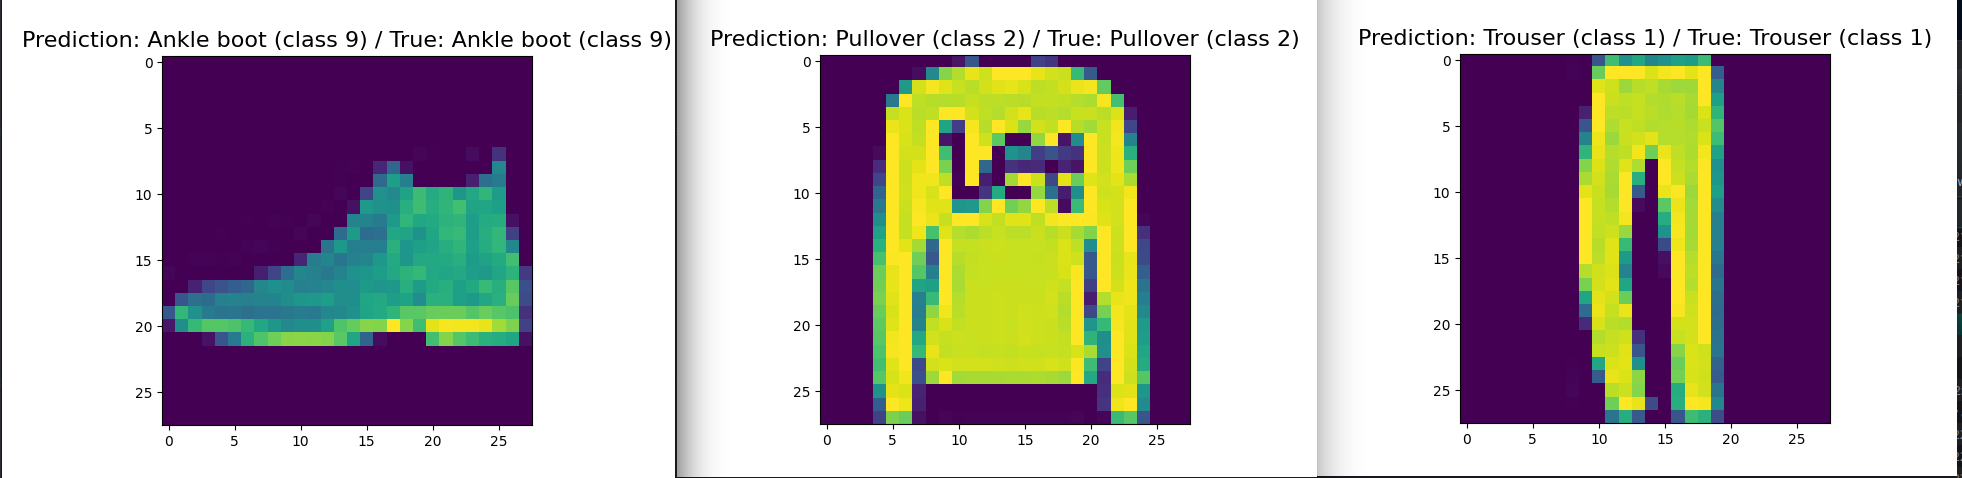
To return all 3 results for the 3 random images we send we can use a simple loop:
for i in range(0,3):
  show(i, 'Prediction: {} (class {}) / True: {} (class {})'.format(
    class_names[np.argmax(predictions[i])], y_test[i], class_names[np.argmax(predictions[i])], y_test[i]))