Apache Airflow Dynamic DAGs

Docker Compose
Preparation
To deploy Airflow with Docker Compose, you should fetch docker-compose.yaml:
curl -LfO 'https://airflow.apache.org/docs/apache-airflow/2.5.1/docker-compose.yaml'
This file contains several service definitions:
airflow-scheduler: The scheduler monitors all tasks and DAGs, then triggers the task instances once their dependencies are complete.airflow-webserver: The webserver is available athttp://localhost:8080.airflow-worker: The worker that executes the tasks given by the scheduler.airflow-init: The initialization service.postgres: The database.redis: The redis - broker that forwards messages from scheduler to worker.
Some directories in the container are mounted, which means that their contents are synchronized between your computer and the container:
dags: you can put your DAG files here.logs: contains logs from task execution and scheduler.plugins: you can put your custom plugins here.
mkdir -p ./dags ./logs ./plugins
echo -e "AIRFLOW_UID=$(id -u)" > .env
Initialization
We first need to bring up the Postgres container, run database migrations and create the first user account. The following command also downloads all the other needed container images for us to be ready to go:
docker-compose up airflow-init
After initialization is complete, you should see a message like this:
airflow-init_1       | INFO - Added user airflow
airflow-init_1       | User "airflow" created with role "Admin"
airflow-init_1       | 2.5.1
docker-compose_airflow-init_1 exited with code 0
The account created has the login airflow and the password airflow.
Running Airflow
Now we can start all services with:
docker-compose up

|   ____________       _____________
|  ____    |__( )_________  __/__  /________      __
| ____  /| |_  /__  ___/_  /_ __  /_  __ \_ | /| / /
| ___  ___ |  / _  /   _  __/ _  / / /_/ /_ |/ |/ /
|  _/_/  |_/_/  /_/    /_/    /_/  \____/____/|__/
docker ps

IMAGE                  PORTS                    NAMES
apache/airflow:2.5.1   8080/tcp                 docker-compose_airflow-triggerer_1
apache/airflow:2.5.1   0.0.0.0:8080->8080/tcp   docker-compose_airflow-webserver_1
apache/airflow:2.5.1   8080/tcp                 docker-compose_airflow-worker_1
apache/airflow:2.5.1   8080/tcp                 docker-compose_airflow-scheduler_1
postgres:13            5432/tcp                 docker-compose_postgres_1
redis:latest           6379/tcp                 docker-compose_redis_1
The webserver is available at: http://localhost:8080. The default account has the login airflow and the password airflow.
To bring everything down again afterwards run:
docker-compose down --volumes --remove-orphans
To get rid of all downloaded images:
docker compose down --volumes --rmi all
DAG Templating
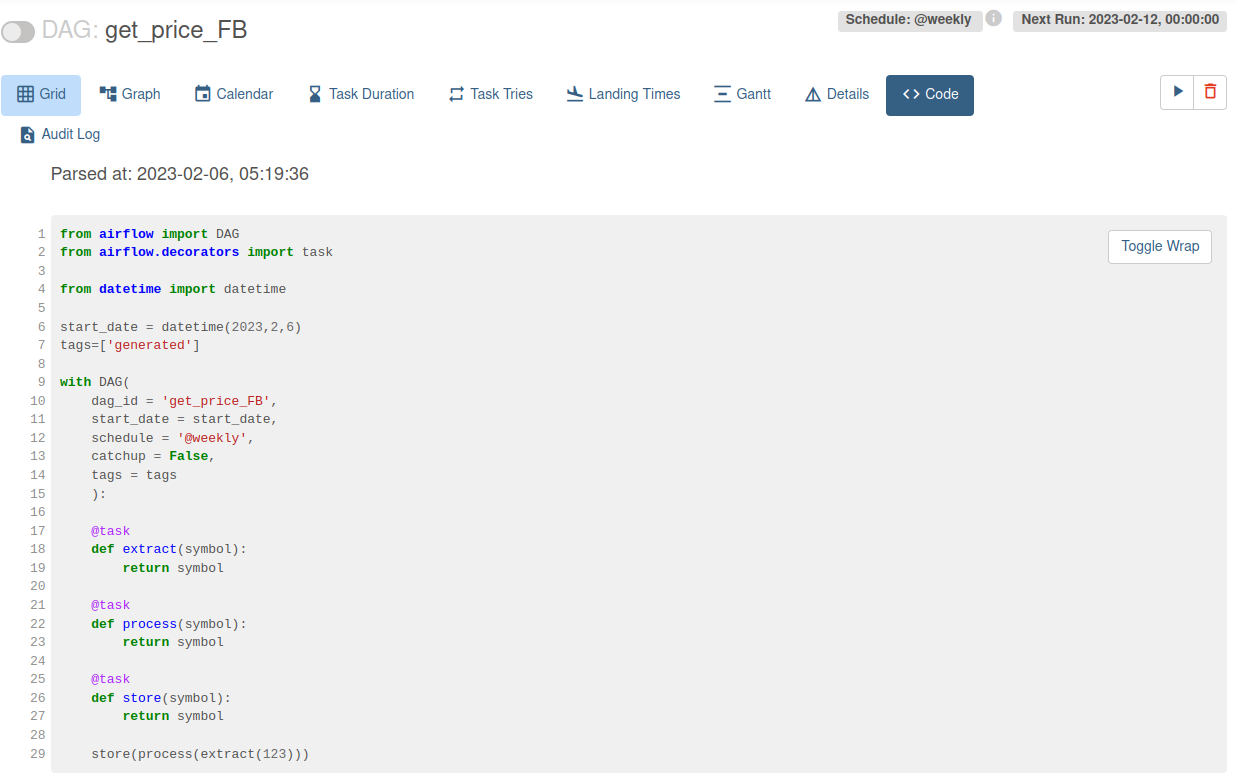
Generating DAGs On-Demand using Jinja templating and YAML (pip install jinja2 pyyaml). We can start by writing a DAG template that can be used to generate DAGs for us that only differ in small configuration changes:
dags/dynamic_dags/template_dag.jinja2
from airflow import DAG
from airflow.decorators import task

from datetime import datetime

start_date = datetime(2023,2,6)
tags=['generated']

with DAG(
    dag_id = 'get_price_{{ dag_id }}',
    start_date = start_date,
    shedule_interval = '{{ shedule_interval }}',
    catchup = {{ catchup or False }},
    tags = tags
    ):

    @task
    def extract(symbol):
        return symbol

    @task
    def process(symbol):
        return symbol

    @task
    def store(symbol):
        return symbol

    store(process(extract({{ input }})))
And example configuration YAML file for this template looks like:
dags/dynamic_dags/config_fb.yml
dag_id: 'FB'
schedule_interval: '@weekly'
catchup: False
input: 123
Create all your configuration files and write a generator script that will build your DAGs for you:
dags/dynamic_dags/generator.py
from jinja2 import Environment, FileSystemLoader
import yaml
import os

file_dir = os.path.dirname(os.path.abspath(__file__))
env = Environment(loader=FileSystemLoader(file_dir))
template = env.get_template('template_dag.jinja2')

for filename in os.listdir(file_dir):
    # loop over configuration yaml
    if filename.endswith('.yml'):
        # read configuration
        with open(f'{file_dir}/{filename}', 'r') as configfile:
            config = yaml.safe_load(configfile)
            # generate dags based on config and template
            with open(f'dags/get_price_{config["dag_id"]}.py', 'w') as file:
                file.write(template.render(config))
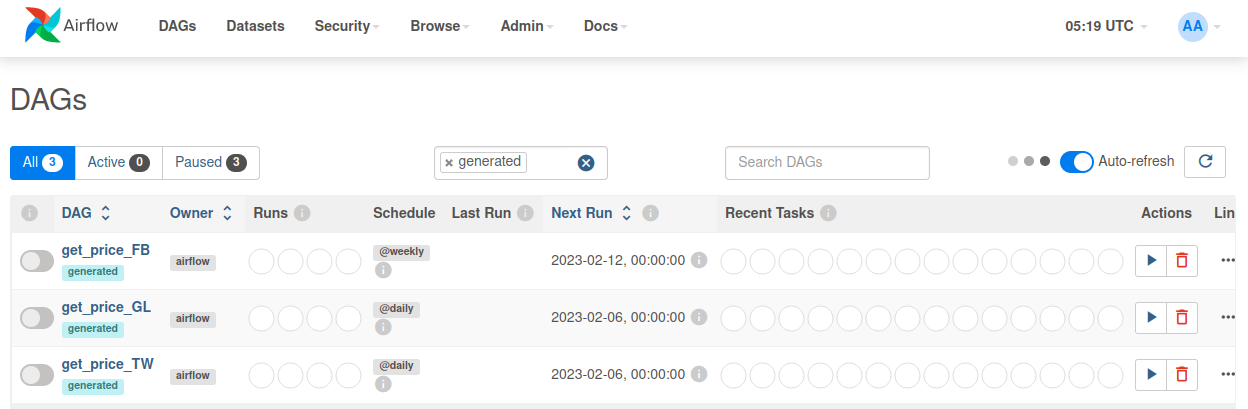
You can now run the generator to output DAGs for every YAML configuration file you created:
python dags/dynamic_dags/generator.py
And the following DAGs will be created for you: