Node / Express with Typescript - (Re)Introduction 2023

- Getting Started
- Webserver
- Database
- Authentication
- Products
- Orders
- Route Permissions
Getting Started
Node.js
Install the latest version of Node.js and create a new Node project using npm:
mkdir hello-next && cd hello-next
npm init -y
Test your Node.js installation by creating a hello world js file:
nano ./index.js
with the following content:
console.log('Hello from Node.js')
Add a start script to ./package.json
 "scripts": {
    "start": "node index.js"
  },
And execute it using npm:
 npm start

> hello-next@1.0.0 start
> node index.js

Hello from Node.js
Typescript
sudo npm install -g typescript
npm install -D typescript ts-node nodemon
tsc --init

Created a new tsconfig.json with:

TS
  target: es2016
  module: commonjs
  strict: true
  esModuleInterop: true
  skipLibCheck: true
  forceConsistentCasingInFileNames: true
Move the index file into a src sub-directory and rename the file to index.ts and change the npm script to "start": "ts-node src/index.ts". Verify that everything still works:
npm start

> hello-next@1.0.0 start
> ts-node index.ts

Hello from Node.js
Nodemon
For development we can use "dev": "nodemon src/index.ts" to get live reloading with the following configuration:
nano nodemon.json
{
    "ignore": [
        ".git",
        "node_modules/",
        "dist/",
        "coverage/"
    ],
    "watch": [
        "src/*"
    ],
    "ext": "js, json, ts"
}
npm run dev

> hello-next@1.0.0 dev
> nodemon src/index.ts

[nodemon] 2.0.22
[nodemon] to restart at any time, enter `rs`
[nodemon] watching path(s): src/**/*
[nodemon] watching extensions: js,json,ts
[nodemon] starting `ts-node src/index.ts`
Hello from Node.js
[nodemon] clean exit - waiting for changes before restart
Webserver
Express.js
npm install express cors
npm install -D @types/express @types/cors
Clean out the index file and replace it with the Express boilerplate:
import express, {Request, Response} from 'express'
import cors from 'cors'

const expressPort = 8888;
const app = express();

// use json for API routes
app.use(express.json());
// cors for api address/port
app.use(cors({
    credentials: true,
    origin: ["http://localhost:3000"]
}));

app.get('/', (req: Request, res: Response) => {
    res.send('INFO :: Root route called');
});

app.listen(expressPort, () => {
    console.log('INFO :: Webserver started on port ' + expressPort)
});
Test that the root route is working:
curl localhost:8888
INFO :: Root route called
Express Router
Above we created a route inside the index file. But Express allows us to export routes as well as controller functions - e.g. authentication - from separate files to keep things tidy:
nano src/routes.ts
import { Router } from 'express';
import { Register } from './controller/auth.controller'

export const routes = (router: Router) => {
    router.post('/api/register', Register)
}
nano src/controller/auth.controller.ts
import { Request, Response } from 'express';

export const Register = (req: Request, res: Response) => {
    res.send(req.body);
};
The routes can now be imported into your index file:
import { routes } from './routes';

// import routes from router
routes(app)
We can now test the registration URL:
curl --header "Content-Type: application/json" \
  --request POST \
  --data '{"username":"itsme","password":"secret"}' \
  http://localhost:8888/api/register
This returns the JSON body {"username":"itsme","password":"secret"} as configured.
Request Validation
Use the express request-validation inside your authentication controller to verify that an incoming request is valid:
npm install express-validation
nano ./src/validation/register.validation.ts
import { Joi } from 'express-validation';

export const registerValidation = Joi.object({
    firstName: Joi.string().required(),
    lastName: Joi.string().required(),
    email: Joi.string().email().required(),
    password: Joi.string().required(),
    passwordConfirm: Joi.string().required(),
})
The validation can now be imported into the auth controller to return an error message if the validation fails:
src/controller/auth.controller.ts
import { Request, Response } from 'express';
import { registerValidation } from '../validation/register.validation';

export const Register = (req: Request, res: Response) => {
    const body = req.body;

    const { error } = registerValidation.validate(body);

    if (error) {
        return res.status(400).send(error.details);
    }

    if (body.password !== body.passwordConfirm){
        return res.status(400).send({
            message: 'ERROR :: Passwords do not match!'
        });
    }
Test the validation with missing data and a valid request:
curl --header "Content-Type: application/json" \
  --request POST \
  --data '{"firstName":"its","lastName":"me","email":"me@email.com","password":"secret"}' \
  http://localhost:8888/api/register
[{"message":"\"passwordConfirm\" is required","path":["passwordConfirm"],"type":"any.required","context":{"label":"passwordConfirm","key":"passwordConfirm"}}]
curl --header "Content-Type: application/json" \
  --request POST \
  --data '{"firstName":"its","lastName":"me","email":"me@email.com","password":"secret","passwordConfirm":"secret"}' \
  http://localhost:8888/api/register
{"firstName":"its","lastName":"me","email":"me@email.com","password":"secret","passwordConfirm":"secret"}
Database
SQL Database
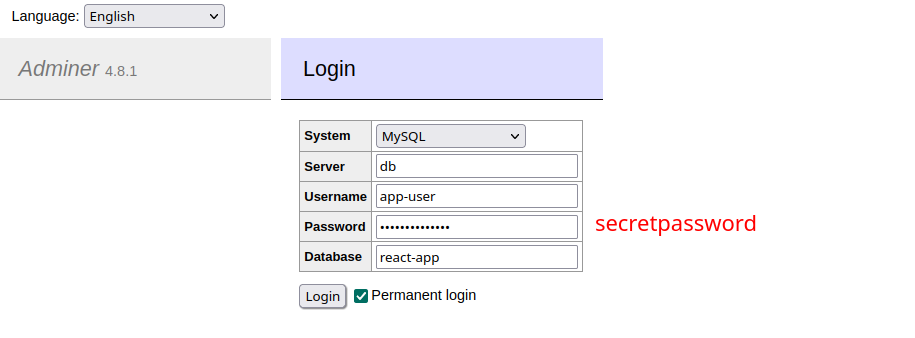
Bring up an SQL database to handle your app data, e.g. with Docker-Compose:
./src/docker/docker-compose.yml
version: '3'

services:

  db:
    image: mariadb
    restart: always
    ports:
      - 3306:3306
    environment:
      MARIADB_ROOT_PASSWORD: secretpassword
      MARIADB_DATABASE: react-app
      MARIADB_USER: app-user
      MARIADB_PASSWORD: secretpassword

  adminer:
    image: adminer
    restart: always
    ports:
      - 8080:8080
You can login on port 8080 to verify that MariaDB is up and the app database was created:
MySQL Connector
Now we need to connect the app to freshly created database:
npm install typeorm reflect-metadata @types/node mysql2 bcryptjs @types/bcryptjs
To keep things simple we can move the entire DB logic into it's own file:
./src/db-connector.ts
import { DataSource } from "typeorm";
const dataSourceOptions = require('../dataSourceOptions.json')

export const dataSource = new DataSource(dataSourceOptions);

export const Manager = dataSource.manager
// export const UserRepository = dataSource.getRepository(User)

dataSource
    .initialize()
    .then(() => {
        console.log('INFO :: Data Source has been initialized');
    })
    .catch((err) => {
        console.error('ERROR :: Data Source initialization error', err);
    })

export default dataSource;
The database configuration is exported into a separate JSON file for convenience:
./dataSourceOptions.json
{
    "type": "mysql",
    "host": "localhost",
    "port": 3306,
    "username": "app-user",
    "password": "secretpassword",
    "database": "react-app",
    "entities": [
        "src/entities/*.ts"
    ],
    "logging": false,
    "synchronize": true
}
NOTE that the configuration here has to match up with the configuration set inside the Docker-Compose file you used to start your instance of MariaDB!
The connector can be imported into the index file before calling the Express app - to make sure that the DB connection is establish before the app starts:
./src/index.ts
// Import DB config
import dataSource from "./db-connector";
// Create connection with DB
dataSource
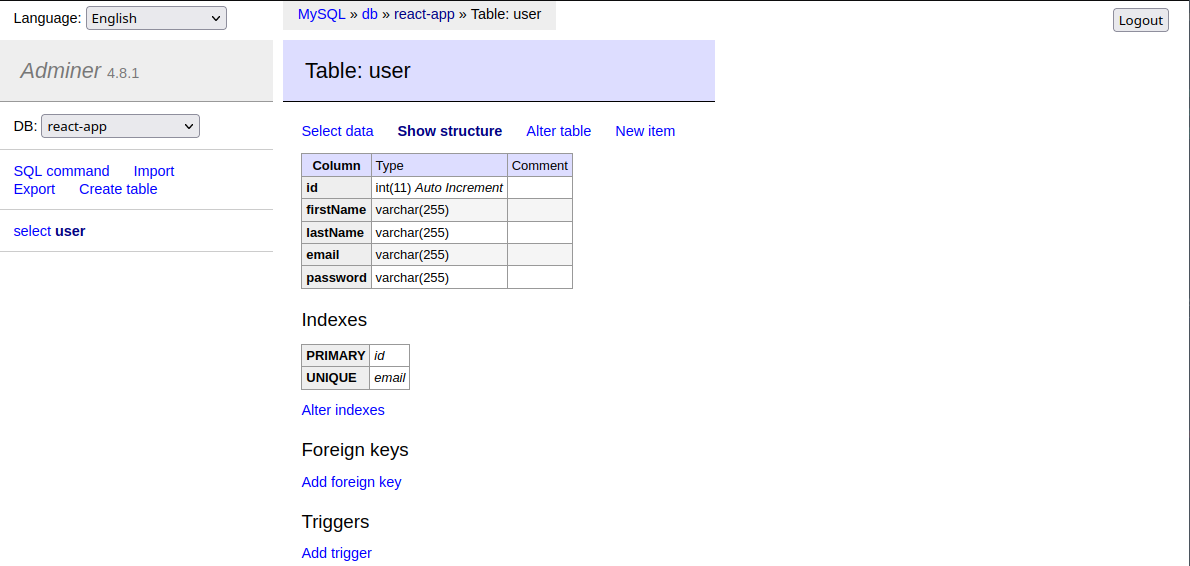
The connector now only connects us to our database. To have actually do something we have to add "entities" in the configured entity folder src/entities/*.ts:
./src/entities/user.entity.ts
import { Column, PrimaryGeneratedColumn, Entity } from "typeorm";

@Entity()
export class User {
    @PrimaryGeneratedColumn()
    id: number;

    @Column()
    firstName: string;

    @Column()
    lastName: string;

    @Column({
        unique: true
    })
    email: string;

    @Column()
    password: string;

}
This will make sure that the user table is generated as soon as the app is restarted:
Authentication
Registering Users
To be able to populate the User table with user logins we now have to add a function to the auth controller:
src/controller/auth.controller.ts
// REGISTER USER
export const Register = async (req: Request, res: Response) => {
    const body = req.body;

    // check if all infos were send
    const { error } = registerValidation.validate(body);
    // break if something is missing
    if (error) {
        return res.status(400).send(error.details);
    }
    // verify that password is confirmed
    if (body.password !== body.passwordConfirm){
        return res.status(400).send({
            message: 'ERROR :: Passwords do not match!'
        });
    }
    // save password to database
    const { password, ...user } = await repository.save({
        firstName: body.firstName,
        lastName: body.lastName,
        email: body.email,
        password: await bcryptjs.hash(body.password, 10)
    })

    res.send(user);
};
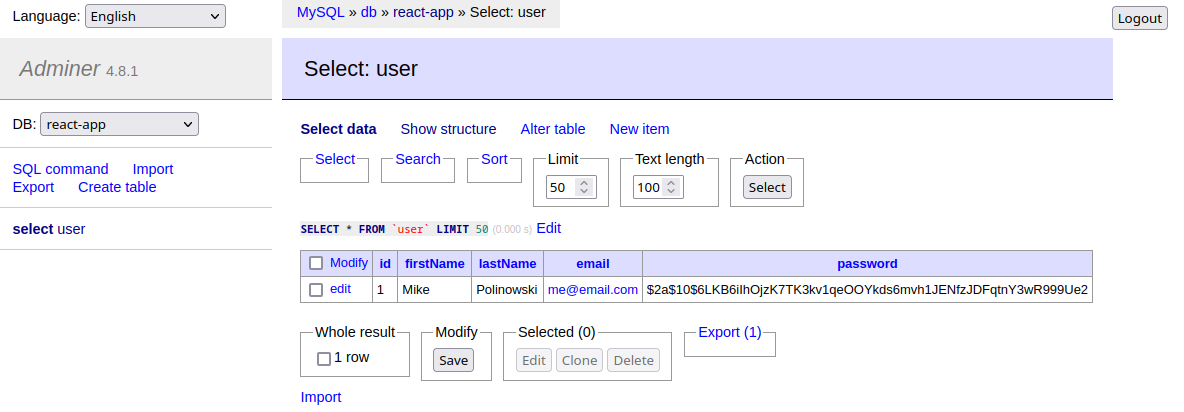
Here I am using bcryptjs to make sure that the password is not stored in plain text. The user registration can be tested using curl:
curl --header "Content-Type: application/json" \
  --request POST \
  --data '{"firstName":"Mike","lastName":"Polinowski","email":"me@email.com","password":"secret","passwordConfirm":"secret"}' \
  http://localhost:8888/api/register
Note that the password in the returned body is hashed and also received an ID - the first user registered in the User table:
{"firstName":"Mike","lastName":"Polinowski","email":"me@email.com","password":"$2a$10$6LKB6iIhOjzK7TK3kv1qeOOYkds6mvh1JENfzJDFqtnY3wR999Ue2","id":1}
Users Login
Create a login route that points to a function called Login in the auth controller:
./src/routes.ts
import { Router } from 'express';
import { Register, Login } from './controller/auth.controller'

export const routes = (router: Router) => {
    router.post('/api/register', Register)
    router.post('/api/login', Login)
}
And create the login function:
./src/controller/auth.controller.ts
// LOGIN USER
export const Login = async (req: Request, res: Response) => {
    // check if user exists in db
    const user = await repository.findOneBy(
            {
                email: req.body.email
            }
        )

    // if does not exists break
    if(!user){
        return res.status(404).send({
            message: 'ERROR :: User does not exists!'
        })
    }

    // if exists but password is wrong break
    if(!await bcryptjs.compare(req.body.password, user.password)) {
        return res.status(404).send({
            message: 'ERROR :: Invalid credentials!'
        })
    }

    // don't return password after successful login
    const { password, ...data } = user;
    res.send(user);
}
Again, we can test the user login with curl:
curl --header "Content-Type: application/json" \
  --request POST \
  --data '{"email":"me@email.com","password":"secret"}' \
  http://localhost:8888/api/login

{"id":1,"firstName":"Mike","lastName":"Polinowski","email":"me@email.com"}
JSON Web Tokens
Return a JWT to keep users authenticated after a successful login:
npm install jsonwebtoken @types/jsonwebtoken cookie-parser @types/cookie-parser
Instead of returning the user we now need to return a JWT in Login function:
./src/controller/auth.controller.ts
// return JWT to authenticated user
const payload = { id: user.id }
const token = sign(payload, 'secretkey')

// don't return password after successful login
// const { password, ...data } = user;
res.send(token);
Test that the login now returns the token:
curl --header "Content-Type: application/json" \
  --request POST \
  --data '{"email":"me@email.com","password":"secret"}' \
  http://localhost:8888/api/login

eyJhbGciOiJIUzI1NiIsInR5cCI6IkpXVCJ9.eyJpZCI6MSwiaWF0IjoxNjg1ODkwNjIxfQ.W8D81og0GuWZ8Q8Nvp1XDpqK0XwDFXy0qYgjXxP8uno
Write token to HTTP cookie instead of returning it directly:
// return JWT to authenticated user
const token = sign(
    {
        id: user.id
    }, 'secretkey'
)

res.cookie('jwt', token, {
    // keep cookie in node.js backend
    httpOnly: true,
    maxAge: 24*60*60*1000 //1day
})

res.send({
    message: 'INFO :: Successfully logged in.'
})
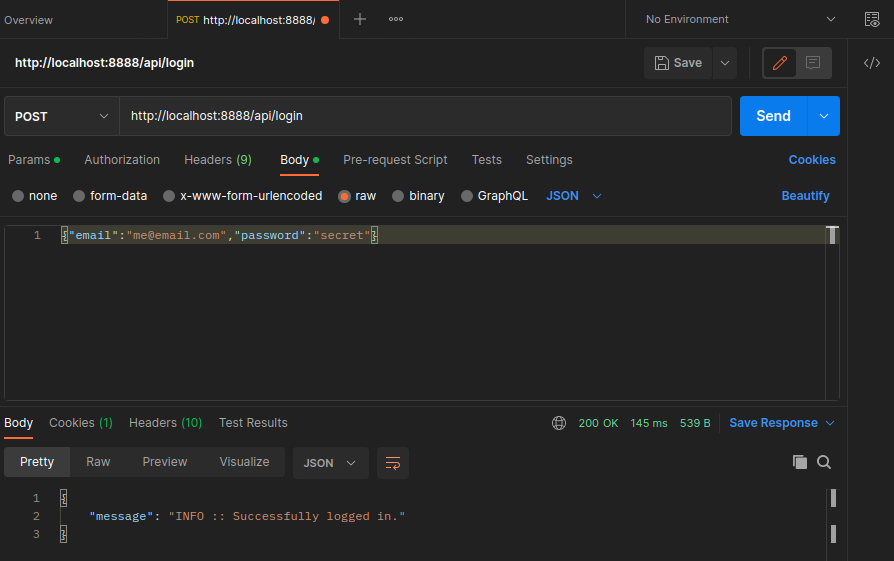
Try the login again:
curl --header "Content-Type: application/json" \
  --request POST \
  --data '{"email":"me@email.com","password":"secret"}' \
  http://localhost:8888/api/login

{"message":"INFO :: Successfully logged in."}
Authenticate Users
Start by creating a route for returning the authenticated user:
./src/routes.ts
import { Router } from 'express';
import { Register, Login, AuthenticatedUser } from './controller/auth.controller'

export const routes = (router: Router) => {
    // register new user
    router.post('/api/register', Register)
    // login known user
    router.post('/api/login', Login)
    // get authenticated user from jwt
    router.get('/api/user', AuthenticatedUser)
}
Then create the referenced function for this route:
./src/controller/auth.controller
export const AuthenticatedUser = async (req: Request, res: Response) => {
    // get cookie from authenticated user
    const jwt = req.cookies['jwt'];
    // get user id from jwt
    const payload: any = verify(jwt, secret)

    if(!payload) {
        return res.status(401).send({
            message: 'ERROR :: User unauthenticated!'
        })
    }
    // return user info  for user id
    const {password, ...user} = await repository.findOneBy(payload.id)

    res.send(user)
}
We can test the function in Postman by first logging in:
And then calling the /api/user route with the received web token:
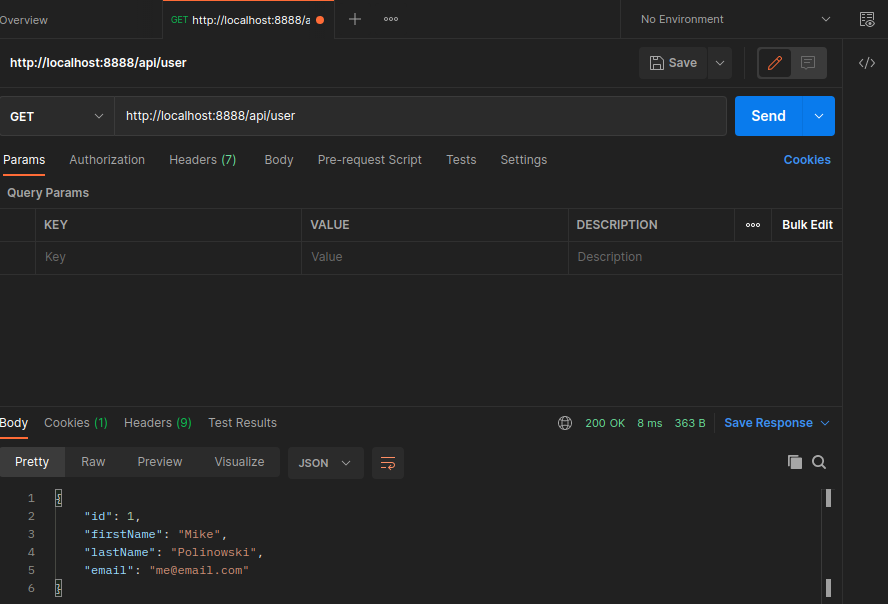
Our web token contained our user id that the backend could use to identify the authenticated user and return the user information.
Deauthenticate Users
Once logged in we need to provide a function that allows us to remove the web token and log out the user. Start by providing a route:
import { Router } from 'express';
import { Register, Login, AuthenticatedUser, Logout } from './controller/auth.controller'

export const routes = (router: Router) => {
    // register new user
    router.post('/api/register', Register)
    // login known user
    router.post('/api/login', Login)
    // get authenticated user from jwt
    router.get('/api/user', AuthenticatedUser)
    // force expire jwt to log out
    router.post('/api/logout', Logout)
}
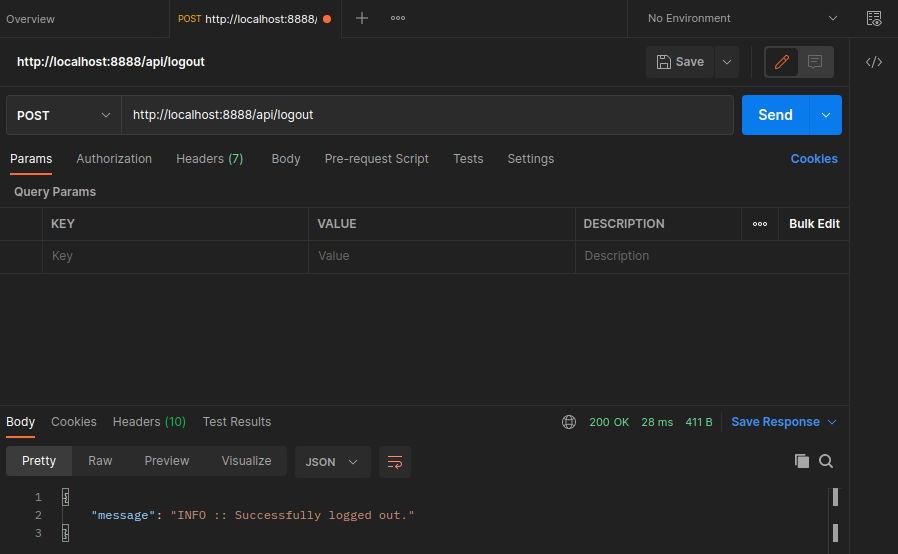
To logout we need to expire the active JWT:
./src/controller/auth.controller.ts
export const Logout = async (req: Request, res: Response) => {
    res.cookie('jwt', '',  {maxAge: 0})

    res.send({
        message: 'INFO :: Successfully logged out.'
    })
}
The function can be verified with Postman:
Dotenv
Using dot environment variables to pass in global variables like the JWT secretkey:
npm install dotenv @types/dotenv
Collect all global variables in a dotenv file:
./.env
# Express webfrontend port
WEB_PORT = 8888
# JWT secret key
SECRET_KEY = 'secretkey'
# API url for CORS
API_URL = 'http://localhost:3000'
# Datasource options for TypeORM
DS_HOST = 'localhost'
DS_USER = 'app-user'
DS_PASS = 'secretpassword'
DS_DB = 'react-app'
DS_ENTITIES = 'src/entities/*.ts'
And require the configuration file ON TOP of your index file:
require('dotenv').config();
Now you are able to use these variables in your entire app:
./src/index.ts
const apiUrl = process.env.API_URL;
const expressPort = process.env.WEB_PORT || 8080;
./src/db-connector.ts
export const dataSource = new DataSource({
    type: 'mariadb',
    host: process.env.DS_HOST,
    port: 3306,
    username: process.env.DS_USER,
    password: process.env.DS_PASS,
    database: process.env.DS_DB,
    entities: [process.env.DS_ENTITIES],
    logging: false,
    synchronize: true
  });
Verify Auth Status Middleware
Move the auth status check into middleware to simplify the AuthenticatedUser function that should only return the user details of authenticated users:
src/middleware/auth.middleware.ts
import { Request, Response } from 'express';
import { verify } from 'jsonwebtoken';

import Manager from '../db-connector';
import { User } from '../entities/user.entity';
const secret = process.env.SECRET_KEY

const repository = Manager.getRepository(User);

export const CheckAuthState = async (req: Request, res: Response, next: Function) => {

        try {
            // get cookie from authenticated user
            const jwt = req.cookies['jwt'];
            // get user id from jwt
            const payload: any = verify(jwt, secret)

            if(!payload) {
                return res.status(401).send({
                    message: 'ERROR :: User unauthenticated!'
                })
            }
            // return user info  for user id
            req['user'] = await repository.findOneBy(payload.id)

            next();

        } catch (e) {
            return res.status(401).send({
                message: 'ERROR :: User unauthenticated!'
        })
    }
}
The entire verification logic now moved into the middleware. By adding it to our user and logout route we can now directly request the user details inside the auth controller:
src/routes.ts
import { Router } from 'express';
import { Register, Login, AuthenticatedUser, Logout } from './controller/auth.controller'
import { CheckAuthState } from './middleware/auth.middleware'

export const routes = (router: Router) => {
    // register new user
    router.post('/api/register', Register)
    // login known user
    router.post('/api/login', Login)
    // get authenticated user from jwt
    router.get('/api/user', CheckAuthState, AuthenticatedUser)
    // force expire jwt to log out
    router.post('/api/logout', CheckAuthState, Logout)
}
src/controller/auth.controller.ts
// RETURN USER DATA BY JWT ID
export const AuthenticatedUser = async (req: Request, res: Response) => {
    const {password, ...user} = req['user']
    res.send(user);
}
Update User Info
Add two more routes to update the user name and password:
src/routes.ts
import { Router } from 'express';
import { Register, Login, AuthenticatedUser, Logout, UpdateUserInfo, UpdateUserPass } from './controller/auth.controller'
import { CheckAuthState } from './middleware/auth.middleware'

export const routes = (router: Router) => {
    // register new user
    router.post('/api/register', Register)
    // login known user
    router.post('/api/login', Login)
    // get authenticated user from jwt
    router.get('/api/user', CheckAuthState, AuthenticatedUser)
    // force expire jwt to log out
    router.post('/api/logout', CheckAuthState, Logout)
    // update user info
    router.put('/api/users/info', CheckAuthState, UpdateUserInfo)
    // update user password
    router.put('/api/users/pass', CheckAuthState, UpdateUserPass)
}
And add the corresponding controller functions:
src/controller/auth.controller.ts
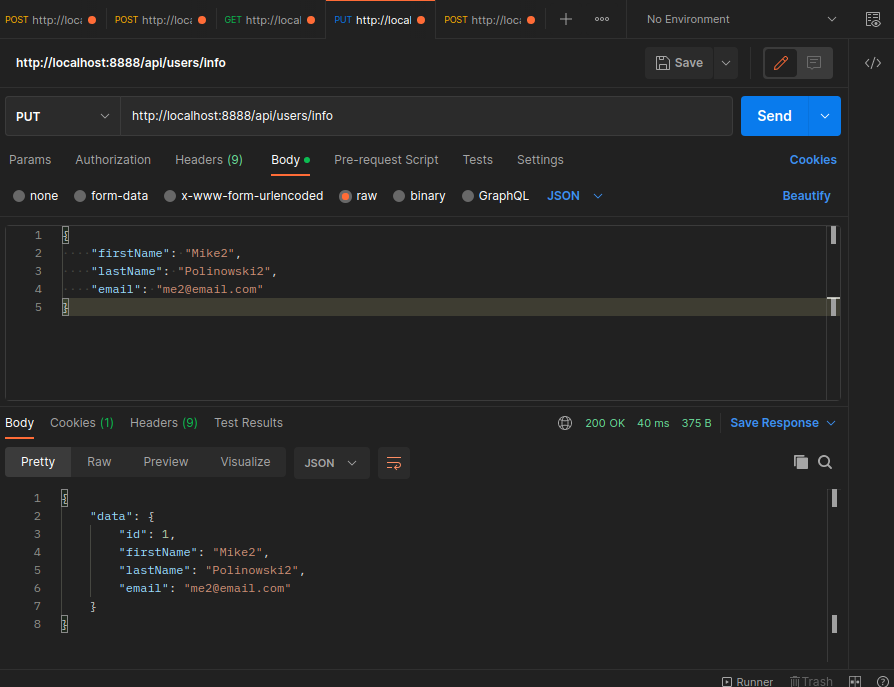
// UPDATE USER INFO
export const UpdateUserInfo = async (req: Request, res: Response) => {

    const user = req['user'];

    await repository.update(user.id, req.body)

    const { password, ...data } = await repository.findOneBy(user.id)

    res.send({data})
}

// UPDATE USER PASSWORD
export const UpdateUserPass = async (req: Request, res: Response) => {

    const user = req['user'];

    // verify that password is confirmed
    if (req.body.password !== req.body.passwordConfirm){
        return res.status(400).send({
            message: 'ERROR :: Passwords do not match!'
        });
    }

    await repository.update(user.id, {
        password: await bcryptjs.hash(req.body.password, 10)
    })

    const { password, ...data } = await repository.findOneBy(user.id)

    res.send({data})
}
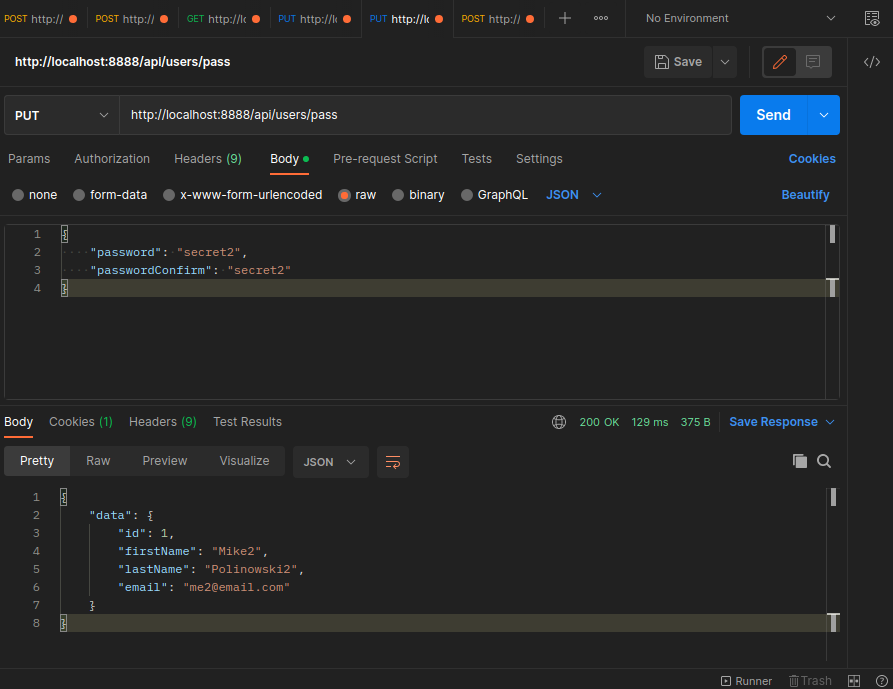
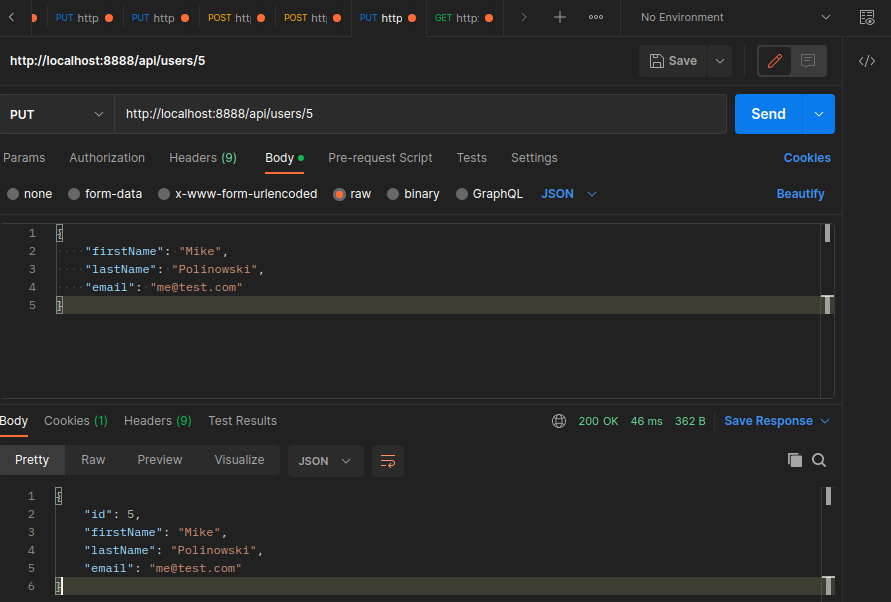
Use the /api/users/info route to update the user name and email:
And /api/users/pass to update the user password:
User Administration
The admin user has to be able to administer other users. Start by creating routes that:
- fetch all registered users
- fetch user by ID
- create new users
- update user
- delete user
src/routes.ts
export const routes = (router: Router) => {

    // register new user
    router.post('/api/register', Register)
    // login known user
    router.post('/api/login', Login)
    // get authenticated user from jwt
    router.get('/api/user', CheckAuthState, AuthenticatedUser)
    // force expire jwt to log out
    router.post('/api/logout', CheckAuthState, Logout)
    // update user info
    router.put('/api/users/info', CheckAuthState, UpdateUserInfo)
    // update user password
    router.put('/api/users/pass', CheckAuthState, UpdateUserPass)

    // user administration - get all users
    router.get('/api/users', CheckAuthState, GetUsers)
    // user administration - get user by ID
    router.get('/api/users/:id', CheckAuthState, GetUser)
    // user administration - create new user
    router.put('/api/users/:id', CheckAuthState, UpdateUser)
    // user administration - create new user
    router.post('/api/users', CheckAuthState, CreateUser)
    // user administration - delete user
    router.delete('/api/users/:id', CheckAuthState, DeleteUser)
}
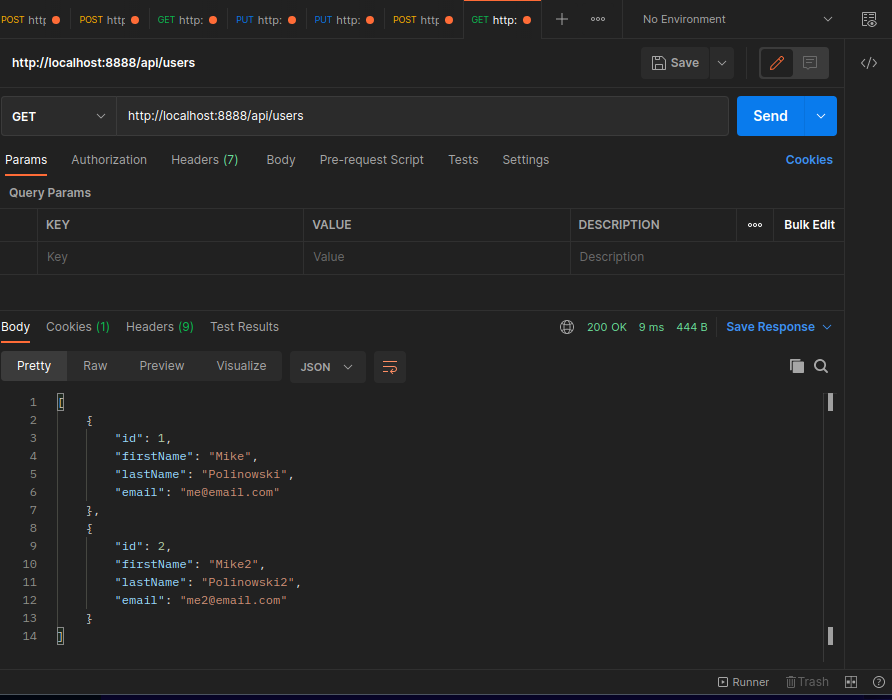
Get all Users
The administration functions are collected in the user controller. The GetUsers function selects the user table and returns everything:
src/controller/controller.controller.ts
import { Request, Response } from "express";


import Manager from "../db-connector";
import { User } from '../entities/user.entity';
const repository = Manager.getRepository(User);


export const GetUsers = async (req: Request, res: Response) => {
    const users = await repository.find()

    res.send(
        users.map(user => {
            //remove password
            const { password, ...data} = user
            return data
        })
    )
}
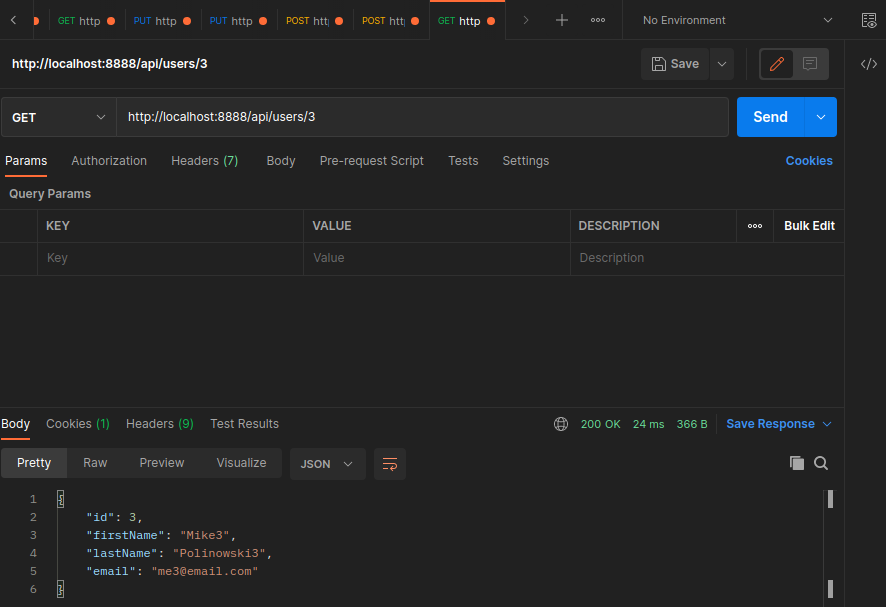
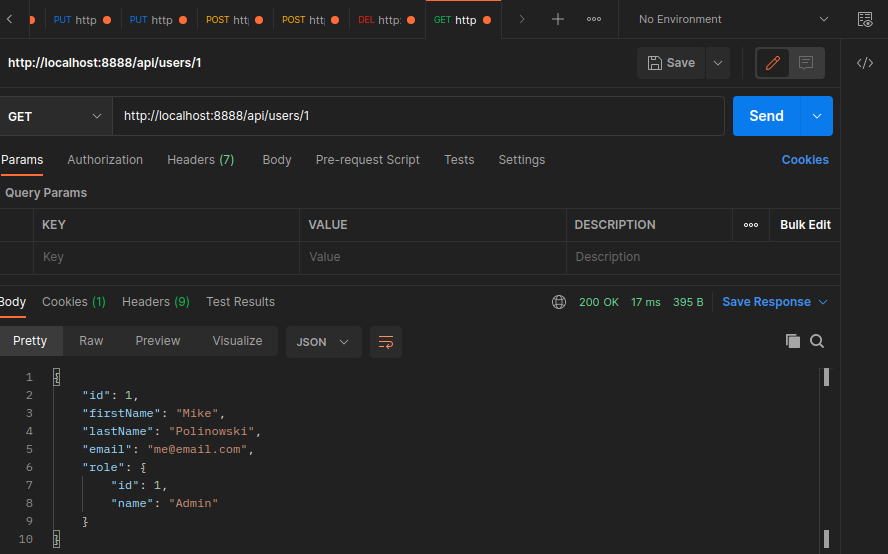
Get User by ID
To fetch the a single user we can add the user ID as request param:
src/controller/controller.controller.ts
export const GetUser = async (req: Request, res: Response) => {
    const {password, ...user} = await repository.findOne({ where: { id: req.params.id } })

    res.send(user)
}
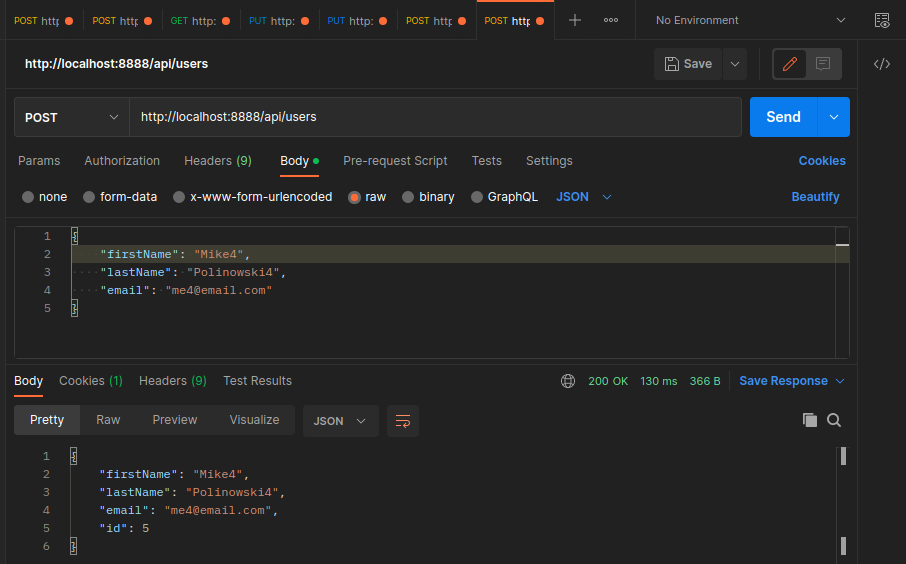
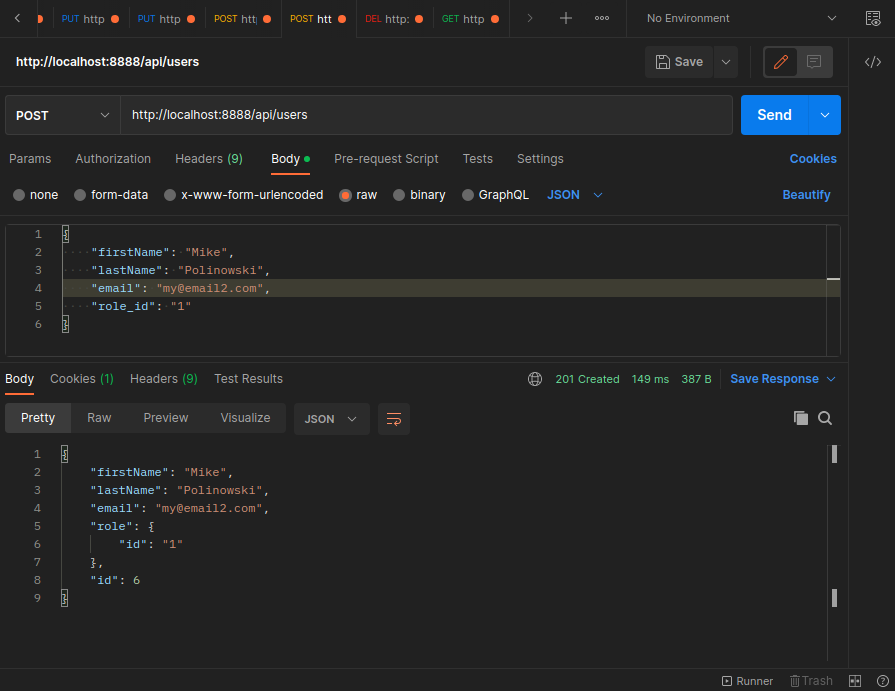
Create User
I already created the POST route to create new users in the previous step. Now the function for it is still missing:
src/controller/controller.controller.ts
export const CreateUser = async (req: Request, res: Response) => {
    const { role_id, ...body } = req.body;
    const hashedPassword = await bcryptjs.hash('pass1234', 10);
    const { password, ...user} = await repository.save({
        ...body,
        password: hashedPassword
    })

    res.status(201).send(user)
}
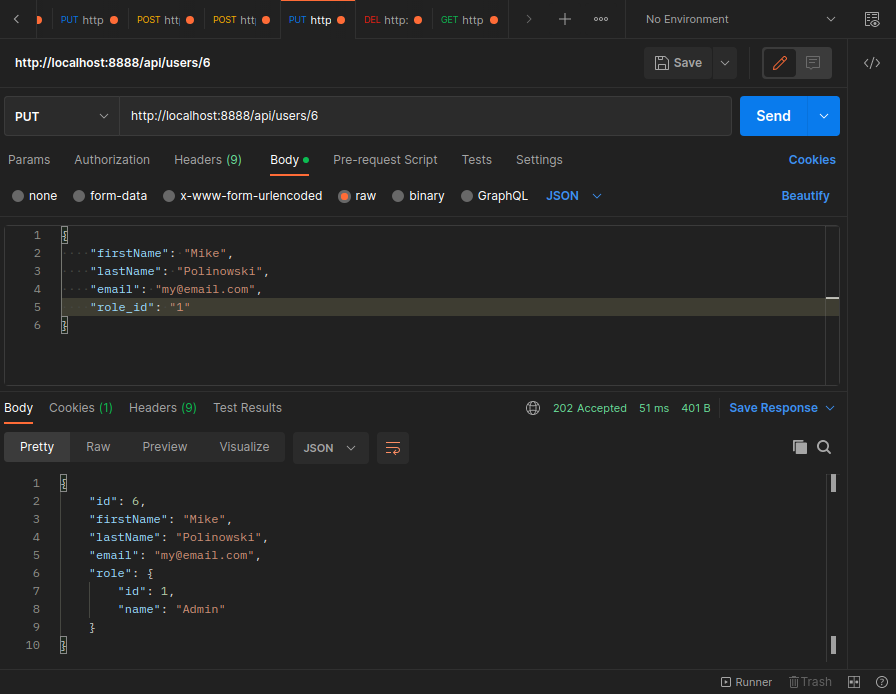
Update User
src/controller/controller.controller.ts
export const UpdateUser = async (req: Request, res: Response) => {
    const { role_id, ...body } = req.body;
    const update = await repository.update(req.params.id, body)

    res.status(202).send(update)
}
Delete User
src/controller/controller.controller.ts
export const DeleteUser = async (req: Request, res: Response) => {
    const deleteUser = await repository.delete(req.params.id)

    res.status(204).send(deleteUser)
}

User Role Model
Create a new database table to define user roles:
src/entities/role.entity.ts
import { BaseEntity, Column, Entity, PrimaryGeneratedColumn } from "typeorm";

@Entity ()
export class Role extends BaseEntity {
    @PrimaryGeneratedColumn()
    id: any;

    @Column()
    name: string;

}
And link this role into the User table:
src/entities/role.entity.ts
@Entity ()
export class User extends BaseEntity {
    @PrimaryGeneratedColumn()
    id: any;

    @Column()
    firstName: string;

    @Column()
    lastName: string;

    @Column({ unique: true })
    email: string;

    @Column()
    password: string;

    @ManyToOne(() => Role)
    @JoinColumn({name: 'role_id'})
    role: Role;

}
For testing we can manually add an Admin role to the table:
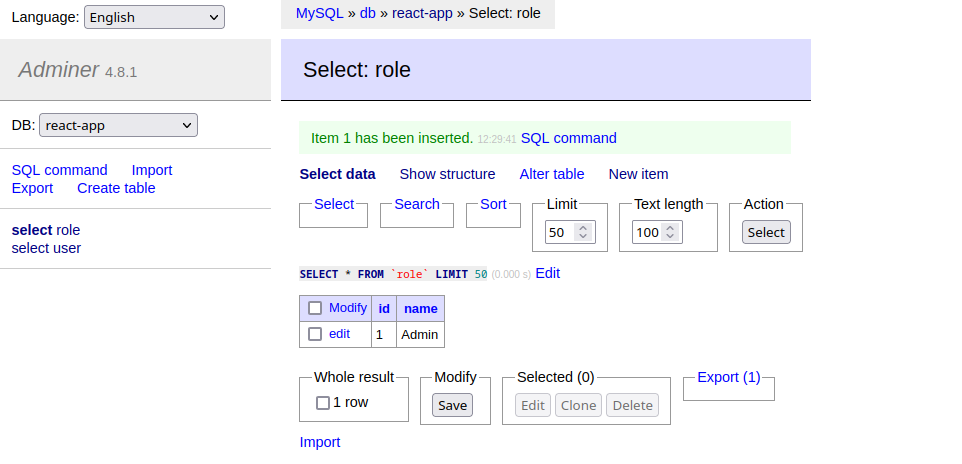
And assign this role to existing users in the User table:
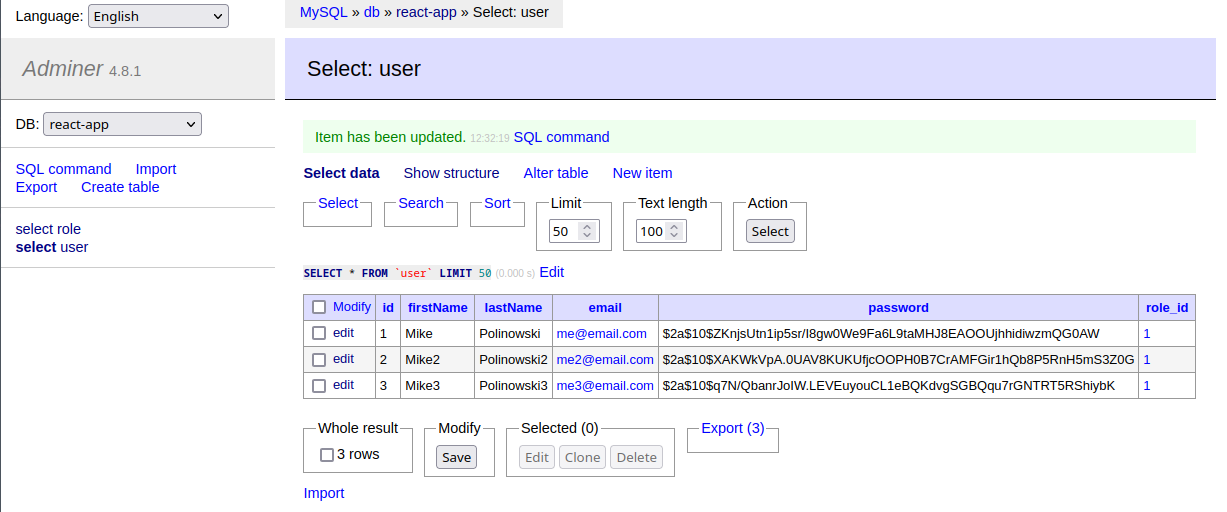
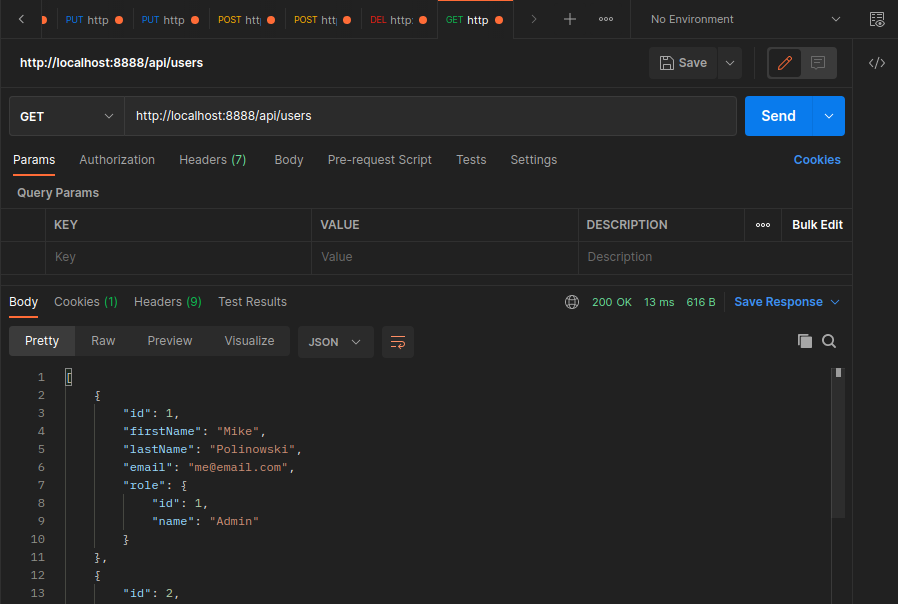
Add role to the output of the GetUsers function:
src/controller/user.controller.ts
export const GetUsers = async (req: Request, res: Response) => {
    const users = await repository.find({
        relations: ['role']
    })

    res.send(
        users.map(user => {
            const { password, ...data} = user
            return data
        })
    )
}
As well as to the CreateUser function:
src/controller/user.controller.ts
export const CreateUser = async (req: Request, res: Response) => {
    const { role_id, ...body } = req.body;
    const hashedPassword = await bcryptjs.hash('pass1234', 10);
    const { password, ...user} = await repository.save({
        ...body,
        password: hashedPassword,
        role: {
            id: role_id
        }
    })

    res.status(201).send(user)
}
And to the GetUser function:
src/controller/user.controller.ts
export const GetUser = async (req: Request, res: Response) => {
    const {password, ...user} = await repository.findOne({
        where: { id: req.params.id }, relations: ['role']
    })

    res.send(user)
}
And to the UpdateUser function:
src/controller/user.controller.ts
export const UpdateUser = async (req: Request, res: Response) => {
    const { role_id, ...body } = req.body;

    await repository.update(req.params.id, {
        ...body,
        role: {
            id: role_id
        }
    });

    const {password, ...user} = await repository.findOne({
            where: { id: req.params.id }, relations: ['role']
        });

    res.status(202).send(user)
}
User Permissions
Create a new database table to define user permissions:
src/entities/permission.entity.ts
import { BaseEntity, Column, Entity, PrimaryGeneratedColumn } from "typeorm";

@Entity ()
export class Permission extends BaseEntity {
    @PrimaryGeneratedColumn()
    id: any;

    @Column()
    name: string;

}
Permissions are not directly linked to a user but to it's role:
src/entities/role.entity.ts
import { BaseEntity, Column, Entity, JoinTable, ManyToMany, PrimaryGeneratedColumn } from "typeorm";
import { Permission } from "./permission.entity";

@Entity ()
export class Role extends BaseEntity {
    @PrimaryGeneratedColumn()
    id: any;

    @Column()
    name: string;

    @ManyToMany(() => Permission)
    @JoinTable({
        name: 'role_permissions',
        joinColumn: {
            name: 'role_id',
            referencedColumnName: 'id'
        },
        inverseJoinColumn: {
            name: 'permission_id',
            referencedColumnName: 'id'
        }
    })
    permissions: Permission[];

}
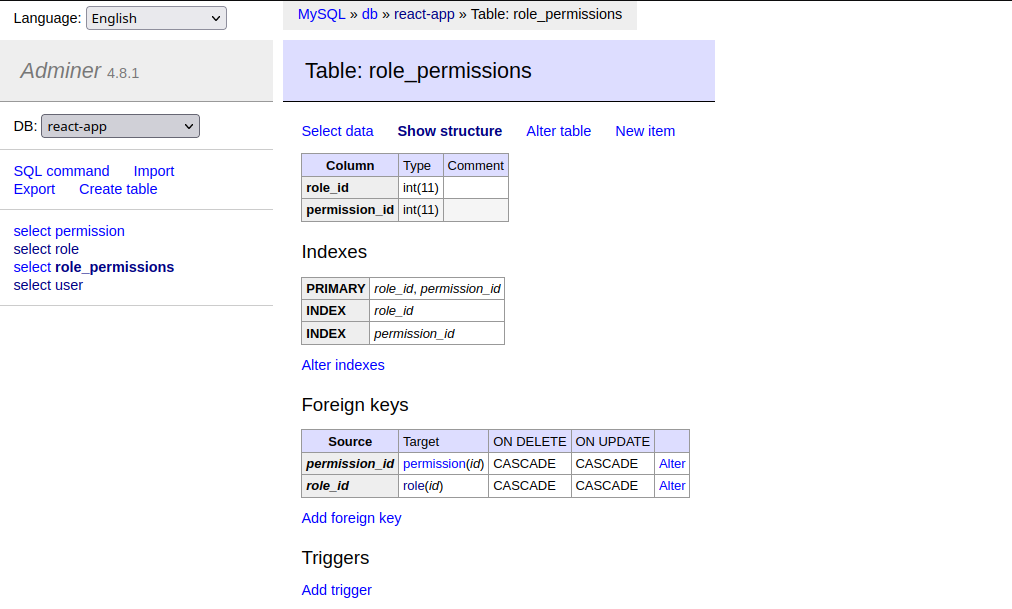
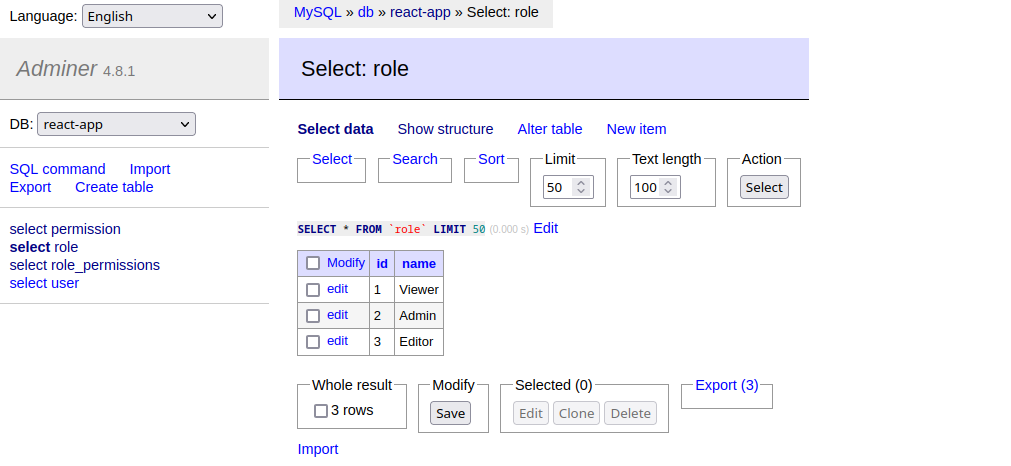
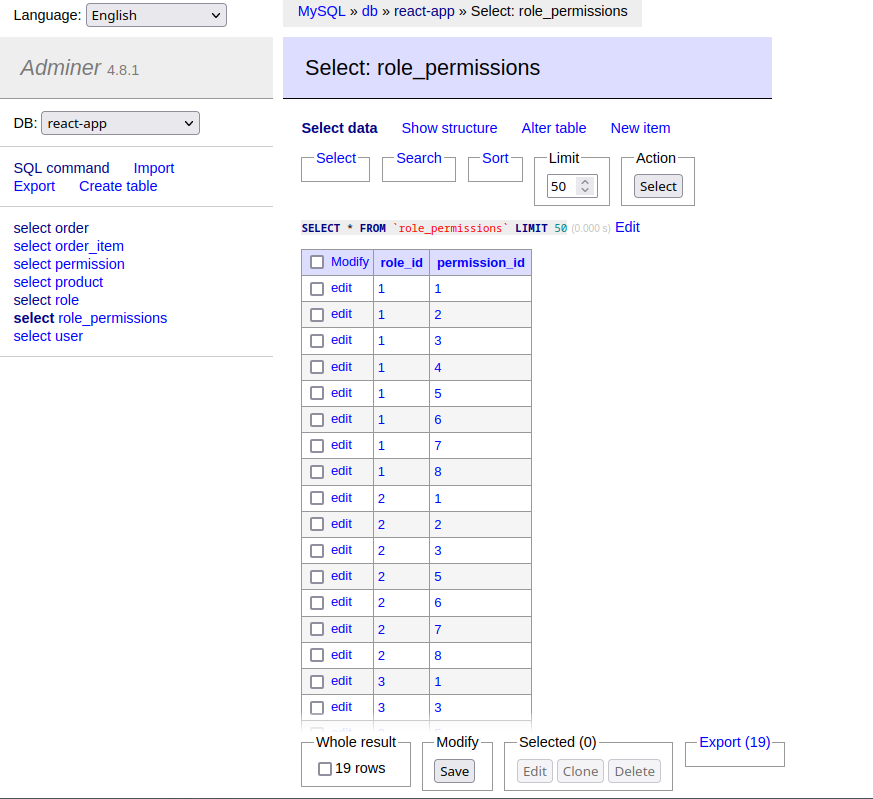
TypeORM will automatically create a new table role_permissions for us:
Pre-Seeding Roles and Permissions
Please check out the Update Role Seed below... the function following here is not working.
We can add the permissions we want to be able to assign to user roles when the DB connection is established:
src/db-connector.ts
dataSource
    .initialize()
    .then( async () => {

        // create role permissions
        const permissionRepository = Manager.getRepository(Permission)

        const perms = [
            'view_users',
            'edit_users',
            'view_roles',
            'edit_roles',
            'view_products',
            'edit_products',
            'view_orders',
            'edit_orders'
        ]

        let permissions = []

        // insert permissions into Permission table
        for (let i = 0; i< perms.length; i++){
            permissions.push(
                // use upsert instead of save
                await permissionRepository.upsert(
                    { name: perms[i] },
                    // if name exists only update else insert
                    ['name']
                )
            )
        }

        console.log('INFO :: Data Source has been initialized');
    })
    .catch((err) => {
        console.error('ERROR :: Data Source initialization error', err);
    })
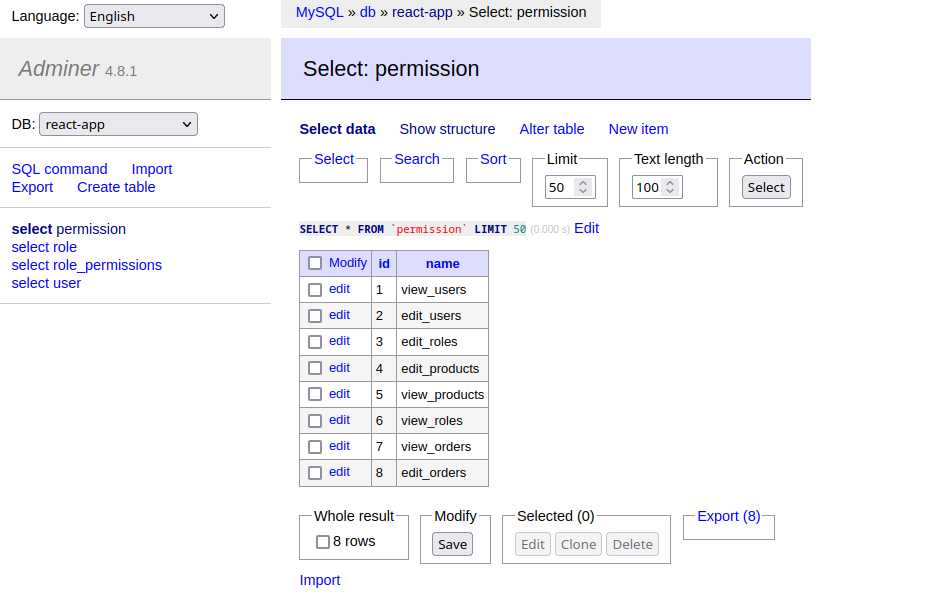
After app reloaded the permissions are now added:
In the same function we can now add the assignment of permissions to their respective roles:
src/db-connector.ts
// assign permissions to roles
const roleRepository = Manager.getRepository(Role)
// admin can do it all
// insert or update
await roleRepository.upsert({ name: 'Admin', permissions }, ['name'])

// editor can do all but to edit roles
delete permissions[3]
// insert or update
await roleRepository.upsert({ name: 'Editor', permissions }, ['name'])

// viewer cannot edit anything
delete permissions[1]
delete permissions[5]
delete permissions[7]
// insert or update
await roleRepository.upsert({ name: 'Viewer', permissions }, ['name'])
Permissions Controller
Check permissions for active user:
src/routes.ts
router.get('/api/permissions', CheckAuthState, Permissions)
src/controller/permission.controller.ts
import { Request, Response } from "express";
import { Permission } from "../entities/permission.entity";
import Manager from "../db-connector";
const repository = Manager.getRepository(Permission);
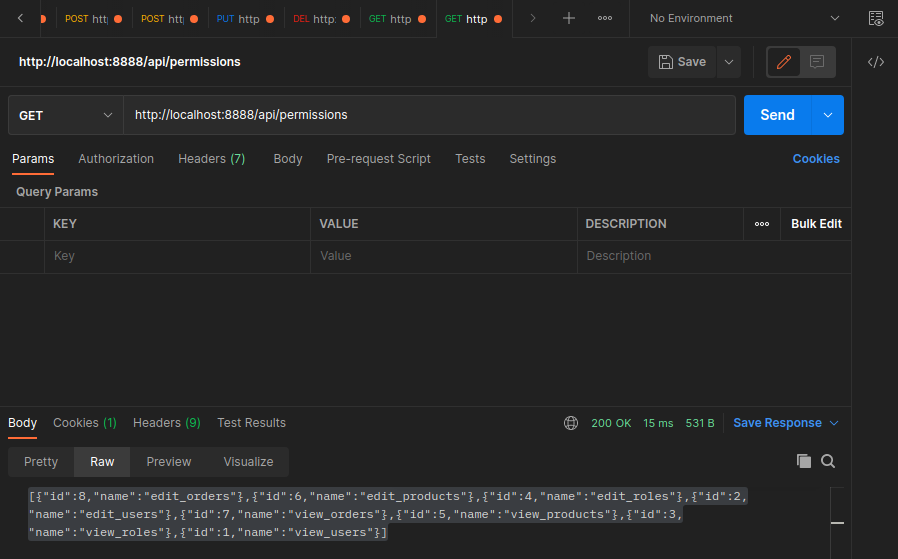
export const Permissions = async (req: Request, res: Response) => {
res.send(await repository.find())
}
Role Controller
Get all available roles:
src/routes.ts
router.get('/api/roles', CheckAuthState, Roles)
src/controller/roles.controller.ts
import { Request, Response } from "express";
import { Roles } from "../entities/roles.entity";
import Manager from "../db-connector";
const repository = Manager.getRepository(Roles);
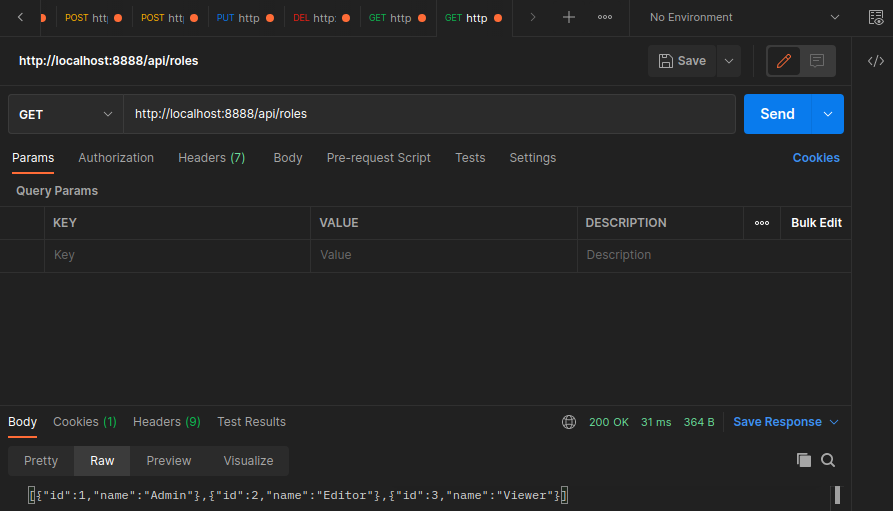
export const Roles = async (req: Request, res: Response) => {
res.send(await repository.find())
}
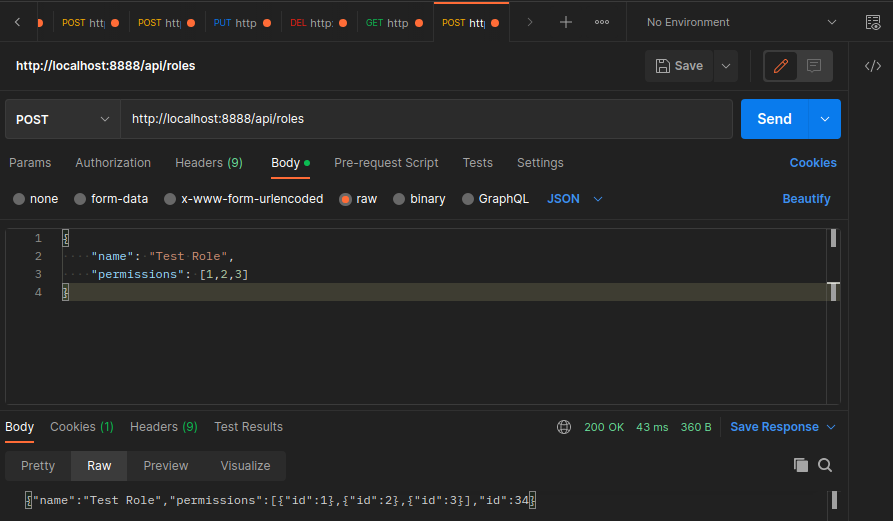
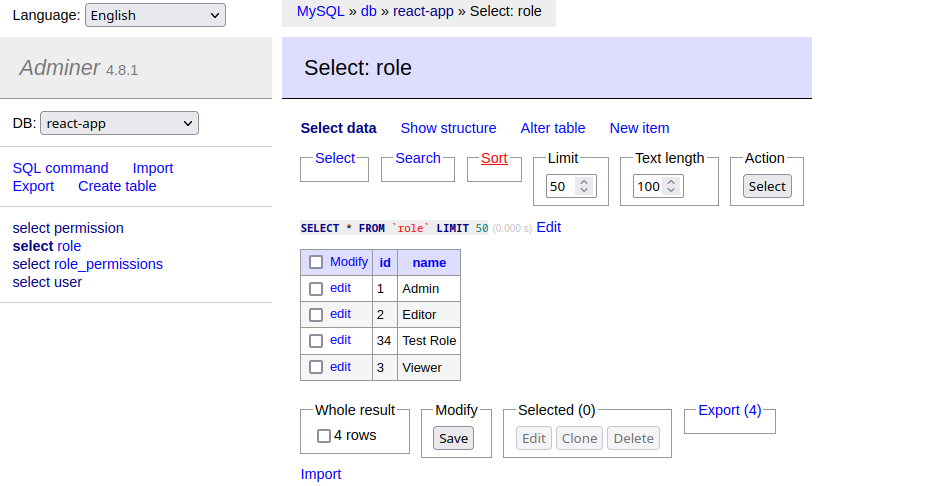
Manually Adding Roles
Create a new role:
src/routes.ts
router.post('/api/roles', CheckAuthState, CreateRole)
src/controller/roles.controller.ts
export const CreateRole = async (req: Request, res: Response) => {
    const { name, permissions } = req.body;
    const role = await repository.save({
        name,
        permissions: permissions.map( id => {
            return {
                id: id
            }
        })
    })

    res.send(role)
}
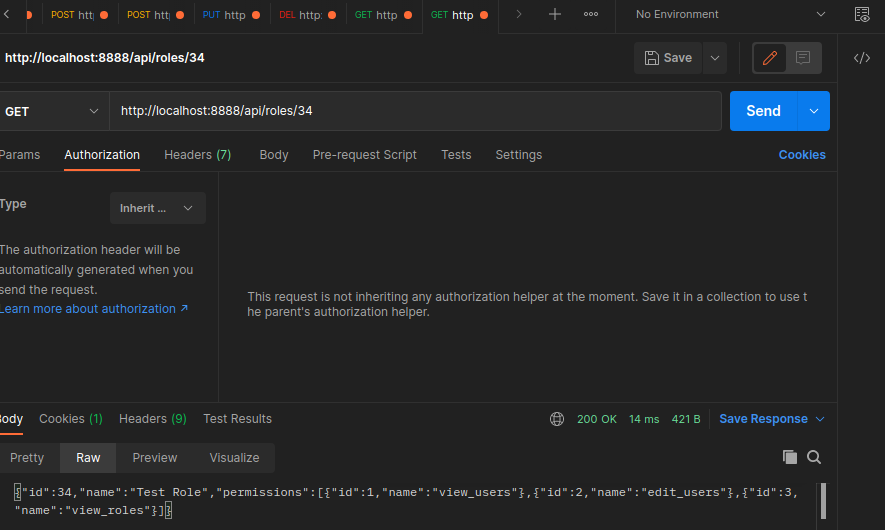
Get Permissions for a Role
Return all permissions for a specified role:
src/routes.ts
router.get('/api/roles/:id', CheckAuthState, CreateRole)
src/controller/roles.controller.ts
export const GetRole = async (req: Request, res: Response) => {
    res.send(await repository.findOne({
        where: { id: req.params.id }, relations: ['permissions']
    })
}
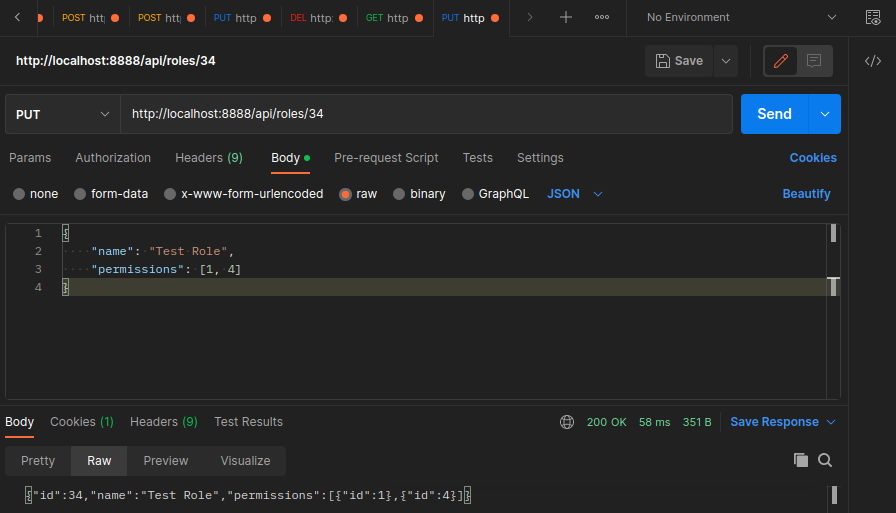
Update Permissions for a Role
Add permissions for a specified role:
src/routes.ts
router.post('/api/roles/:id', CheckAuthState, CreateRole)
src/controller/roles.controller.ts
export const UpdateRole = async (req: Request, res: Response) => {
    const { name, permissions } = req.body;
    const role = await repository.save({
        id: parseInt(req.params.id),
        name,
        permissions: permissions.map( id => {
            return {
                id: id
            }
        })
    })
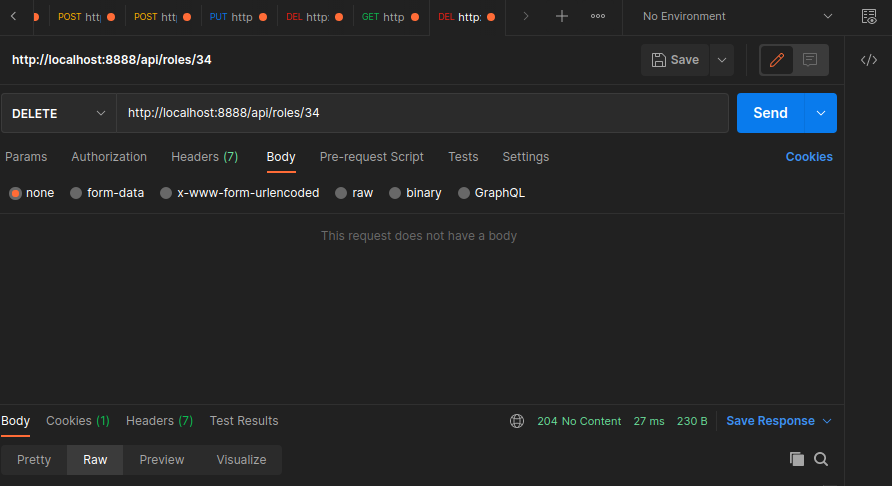
Manually Deleting Roles
Delete an existing role:
src/routes.ts
router.delete('/api/roles/:id', CheckAuthState, DeleteRole)
src/controller/roles.controller.ts
export const DeleteRole = async (req: Request, res: Response) => {
    const deleteRole = await repository.delete(req.params.id)

    res.status(204).send(deleteRole)
}
Products
Create a table for items to be displayed on the web frontend:
src/entities/product.entity.ts
import { BaseEntity, Column, Entity, Unique, PrimaryGeneratedColumn } from "typeorm";

@Entity ()
@Unique('constraint_name', ['title'])
export class User extends BaseEntity {
    @PrimaryGeneratedColumn()
    id: number;

    @Column({ unique: true })
    title: string;

    @Column()
    description: string;

    @Column()
    image: string;

    @Column()
    price: number;
}
Product Controller
The Product routes and the controller is basically identical to the User pendants:
src/routes.ts
// product administration - get all products
router.get('/api/products', CheckAuthState, GetProducts)
// product administration - get product by ID
router.get('/api/products/:id', CheckAuthState, GetProduct)
// product administration - create new product
router.put('/api/products/:id', CheckAuthState, UpdateProduct)
// product administration - create new product
router.post('/api/products', CheckAuthState, CreateProduct)
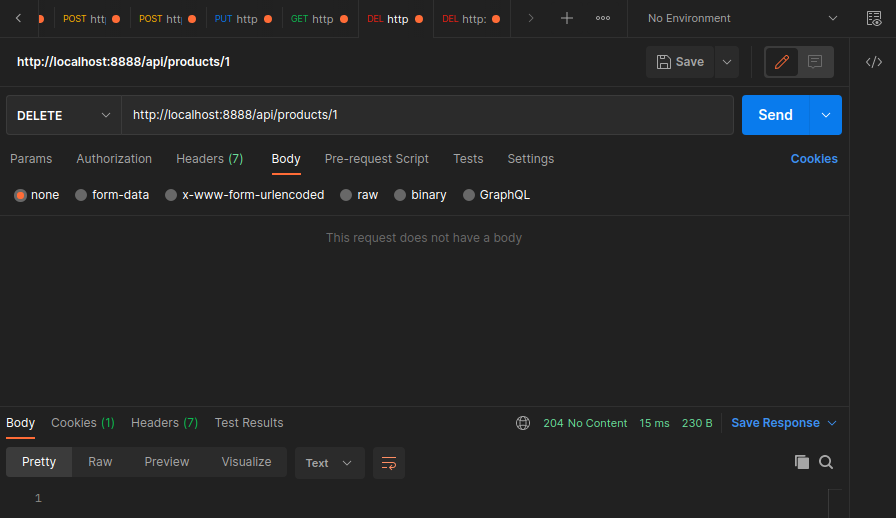
// product administration - delete product
router.delete('/api/products/:id', CheckAuthState, DeleteProduct)
src/controller/product.controller.ts
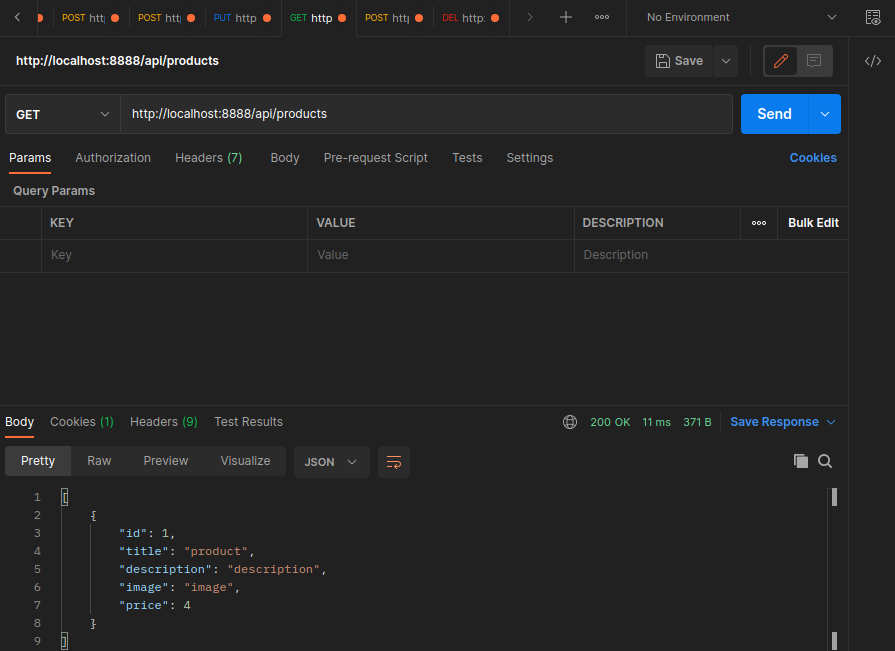
export const GetProducts = async (req: Request, res: Response) => {
const products = await repository.find()
res.send(products)
}
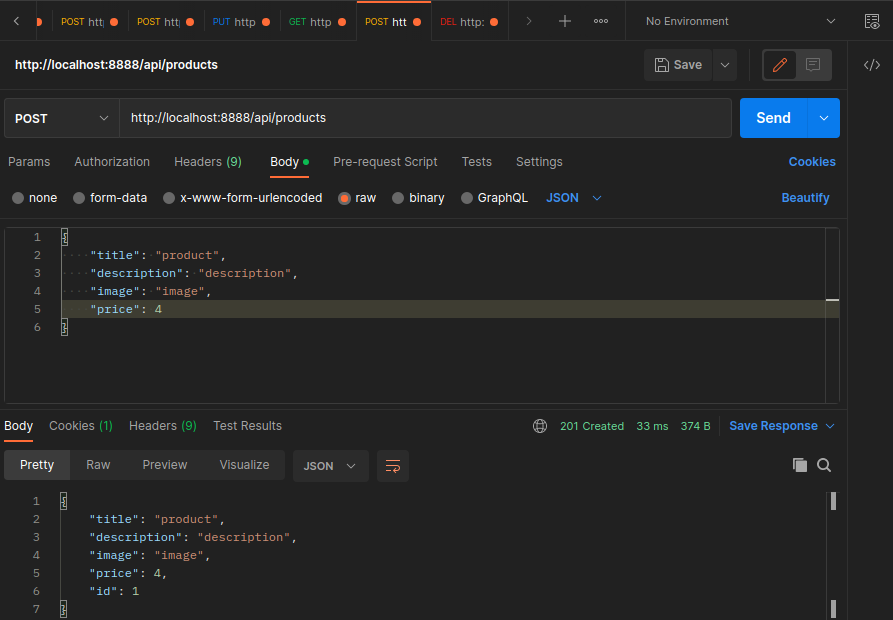
export const CreateProduct = async (req: Request, res: Response) => {
const product = await repository.save(req.body)
res.status(201).send(product)
}
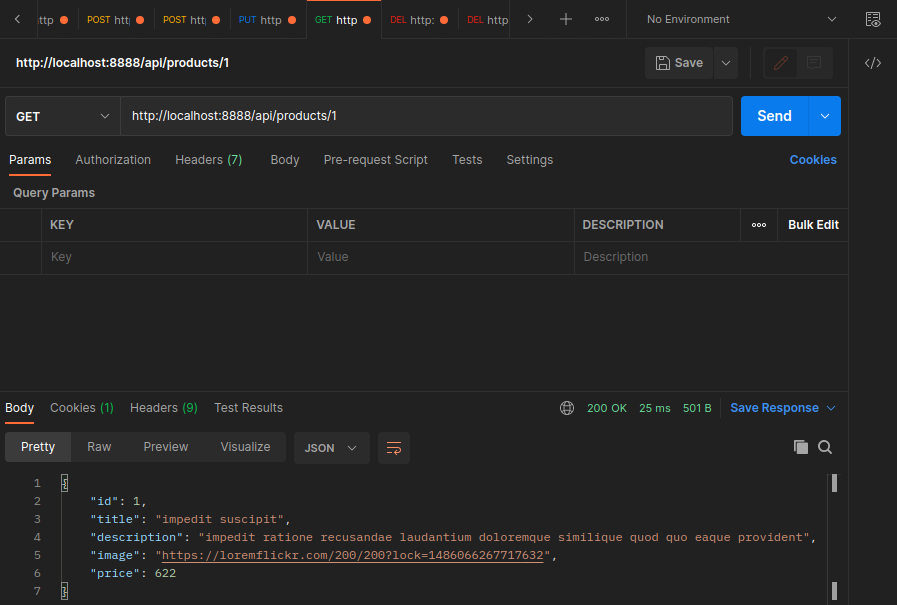
export const GetProduct = async (req: Request, res: Response) => {
res.send(await repository.findOne({
where: { id: parseInt(req.params.id) }
})
)}
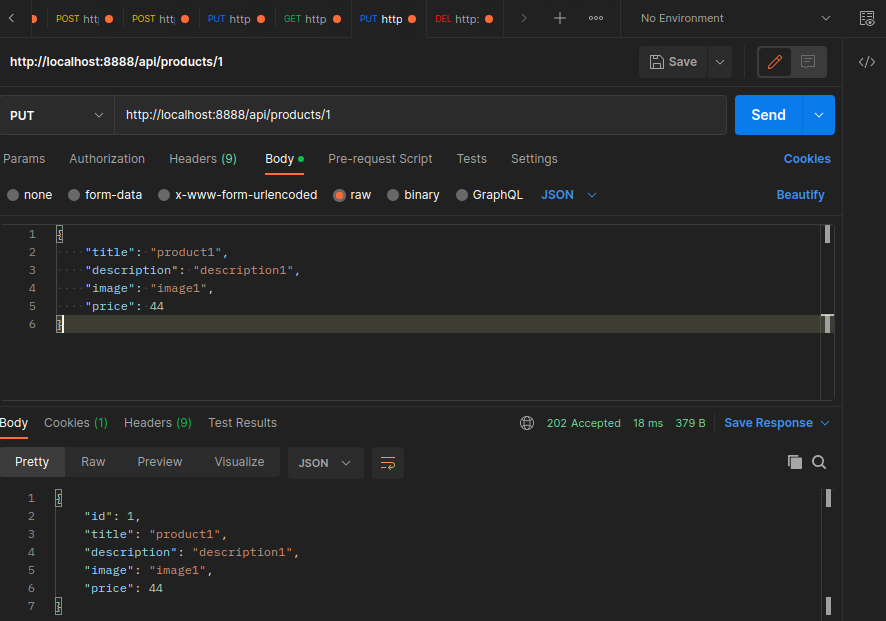
export const UpdateProduct = async (req: Request, res: Response) => {
await repository.update(parseInt(req.params.id), req.body);
res.status(202).send(await repository.findOne({
where: { id: parseInt(req.params.id) }
}))
}
export const DeleteProduct = async (req: Request, res: Response) => {
const deleteProduct = await repository.delete(req.params.id)
res.status(204).send(deleteProduct)
}

Product Entity
src/entities/product.entity.ts
import { BaseEntity, Column, Entity, Unique, PrimaryGeneratedColumn } from "typeorm";

@Entity ()
@Unique('constraint_name', ['title'])
export class Product extends BaseEntity {
    @PrimaryGeneratedColumn()
    id: number;

    @Column({ unique: true })
    title: string;

    @Column()
    description: string;

    @Column()
    image: string;

    @Column()
    price: number;
}
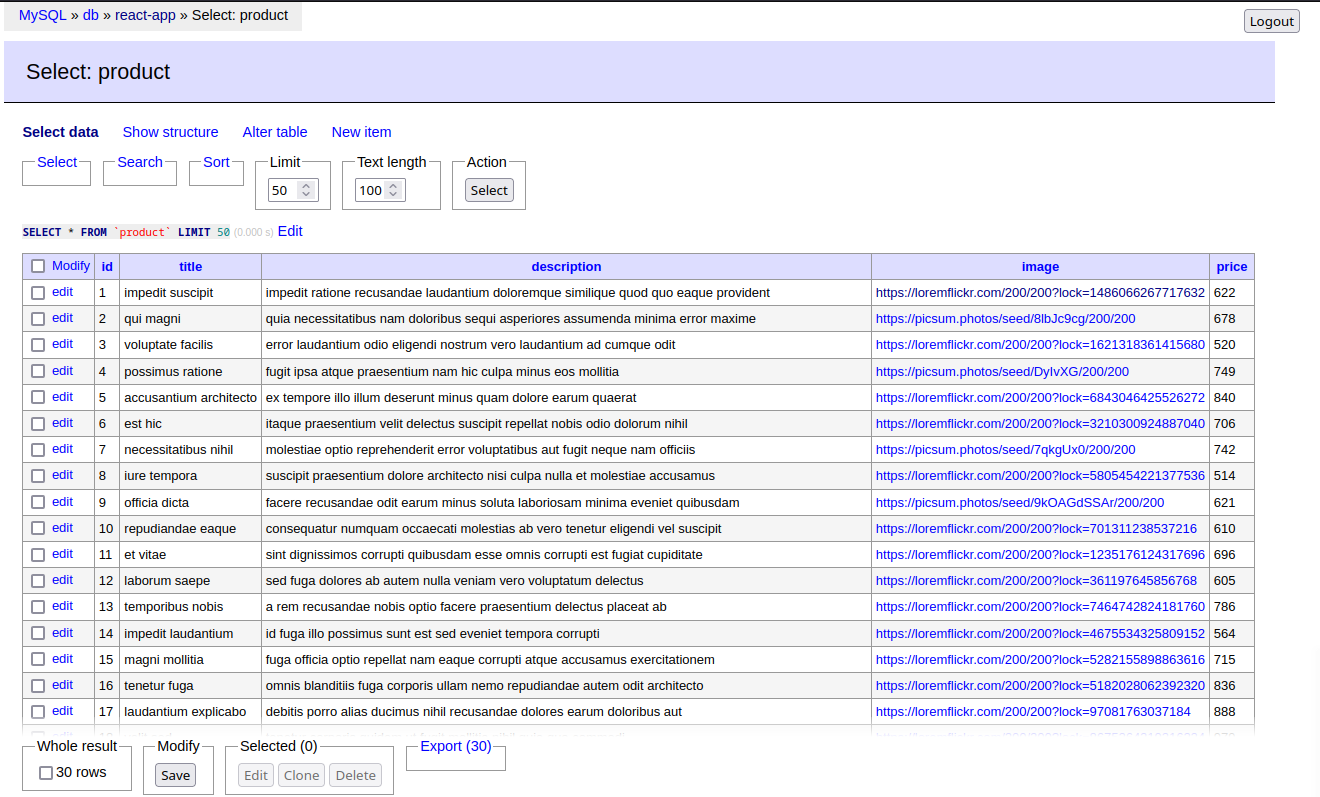
Pre-Seeding Products
Use faker to generate items:
npm install @faker-js/faker
src/seeds/product.seed.ts
import { faker } from '@faker-js/faker'
import { Product } from '../entities/product.entity'
import { Manager } from '../db-connector'

export const productSeed = async () => {

    // create role permissions
    const productRepository = Manager.getRepository(Product)

    // generate 30 fake items
    for (let i = 0; i< 30; i++){
        // use upsert instead of save
        await productRepository.upsert(
            {
                title: faker.lorem.words(2),
                description: faker.lorem.words(10),
                image: faker.image.url({ width: 200, height: 200 }),
                price: parseInt(faker.finance.amount({ min: 500, max: 1000, dec: 2 }))
            },
            // if name exists only update else insert
            ['title']
        )
    }
}
And use the data source initialization to trigger the seed:
src/db-connector.ts
dataSource
    .initialize()
    .then( () => {
        roleSeed()
        productSeed()

        console.log('INFO :: Data Source has been initialized');
    })
Pagination
Edit the Product Controller to paginate on getProducts:
src/controller/product.controller.ts
export const GetProducts = async (req: Request, res: Response) => {
    // pagination
    // only retrieve 15 items per page
    const take = 15
    const page = parseInt(req.query.page as string || '1')
    // find 'take' number of items starting from zero or (page-1)*take
    const [data, total] = await repository.findAndCount({
        take: take,
        skip: ( page - 1 ) * take
    })

    res.send({
        data: data,
        // also return active page, last page and total number of items
        meta: {
            total,
            page,
            last_page: Math.ceil(total / take)
        }
    })
}

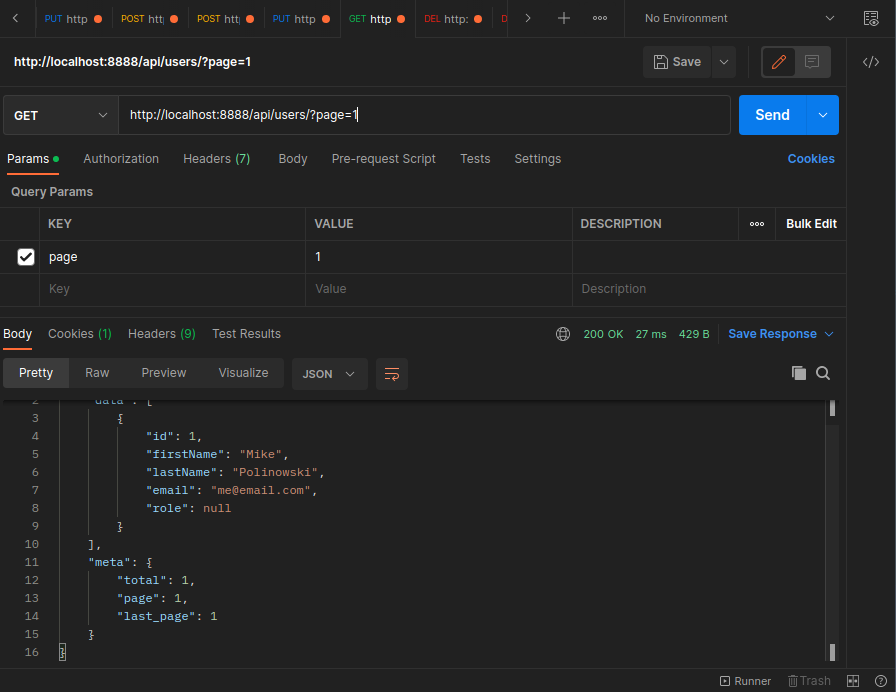
And the same edit for the user table:
src/controller/user.controller.ts
export const GetUsers = async (req: Request, res: Response) => {
    // pagination
    // only retrieve 15 items per page
    const take = 15
    const page = parseInt(req.query.page as string || '1')
    // find 'take' number of items starting from zero or (page-1)*take
    const [data, total] = await repository.findAndCount({
        take: take,
        skip: ( page - 1 ) * take,
        relations: ['role']
    })

    res.send({
        data: data.map(user => {
            const { password, ...data} = user
            return data
        }),
        // also return active page, last page and total number of items
        meta: {
            total,
            page,
            last_page: Math.ceil(total / take)
        }
    })
}
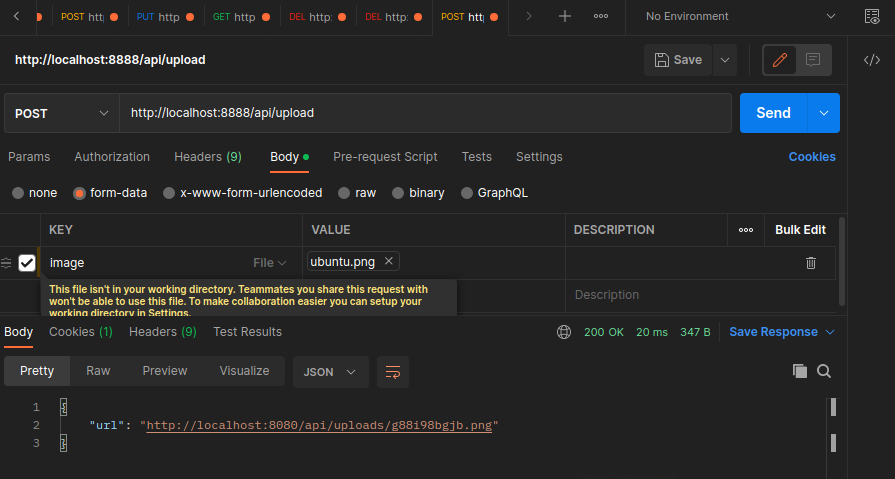
File Uploads
npm install multer @types/multer
Add multer middleware to upload route:
src/controller/role.controller.ts
// image upload
router.post('/api/upload', CheckAuthState, FileUpload)
Add a controller for the file upload:
src/controller/upload.controller.ts
import { Request, Response } from "express";
import multer from 'multer';
import { extname } from 'path';


export const FileUpload = async (req: Request, res: Response)  => {
    const storage = multer.diskStorage({
        destination: './uploads',
        filename(_, file, cb){
            const randomName = Math.random().toString(20).substring(2, 12)
            return cb(null, `${randomName}${extname(file.originalname)}`)
        }
    })

    const upload = multer({ storage }).single('image')

    upload(req, res, (err) => {

        if(err){
            return res.send(400).send(err)
        }

        res.send({
            url: `http://localhost:8080/api/uploads/${req.file.filename}`
        })
    })
}
Static Routes
To be able to access the uploaded files we need to add static routes:
src/controller/role.controller.ts
// image upload
router.post('/api/upload', CheckAuthState, FileUpload)
// make upload route public
router.use('/api/uploads', express.static('./uploads'))
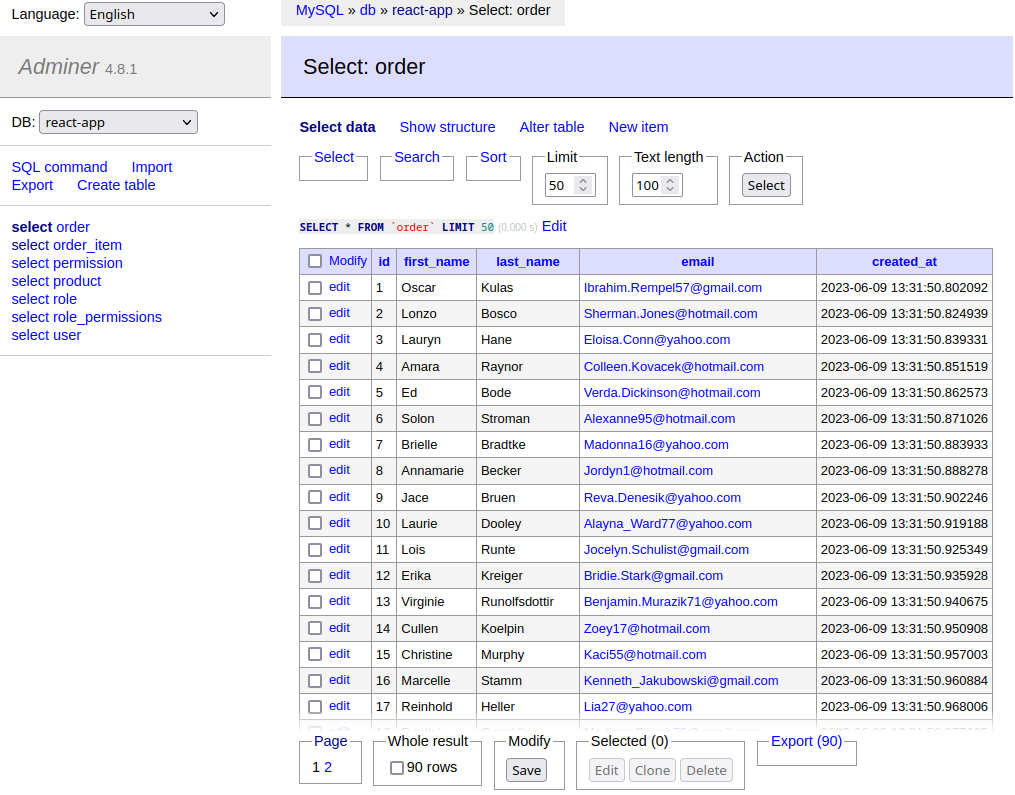
Orders
Create tables for incoming order:
src/entities/order.entity.ts
import { BaseEntity, Column, Entity, Unique, PrimaryGeneratedColumn, CreateDateColumn, OneToMany } from "typeorm";
import { OrderItem } from "./order-item.entity";

@Entity ()
@Unique('constraint_name', ['email'])
export class Order extends BaseEntity {
    @PrimaryGeneratedColumn()
    id: number;

    @Column()
    first_name: string;

    @Column()
    last_name: string;

    @Column()
    email: string;

    @CreateDateColumn()
    created_at: string;

    @OneToMany( () => OrderItem, OrderItem => OrderItem.order)
    order_items: OrderItem[];

}
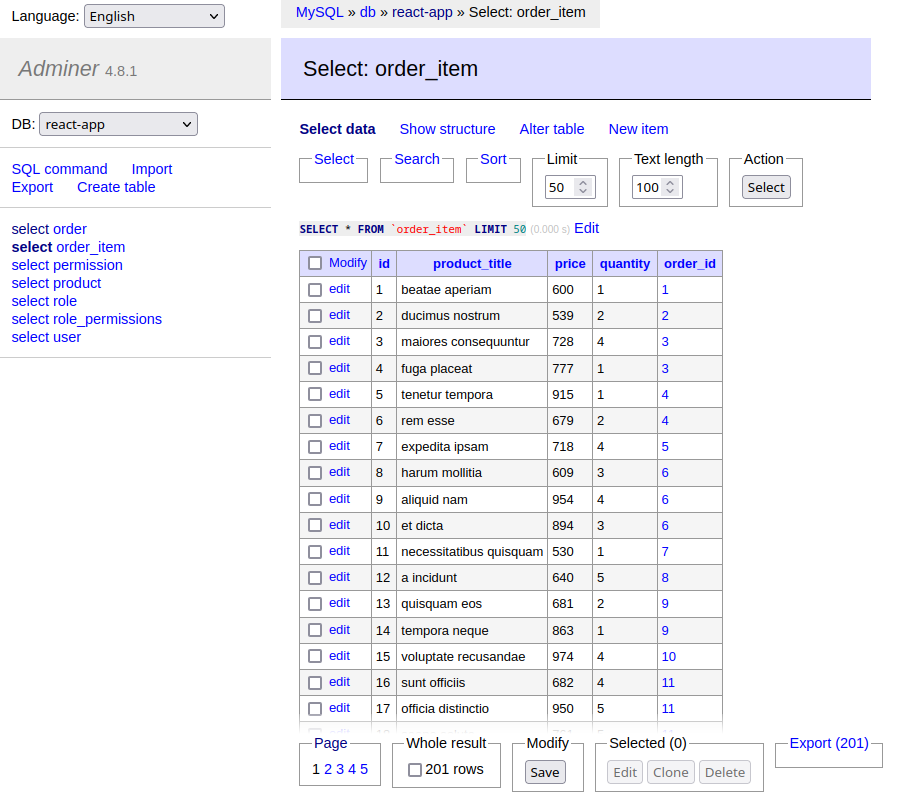
src/entities/order-item.entity.ts
import { BaseEntity, Column, Entity, Unique, PrimaryGeneratedColumn, ManyToOne, JoinColumn } from "typeorm";
import { Order } from "./order.entity";

@Entity ()
@Unique('constraint_name', ['product_title'])
export class OrderItem extends BaseEntity {
    @PrimaryGeneratedColumn()
    id: number;

    @Column()
    product_title: string;

    @Column()
    price: number;

    @Column()
    quantity: number;

    @ManyToOne( () => Order)
    @JoinColumn({ name: 'order_id' })
    order: Order
}
Pre-Seeding Orders
src/seeds/order.seed.ts
import { faker } from '@faker-js/faker';
import { Manager } from '../db-connector'
import { Order } from '../entities/order.entity';
import { randomInt } from 'crypto';
import { OrderItem } from '../entities/order-item.entity';

export const orderSeed = async () => {

    const orderRepository = Manager.getRepository(Order)
    const orderItemsRepository = Manager.getRepository(OrderItem)

    // generate 30 fake orders
    for (let i = 0; i< 30; i++){
        const order = await orderRepository.save(
            {
                first_name: faker.person.firstName(),
                last_name: faker.person.lastName(),
                email: faker.internet.email(),
                created_at: faker.date.recent({ days: 10, refDate: '2023-06-10T00:00:00.000Z' })
            }
        );
        console.log(order)
        // add number of items in order
        for(let j = 0; j < randomInt(1,5); j++) {
            await orderItemsRepository.save(
                {
                    product_title: faker.lorem.words(2),
                    price: parseInt(faker.finance.amount({ min: 500, max: 1000, dec: 2 })),
                    quantity: parseInt(faker.finance.amount({ min: 1, max: 5, dec: 0 })),
                    order: order
                }
            )
        }
    }
}
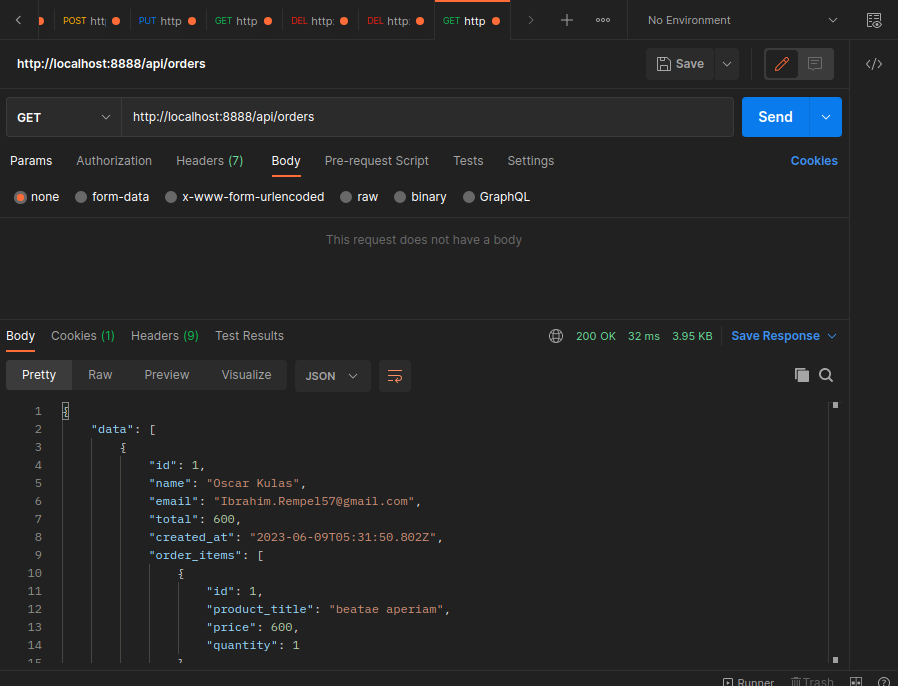
Order Controller
Add a route:
src/routes.ts
// get all orders
router.get('/api/orders', CheckAuthState, GetOrders)
src/controller/order.controller.ts
import { Request, Response } from "express";

import Manager from "../db-connector";
import { Order } from "../entities/order.entity";
const repository = Manager.getRepository(Order);


export const GetOrders = async (req: Request, res: Response) => {
    // pagination
    // only retrieve 15 items per page
    const take = 15
    const page = parseInt(req.query.page as string || '1')
    // find 'take' number of items starting from zero or (page-1)*take
    const [data, total] = await repository.findAndCount({
        take: take,
        skip: ( page - 1 ) * take,
        relations: ['order_items']
    })

    res.send({
        data: data.map((Order) => ({
            id: Order.id,
            name: Order.name,
            email: Order.email,
            total: Order.total,
            created_at: Order.created_at,
            order_items: Order.order_items
        })),
        // also return active page, last page and total number of items
        meta: {
            total,
            page,
            last_page: Math.ceil(total / take)
        }
    })
}
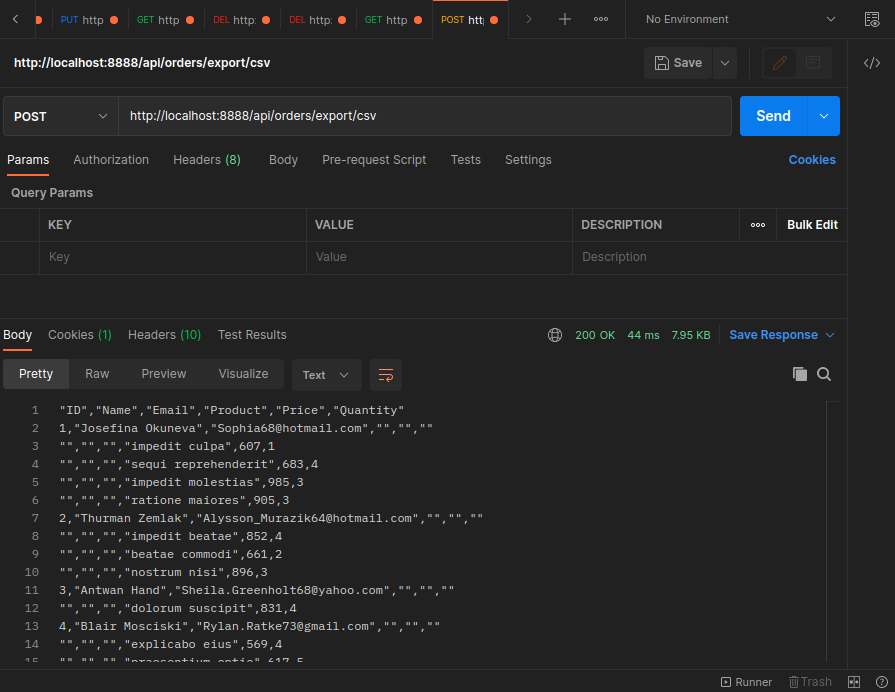
Exporting Order to CSV
npm install json2csv @types/json2csv @types/json2csv
Add a route:
src/routes.ts
// export orders
router.post('/api/orders/export/csv', CheckAuthState, ExportCsv)
src/controller/order.controller.ts
export const ExportCsv = async (req: Request, res: Response) => {
    const parser = new Parser({
        fields: ['ID', 'Name', 'Email', 'Product', 'Price', 'Quantity']
    })

    const orders = await repository.find({relations: ['order_items']})

    const json = []

    orders.forEach((order:Order) => {
        json.push({
            ID: order.id,
            Name: order.name,
            Email: order.email,
            Product: '',
            Price: '',
            Quantity: ''
        })

        order.order_items.forEach((item: OrderItem) => {
            json.push({
                ID: '',
                Name: '',
                Email: '',
                Product: item.product_title,
                Price: item.price,
                Quantity: item.quantity
            })
        })
    })

    const csv = parser.parse(json)

    res.header('Content-Type', 'text/csv')
    res.attachment('orders.csv')
    res.send(csv)
}
Charting Order Data
Add a route:
src/routes.ts
// order chart data
router.get('/api/orders/chart', CheckAuthState, ChartData)
src/controller/order.controller.ts
export const ChartData = async (req: Request, res: Response) => {
    const result = await Manager.query(`
        SELECT DATE_FORMAT(o.created_at, '%Y-%m-%d') as date, SUM(oi.price * oi.quantity) as sum
        FROM \`order\` o
            JOIN order_item oi
        on o.id = oi.order_id
        GROUP BY date
    `)

    res.send(result)
}

Route Permissions
Update Role Seed
I noticed that the upsert pre-seed created here -> Pre-Seeding Roles and Permissions did not create the role permissions. Which meant that the roles were being created but none of the roles had any permissions assigned to them. Unfortunately, I am not sure where the issue is. So I replace the upsert with a save - and now everything works as expected. With the caveat that you have to make sure that this function is only ever executed once!
To make sure I created a new file for this function:
src/seeds/role.preseed.ts
import { Request, Response } from 'express';
import { Permission } from '../entities/permission.entity'
import { Role } from '../entities/role.entity'
import { Manager } from '../db-connector'


export const roleSeed = async (req: Request, res: Response) => {

    // create role permissions
    const permissionRepository = Manager.getRepository(Permission)

    const perms = [
        'view_users',
        'edit_users',
        'view_roles',
        'edit_roles',
        'view_products',
        'edit_products',
        'view_orders',
        'edit_orders'
    ]

    let permissions = []

    // insert permissions into Permission table
    for (let i = 0; i< perms.length; i++){
        permissions.push(
            await permissionRepository.save(
                { name: perms[i] }
            )
        )
    }

    // assign permissions to roles
    const roleRepository = Manager.getRepository(Role)
    // admin gets all the permissions
    await roleRepository.save({
        name: 'Admin',
        permissions: permissions
    })

    // editor is not allowed to edit roles
    delete permissions[3];

    await roleRepository.save({
        name: 'Editor',
        permissions: permissions
    })

    // viewer cannot edit at all
    delete permissions[1];
    delete permissions[5];
    delete permissions[7];

    await roleRepository.save({
        name: 'Viewer',
        permissions: permissions
    })

    // // debug
    // console.log(permissions[0].identifiers)
    // console.log(permissions.map(id => {
    //     return {
    //         id: id.raw[0].id
    //     }}))

    res.status(201).send({
        message: 'default user roles created'
    })
}
And assigned it to a route so that it can be triggered manually once by visiting the route:
src/routes.ts
// pre-seed roles
router.put('/api/preseed/roles', roleSeed)
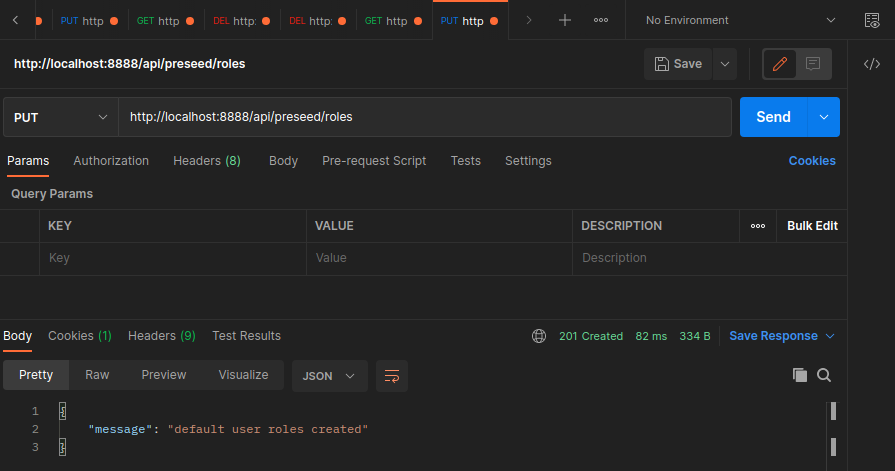
Now the insert works perfectly and all roles have their permissions attached... if you know why upsert don't work the same way (and how I could have fixed that) please let me know...
Permission Middleware
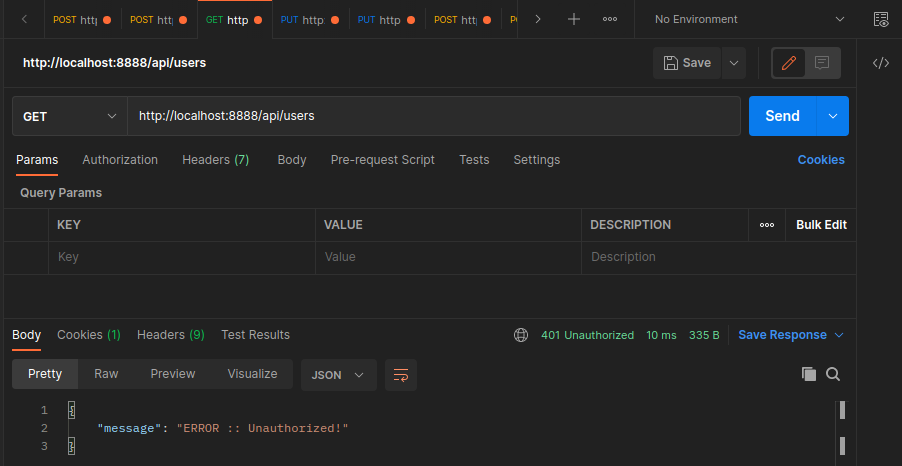
With the role permissions fixed now back to actually implementing the restrictions for every route. Add CheckPermissions function to every route and provide the class users, orders, products, etc. - e.g.:
router.get('/api/users', CheckAuthState, CheckPermissions('users'), GetUsers)
Create the CheckPermissions function to check if it is a GET route (which only requires view rights) and verify that the users has the corresponding permission. Else edit rights are required:
src/middleware/permission.middleware.ts
import { Request, Response } from 'express';
import { User } from '../entities/user.entity';

export const CheckPermissions = (access: string) => {
    return (req: Request, res: Response, next: Function) => {
        const user: User = req['user'];

        // debug
        // console.log(user[0].role.permissions)

        // get permissions array
        const permissions = user[0].role.permissions

        // loop though array of objects and get permClasses
        const permClasses = []

        for (let i = 0; i < permissions.length; i++) {
            permClasses.push(permissions[i].name)
          }

        // debug
        // console.log(permClasses)

        // if route is GET require `view_` or `edit_` perm else you need `edit_`
        if  (req.method === 'GET') {
            if(!permClasses.includes('view_' + access) || !permClasses.includes('edit_' + access)) {
                return res.status(401).send({
                    message: 'ERROR :: Unauthorized!'
                })
        } else {
            if(!permClasses.includes('edit_' + access)) {
                return res.status(401).send({
                    message: 'ERROR :: Unauthorized!'
                })
            }
        }}

        next()
    }
}
Create a user that has the rights to view a given route and one that has not - verify that the latter is blocked from access: