Reactive Search Starter

ReactiveSearch.io provides a supercharged Elasticsearch experience for creating the most demanding app search experiences with a no-code search relevance control plane, UI builder, out-of-the-box search analytics and low-code UI components.
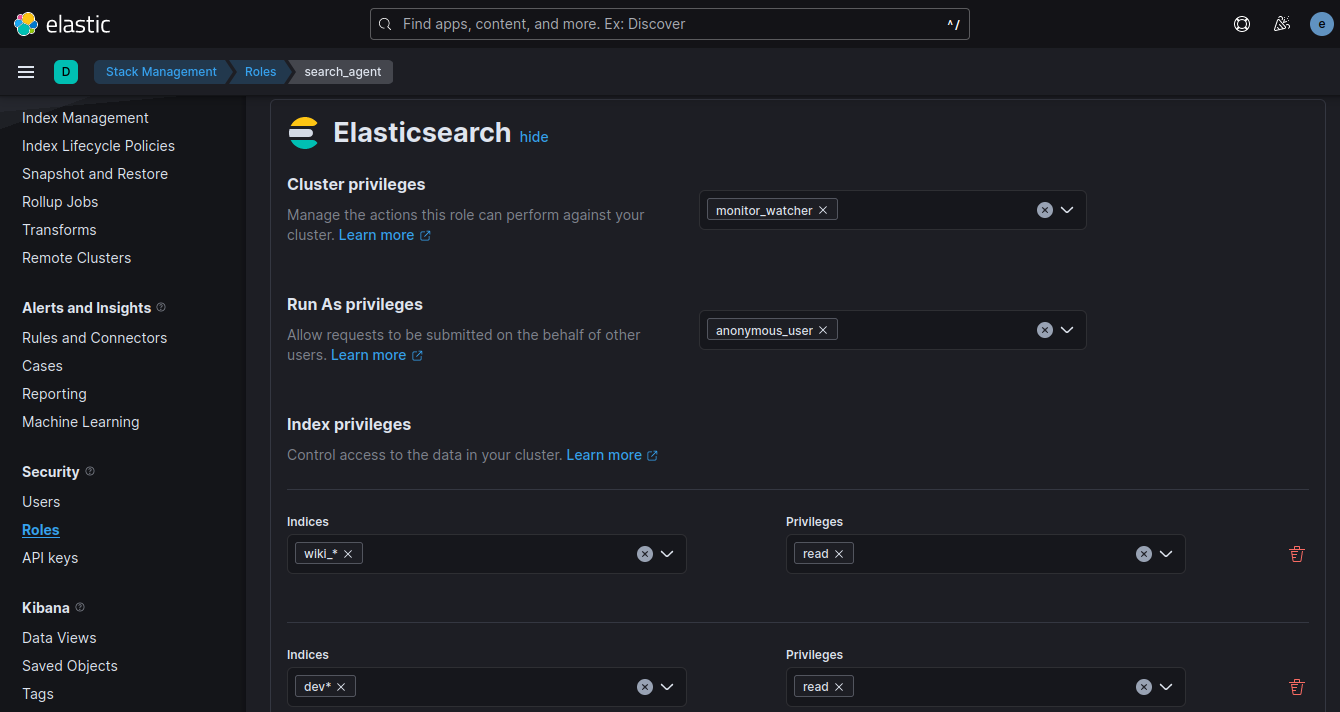
To be able to use the library with your own installation of Elasticsearch or Opensearch you first need to define a user role for the search client. This role needs to have read access to all indexies you want to be able to run searches against:
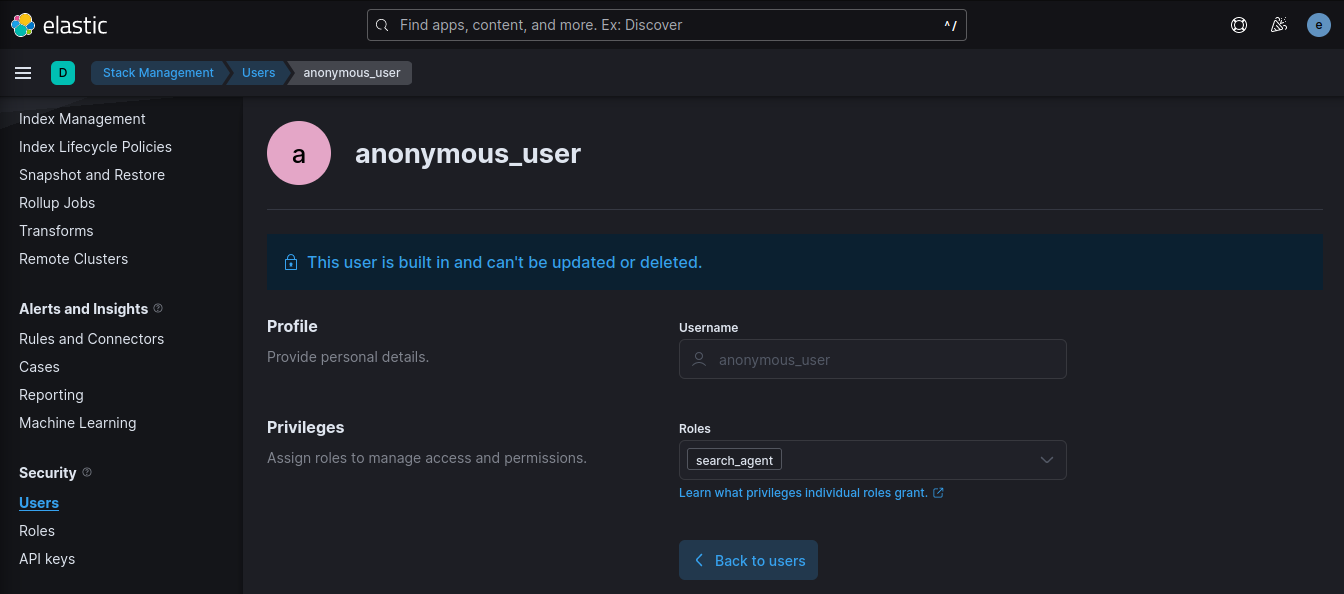
I am going to use this role on an anonymous user to be able to run searches against the Elasticsearch REST API without needing to authenticate - Note that to be able to use the Anonymous User you need to activate it in elasticsearch/config/elasticsearch.yml:
I can now create a file that holds the information my client needs to connect to the Elasticsearch cluster, e.g.:
ElasticParam.js
export const _connectionString = 'https://my.search.com';
export const _index = 'my_index_2022_12_28';
The Search Index Mapping I am using here has a few keys that I will be running searches against:
- "field": "title",
- "field": "description",
- "field": "tags",
- "field": "abstract",
- "field": "short",
Create-React-App
With Elasticsearch/Opensearch set up we can now start coding the search interface. For this example I am going to scaffold a basic React.js App and install the ReactiveSearch library using:
npx create-react-app reactive-search-starter && cd reactive-search-starter
npm install @appbaseio/reactivesearch
Connecting to the Cluster
Update src/App.js to add ReactiveBase component and import the Elasticsearch connection info created earlier:
import React from 'react'
import { ReactiveBase, DataSearch } from '@appbaseio/reactivesearch'

import { _connectionString, _index } from './ElasticParam'

function App() {
  return (
    <ReactiveBase
        url={_connectionString}
        app={_index}
        theme={{
          colors: {
            primaryColor: "#bebebe",
            textColor: "#7e7e7e"
          },
        }}
    >
      PlaceHolder Text to be Replaced by later Search Components
    </ReactiveBase>
  );
}

export default App
Adding Search and Aggregation Components
For this app, I will be using DataSearch and MultiList components for searching and filtering on the index. And ResultCard component for showing the search results.
DataSearch
The DataSearch component creates a searchbox UI component that queries on the specified fields with weights as specified by dataField prop. That's all it takes to create a functional search component.
<DataSearch
	componentId="searchbox"
  placeholder="Search Assistant"
	dataField={[
		{
			"field": "title",
			"weight": 5
		},
		{
			"field": "description",
			"weight": 3
		},
		{
			"field": "tags.raw",
			"weight": 5
		},
		{
			"field": "abstract",
			"weight": 2
		},
		{
			"field": "short",
			"weight": 2
		},
	]}
/>
MultiList
Next, we have to add the MultiList component. This creates a multiple selection aggregation to filter the search results by.
<MultiList
	componentId="searchfilter"
	dataField="tags.raw"
	title="Filter by Tags"
	aggregationSize={10}
/>
Aggregation components like MultiList fire a term type query. You can think of a term query as an exact match query. The field you are using to aggregate over needs to be of type keyword. In my mapping this is the case for tags.raw. The aggregationSize prop is used to specify the total aggregations (think buckets) that you want returned based on the dataField value.
Adding Results Component
The results component displays the articles that we're searching for. We will use the ReactiveList component with the ResultCard preset.
<ReactiveList
  componentId="results"
  dataField="_score"
  size={35}
  pagination={true}
  react={{
    and: ["searchbox", "searchfilter"]
  }}
  render={({ data }) => (
    <ReactiveList.ResultCardsWrapper>
    {data.map((item) => (
      <ResultCard key={item._id}>
      <ResultCard.Image src={item.imagesquare} />
      <ResultCard.Title
        dangerouslySetInnerHTML={{
        __html: item.title
        }}
      />
      <ResultCard.Description>
        {item.abstract}
      </ResultCard.Description>
      </ResultCard>
    ))}
    </ReactiveList.ResultCardsWrapper>
  )}
/>
Adding Layout and Styles
ReactiveSearch doesn't use a layout system internally. But it is easy to add some CSS Flex:
<ReactiveBase>
	<div style={{ display: "flex", flexDirection: "row" }}>
		<div style={{ display: "flex", flexDirection: "column", width: "30%", margin: "10px" }}>
			<MultiList/>
			<SingleRange/>
		</div>
		<div style={{ display: "flex", flexDirection: "column", width: "66%" }}>
			<DataSearch/>
			<ReactiveList/>
		</div>
	</div>
</ReactiveBase>
