Nomad Server Cluster

Extended your single-node setup to a scalable, production-grade cluster with multiple nodes.
Setting up the Server
The first step is to create the configuration file for the server:
mkdir ~/nomad
cd ~/nomad
nano server.hcl
Paste the following into a file called server.hcl:
# Increase log verbosity
log_level = "DEBUG"

# Setup data dir
data_dir = "/tmp/server1"

# Give the agent a unique name. Defaults to hostname
name = "server1"

# Enable the server
server {
  enabled = true

  # Self-elect, should be 3 or 5 for production
  bootstrap_expect = 1
}
This will start an agent in server only mode and have it elected as a leader. The major change that should be made for production is to run more than one server, and to change the corresponding bootstrap_expect value. Once the file is created, start the agent in a new tab:
nomad agent -config server.hcl
Setting up a Client
Similar to the server, you must first configure the clients by pasting the following into ~/nomad/client1.hcl on your Client Server (if your Client and Master are on the same server change the server address to 127.0.0.1):
# Increase log verbosity
log_level = "DEBUG"

# Setup data dir
data_dir = "/tmp/client1"

# Give the agent a unique name. Defaults to hostname
name = "client1"

# Enable the client
client {
  enabled = true

  # For demo assume we are talking to server1 - in my case this is IP 192.168.2.110.
  #  For production, this should be like "nomad.service.consul:4647" and a system
  # like Consul used for service discovery.
  servers = ["192.168.2.110"]
}

# Modify our port to avoid a collision with server1
ports {
  http = 5656
}

# Because we will potentially have two clients talking to the same
# Docker daemon, we have to disable the dangling container cleanup,
# otherwise they will stop each other's work thinking it was orphaned.
plugin "docker" {
  config {
    gc {
      dangling_containers {
        enabled = false
      }
    }
  }
}
Now create the data directory and start the Nomad agent:
mkdir /tmp/client1
nomad agent -config client1.hcl
Back on the Master Server you can now check if the Client was able to connect:
nomad node status
ID        DC   Name     Class   Drain  Eligibility  Status
dfa0023b  dc1  client1  <none>  false  eligible     ready
Your Client was added with the Client ID dfa0023b.
Submit a Job
Because the sample job contains a Consul health check, Nomad’s deployment watcher will wait for the check to pass by default. This will cause your deployment to stall after the first allocation updates. Resolve this by adding the following attribute inside of the update stanza:
nano ~/nomad/example.nomad
health_check = "task_states"
Use the job run command to submit the job:
nomad job run example.nomad
  ==> Monitoring evaluation "0cd401ff"
      Evaluation triggered by job "example"
      Evaluation within deployment: "fdc580b0"
      Allocation "74f0acf4" created: node "dfa0023b", group "cache"
      Evaluation status changed: "pending" -> "complete"
  ==> Evaluation "0cd401ff" finished with status "complete"
You can see that the Master allocated the deployment onto the Client server with the ID dfa0023b. To stop the job run:
nomad job stop example
Multiple Instances
We can now edit the example.nomad file to start more than one instance of redis:
group "cache" {
    # The "count" parameter specifies the number of the task groups that should
    # be running under this group. This value must be non-negative and defaults
    # to 1.
    count = 3

    ...
}
You can verify the modified file with
nomad job plan example.nomad.
To handle this extra load we will create another Client - this time on the same PC that runs the Master Server (I only have those 2 at the moment ¯\(ツ)/¯):
nano ~/nomad/client2.hcl
# Increase log verbosity
log_level = "DEBUG"

# Setup data dir
data_dir = "/tmp/client2"

# Give the agent a unique name. Defaults to hostname
name = "client2"

# Enable the client
client {
  enabled = true
  servers = ["127.0.0.1"]
}

# Modify our port to avoid a collision with server1
ports {
  http = 5657
}

# Because we will potentially have two clients talking to the same
# Docker daemon, we have to disable the dangling container cleanup,
# otherwise they will stop each other's work thinking it was orphaned.
plugin "docker" {
  config {
    gc {
      dangling_containers {
        enabled = false
      }
    }
  }
}
Now create the data directory and start the Nomad agent:
mkdir /tmp/client2
nomad agent -config client2.hcl
You can now check if the second Client was able to connect:
nomad node status

ID        DC   Name     Class   Drain  Eligibility  Status
f5893fd2  dc1  client1  <none>  false  eligible     ready
849470a4  dc1  client2  <none>  false  eligible     ready
Use the job run command to submit the job:
nomad job run example.nomad

==> Monitoring evaluation "b13a03df"
    Evaluation triggered by job "example"
    Evaluation within deployment: "5ce135ac"
    Allocation "2074bce6" created: node "849470a4", group "cache"
    Allocation "da4c9a66" created: node "f5893fd2", group "cache"
    Allocation "0bd967d0" created: node "f5893fd2", group "cache"
    Evaluation status changed: "pending" -> "complete"
==> Evaluation "b13a03df" finished with status "complete"
You can see that the Master allocated the deployment onto the both Client server.
nomad status example

ID            = example
Name          = example
Submit Date   = 2020-08-29T12:45:14Z
Type          = service
Priority      = 50
Datacenters   = dc1
Namespace     = default
Status        = running
Periodic      = false
Parameterized = false

Summary
Task Group  Queued  Starting  Running  Failed  Complete  Lost
cache       0       0         3        0       0         0

Latest Deployment
ID          = 9d27882a
Status      = failed
Description = Failed due to progress deadline

Deployed
Task Group  Desired  Placed  Healthy  Unhealthy  Progress Deadline
cache       3        3       0        0          2020-08-29T12:55:14Z

Allocations
ID        Node ID   Task Group  Version  Desired  Status    Created     Modified
be729abd  849470a4  cache       4        run      running   16m42s ago  13m42s ago
5daea777  f5893fd2  cache       4        run      running   16m42s ago  13m42s ago
88c1eeaa  f5893fd2  cache       4        run      running   16m42s ago  13m42s ago
nomad alloc status be729abd

ID                  = be729abd-865c-f70d-2557-0e364d066b81
Eval ID             = fd465084
Name                = example.cache[1]
Node ID             = 849470a4
Node Name           = client2
Job ID              = example
Job Version         = 4
Client Status       = running
Client Description  = Tasks are running
Desired Status      = run
Desired Description = <none>
Created             = 17m56s ago
Modified            = 14m56s ago
Deployment ID       = 9d27882a
Deployment Health   = unhealthy

Task "redis" is "running"
Task Resources
CPU        Memory           Disk     Addresses
4/500 MHz  952 KiB/256 MiB  300 MiB  db: 192.168.2.110:27149

Task Events:
Started At     = 2020-08-29T12:46:47Z
Finished At    = N/A
Total Restarts = 0
Last Restart   = N/A

Recent Events:
Time                  Type             Description
2020-08-29T12:48:14Z  Alloc Unhealthy  Task not running for min_healthy_time of 10s by deadline
2020-08-29T12:46:47Z  Started          Task started by client
2020-08-29T12:45:48Z  Driver           Docker image pull progress: Pulled 5/6 (24.59MiB/28.03MiB) layers: 0 waiting/1 pulling - est 121.5s remaining
2020-08-29T12:45:14Z  Driver           Downloading image
2020-08-29T12:45:14Z  Task Setup       Building Task Directory
2020-08-29T12:45:14Z  Received         Task received by client
WebUI
You can check out the Nomad UI on your Servers IP address and port 4646 e.g. http://192.168.2.110:4646/ui/jobs:
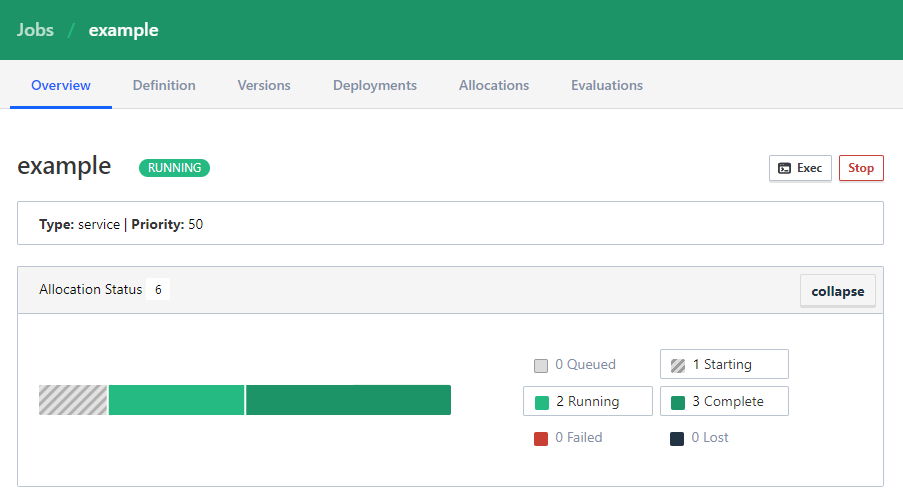
You can use the Stop button to stop the deployment.