Hashicorp Nomad Adding Encryption to your Cluster

Continuation of Hashicorp Nomad Dojo
Enable Transport Encryption for Nomad
The Nomad agent supports encrypting all of its network traffic. There are two separate encryption systems, one for gossip traffic, and one for HTTP and RPC:
- Serf: Used to communicate between Nomad servers. Frequently referred to as
gossip. Secured by a shared key. - HTTP: Used to communicate between CLI and Nomad agents. Secured by mTLS.
- RPC: Used to communicate between Nomad agents. Secured by mTLS.
Enable Gossip Encryption
Nomad server's gossip protocol that is used to communicate membership and liveness information can be encrypted with symmetric keys. Enabling gossip encryption requires you to set an encryption key when starting the Nomad server. The key must be a base64-encoded string of 32 random bytes. The Nomad CLI includes a operator keygen command for generating a new secure gossip encryption key:
nomad operator keygen
4kRkFQfcc3LU0BazP1ca+z==
Current and older versions of nomad operator keygen return 16 bytes; however, Nomad supports gossip encryption keys of 32 bytes as well. Supplying a 32 byte key enables AES-256 mode, where supplying a 16 byte key enables AES-128 mode. You can use OpenSSL to generate this key:
openssl rand -base64 32
IisA4F7Mu/RwGfBZelcsFzMlJ4+twnO5Z7eoTzD0T6c=
And put the same generated key into every server's configuration file nano /etc/nomad.d/server.hcl :
server {
  enabled = true

  ...

  # Encrypt gossip communication
  encrypt = "IisA4F7Mu/RwGfBZelcsFzMlJ4+twnO5Z7eoTzD0T6c="
}
Once all of the nodes have been restarted all gossip traffic will be encrypted between all of your server nodes.
Enable mTLS Encryption for Nomad
Creating Certificates
You can generate a private CA certificate and key with cfssl. Building cfssl requires a working Go 1.12+ installation:
wget https://go.dev/dl/go1.18.3.linux-amd64.tar.gz
rm -rf /usr/local/go && tar -C /usr/local -xzf go1.18.3.linux-amd64.tar.gz && rm go1.18.3.linux-amd64.tar.gz
Add go to path nano ~/.profile or nano ~/.zshrc (don't forget to source .zshrc):
export PATH=$PATH:/usr/local/go/bin
Check it it worked:
go version
go version go1.18.3 linux/amd64
Now we can build cfssl:
git clone https://github.com/cloudflare/cfssl.git
cd cfssl
make
Nomad mTLS CA Certificates
mkdir /etc/nomad.d/tls
cd /etc/nomad.d/tls
cfssl print-defaults csr | cfssl gencert -initca - | cfssljson -bare nomad-ca
The output will be:
ls -la /etc/nomad.d/tls

-rw-r--r-- 1 nomad-ca.csr
-rw------- 1 nomad-ca-key.pem
-rw-r--r-- 1 nomad-ca.pem
The CA key (nomad-ca-key.pem) will be used to sign certificates for Nomad nodes and must be kept private. The CA certificate (nomad-ca.pem) contains the public key necessary to validate Nomad certificates and therefore must be distributed to every node that requires access.
Nomad Node Certificates
Once you have a CA certificate and key you can generate and sign the certificates Nomad will use directly. Nomad certificates are signed with their region and role such as:
client.global.nomad: for a client node in the global regionserver.us-west.nomad: for a server node in the us-west region
To create certificates for the client and server in the cluster create the following configuration file as nano /etc/nomad.d/tls/cfssl.json:
{
  "signing": {
    "default": {
      "expiry": "87600h",
      "usages": ["signing", "key encipherment", "server auth", "client auth"]
    }
  }
}
Generate a certificate for the Nomad Master running the following command inside /etc/nomad.d/tls:
echo '{}' | cfssl gencert -ca=nomad-ca.pem -ca-key=nomad-ca-key.pem -config=cfssl.json \
-hostname="server.global.nomad,localhost,127.0.0.1" - | cfssljson -bare server
Generate a certificate for the Nomad client:
echo '{}' | cfssl gencert -ca=nomad-ca.pem -ca-key=nomad-ca-key.pem -config=cfssl.json \
-hostname="client.global.nomad,localhost,127.0.0.1" - | cfssljson -bare client
Generate a certificate for the CLI:
echo '{}' | cfssl gencert -ca=nomad-ca.pem -ca-key=nomad-ca-key.pem -profile=client \
- | cfssljson -bare cli
Your tls dir should now contain the following files:
ls -la /etc/nomad.d/tls

-rw-r--r-- cfssl.json
-rw-r--r-- cli.csr
-rw-r--r-- client.csr
-rw------- client-key.pem
-rw-r--r-- client.pem
-rw------- cli-key.pem
-rw-r--r-- cli.pem
-rw-r--r-- nomad-ca.csr
-rw------- nomad-ca-key.pem
-rw-r--r-- nomad-ca.pem
-rw-r--r-- server.csr
-rw------- server-key.pem
-rw-r--r-- server.pem
Since we use the
nomaduser on our Master node all those files need to bechown nomad:nomad /etc/nomad.d/tls/*! The Minion nodes use therootuser - so permissions there don't need to be changed.
Each Nomad node should have the appropriate key (-key.pem) and certificate (.pem) file for its region and role. In addition each node needs the CA's public certificate (nomad-ca.pem).
Configuring the Nomad Master
Next Nomad must be configured to use the newly-created key and certificates for mTLS by adding the tls block nano /etc/nomad.d/server.hcl:
# Require TLS
tls {
  http = true
  rpc  = true

  ca_file   = "/etc/nomad.d/tls/nomad-ca.pem"
  cert_file = "/etc/nomad.d/tls/server.pem"
  key_file  = "/etc/nomad.d/tls/server-key.pem"

  verify_server_hostname = true
  verify_https_client    = false
}
If
verify_server_hostnameis set to false the node's certificate will be checked to ensure it is signed by the same CA, but its role and region will not be verified. This means any service with a certificate signed by same CA as Nomad can act as a client or server of any region.
verify_https_clientrequires HTTP API clients to present a certificate signed by the same CA as Nomad's certificate. It may be disabled to allow HTTP API clients (e.g. Nomad CLI, Consul, or curl) to communicate with the HTTPS API without presenting a client-side certificate. Ifverify_https_clientis enabled only HTTP API clients presenting a certificate signed by the same CA as Nomad's certificate are allowed to access Nomad.
Enabling verify_https_client effectively protects Nomad from unauthorized network access at the cost of losing Consul HTTPS health checks for agents.
Configuring your Nomad Minions
The Nomad client configuration is similar to the server configuration. The biggest difference is in the certificate and key used for configuration nano /etc/nomad.d/client.hcl:
# Require TLS
tls {
  http = true
  rpc  = true

  ca_file   = "/etc/nomad.d/tls/nomad-ca.pem"
  cert_file = "/etc/nomad.d/tls/client.pem"
  key_file  = "/etc/nomad.d/tls/client-key.pem"

  verify_server_hostname = true
  verify_https_client    = false
}
Make sure that those three files are added to each minion nomad-ca.pem, client.pem, client-key.pem.
Running with TLS
Restart the Nomad service on all your nodes inside the cluster and check the status:
service nomad restart
service nomad status
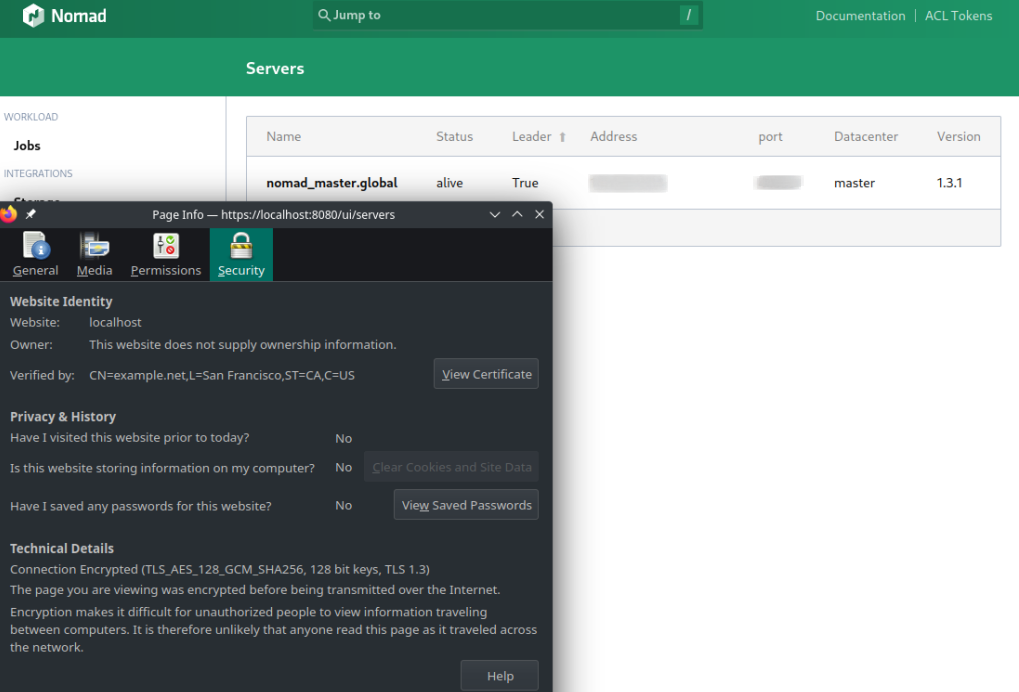
Accessing the Nomad UI now requires you to use HTTPS and accept your self-signed certificate:
But now we are no longer able to just use the HTTP API with the Nomad CLI:
nomad node status
Error querying node status: Unexpected response code: 400
(Client sent an HTTP request to an HTTPS server.)
For this we now also have to provide the certificates as in:
nomad node status \
    -ca-cert=/etc/nomad.d/tls/nomad-ca.pem \
    -client-cert=/etc/nomad.d/tls/cli.pem \
    -client-key=/etc/nomad.d/tls/cli-key.pem \
    -address=https://127.0.0.1:4646
To make this process a little bit less painful we can simply add those parameter to our shell config - e.g. ~/.bashrc or ~/.zshrc (don't forget to source ~/.zshrc afterwards):
export NOMAD_ADDR=https://127.0.0.1:4646
export NOMAD_CACERT=/etc/nomad.d/tls/nomad-ca.pem
export NOMAD_CLIENT_CERT=/etc/nomad.d/tls/cli.pem
export NOMAD_CLIENT_KEY=/etc/nomad.d/tls/cli-key.pem