Hashicorp Nomad Dojo

Setup
See for Hashicorp Nomad Refresher for the initial steps and the Hashicorp Nomad Dojo for the following
Run an Agent in Dev Mode
nomad --version
Nomad v1.3.1 (2b054e38e91af964d1235faa98c286ca3f527e56)
nomad agent -dev -bind 0.0.0.0 -log-level INFO
Deploying a Job
Job Specification
Create a Jobfile frontend.nomad:
- Name your job and assign it to a datacenter. Since we did not define a datacenter before the node is assigned to the default value of
dc1. You can verify this by runningnomad node status. - Set the type to be a
service- A service is a long-lived process that should never go down. - Set the
groupyour service belongs to - If you're coming from the Kubernetes world, think of group as a pod (where you can run multiple containers together under the same network stack). - Inside the group stanza you can set a
countthat defines the number of instances of the service that will be run by the group. Set it to1. - Finally, the
taskis section is used to define thedriver(how you want to deploy your app - we choose docker).
frontend.nomad
job "frontend" {
  datacenters = ["dc1"]
  type = "service"

  group "frontend" {
    count = 1

    task "frontend" {
        driver = "docker"
        config {
          image = "thedojoseries/frontend:latest"
        }
      }
   }
}
Plan and Run the Job
To check if you're able to deploy this job, you can use the command:
nomad plan frontend.nomad

+ Job: "frontend"
+ Task Group: "frontend" (1 create)
  + Task: "frontend" (forces create)

Scheduler dry-run:
- All tasks successfully allocated.

Job Modify Index: 0
To submit the job with version verification run:

nomad job run -check-index 0 frontend.nomad
Now that the job dry-run was successful we can run the plan with:
nomad job run -check-index 0 frontend.nomad

==> 2022-06-04T12:51:28+02:00: Monitoring evaluation "0fb28cb9"
    2022-06-04T12:51:28+02:00: Evaluation triggered by job "frontend"
    2022-06-04T12:51:28+02:00: Evaluation within deployment: "d6acae43"
    2022-06-04T12:51:28+02:00: Allocation "7d403280" created: node "9970f13f", group "frontend"
    2022-06-04T12:51:28+02:00: Evaluation status changed: "pending" -> "complete"
==> 2022-06-04T12:51:28+02:00: Evaluation "0fb28cb9" finished with status "complete"
==> 2022-06-04T12:51:28+02:00: Monitoring deployment "d6acae43"
  ✓ Deployment "d6acae43" successful

    2022-06-04T12:51:55+02:00
    ID          = d6acae43
    Job ID      = frontend
    Job Version = 0
    Status      = successful
    Description = Deployment completed successfully

    Deployed
    Task Group  Desired  Placed  Healthy  Unhealthy  Progress Deadline
    frontend    1        1       1        0          2022-06-04T13:01:54+02:00
Verify with nomad status frontend that the service is up-and-running.
Building a Multi-Node Cluster
Make sure that the following ports are open on your Nomad master server - I am not going to open the HTTP port since I will use the Nomad UI through an SSH tunnel and do not plan on using the HTTP REST interface Nomad supplies (the Nomad clients will connect using the RPC interface instead):
ufw allow 4647,4648/tcp
ufw reload
Configure the Server
mkdir -p /opt/nomad/data
nano /etc/nomad.d/server.hcl
## https://www.nomadproject.io/docs/agent/configuration
name = "nomad_master"
datacenter = "instaryun"
data_dir = "/opt/nomad/data"
bind_addr = "0.0.0.0"

advertise {
  http = "0.0.0.0"
  rpc  = "my.server.com"
  serf = "my.server.com"
}

ports {
  http  = 4646
  rpc  = 4647
  serf = 4648
}

server {
  enabled = true
  bootstrap_expect = 1
}

## https://www.nomadproject.io/docs/agent/configuration/index.html#log_level
## [WARN|INFO|DEBUG]
log_level = "DEBUG"
log_rotate_duration = "30d"
log_rotate_max_files = 12
Start the Server
nomad agent -config /etc/nomad.d/server.hcl
nomad server members

Name                 Address        Port  Status  Leader  Build  Datacenter
nomad_master.global  my.server.com  4647  alive   true   1.3.1  instaryun
Configure the Client
Setting up the Client Server for Production:
Download
wget https://releases.hashicorp.com/nomad/1.3.1/nomad_1.3.1_linux_amd64.zip
wget https://releases.hashicorp.com/nomad/1.3.1/nomad_1.3.1_SHA256SUMS

cat nomad_1.3.1_SHA256SUMS
d16dcea9fdfab3846e749307e117e33a07f0d8678cf28cc088637055e34e5b37  nomad_1.3.1_linux_amd64.zip

sha256sum nomad_1.3.1_linux_amd64.zip
d16dcea9fdfab3846e749307e117e33a07f0d8678cf28cc088637055e34e5b37  nomad_1.3.1_linux_amd64.zip
Installation
unzip ./nomad_1.3.1_linux_amd64.zip
rm ./nomad_1.3.1_linux_amd64.zip && rm ./nomad_1.3.1_SHA256SUMS
mv nomad /usr/bin/nomad

nomad -v
Nomad v1.3.1 (2b054e38e91af964d1235faa98c286ca3f527e56)
Configuration
ufw allow 4647,4648/tcp
ufw reload
nomad -autocomplete-install
complete -C /usr/bin/nomad nomad
useradd --system --home /etc/nomad.d --shell /bin/false nomad
mkdir /etc/nomad.d
mkdir -p /opt/nomad/data
nano /etc/nomad.d/client.hcl
## https://www.nomadproject.io/docs/agent/configuration
name = "my_nomad_client"
datacenter = "instaryun"
data_dir = "/opt/nomad/data"
bind_addr = "0.0.0.0"

advertise {
  http = "0.0.0.0"
  rpc  = "my.server.com"
  serf = "my.server.com"
}

ports {
  http = 4646
  rpc  = 4647
  serf = 4648
}

client {
  enabled = true
  servers = ["my.nomad.master.com:4647"]
}

server {
  enabled = false
}

## https://www.nomadproject.io/docs/agent/configuration/index.html#log_level
## [WARN|INFO|DEBUG]
log_level = "DEBUG"
log_rotate_duration = "30d"
log_rotate_max_files = 12
Start the Client
For now I am going to run the client manually:
nomad agent -config /etc/nomad.d/client.hcl
Verify that it is up in another terminal:
nomad node status
ID        DC         Name           Class   Drain  Eligibility  Status
005f708b  instaryun  my_nomad_client  <none>  false  eligible     ready
Later I will make use of SystemD to run Nomad automatically:
nano /etc/systemd/system/nomad.service
[Unit]
Description=Nomad
Documentation=https://www.nomadproject.io/docs/
Wants=network-online.target
After=network-online.target

# When using Nomad with Consul it is not necessary to start Consul first. These
# lines start Consul before Nomad as an optimization to avoid Nomad logging
# that Consul is unavailable at startup.
#Wants=consul.service
#After=consul.service

[Service]

# Nomad server should be run as the nomad user. Nomad clients
# should be run as root
User=nomad
Group=nomad

ExecReload=/bin/kill -HUP $MAINPID
ExecStart=/usr/bin/nomad agent -config /etc/nomad.d
KillMode=process
KillSignal=SIGINT
LimitNOFILE=65536
LimitNPROC=infinity
Restart=on-failure
RestartSec=2

## Configure unit start rate limiting. Units which are started more than
## *burst* times within an *interval* time span are not permitted to start any
## more. Use `StartLimitIntervalSec` or `StartLimitInterval` (depending on
## systemd version) to configure the checking interval and `StartLimitBurst`
## to configure how many starts per interval are allowed. The values in the
## commented lines are defaults.

# StartLimitBurst = 5

## StartLimitIntervalSec is used for systemd versions >= 230
# StartLimitIntervalSec = 10s

## StartLimitInterval is used for systemd versions < 230
# StartLimitInterval = 10s

TasksMax=infinity
OOMScoreAdjust=-1000

[Install]
WantedBy=multi-user.target
Make sure that the Nomad user has access to the data directory:
chown -R nomad:nomad /opt/nomad/*
And start the service:
systemctl enable nomad.service
service nomad start && service nomad status
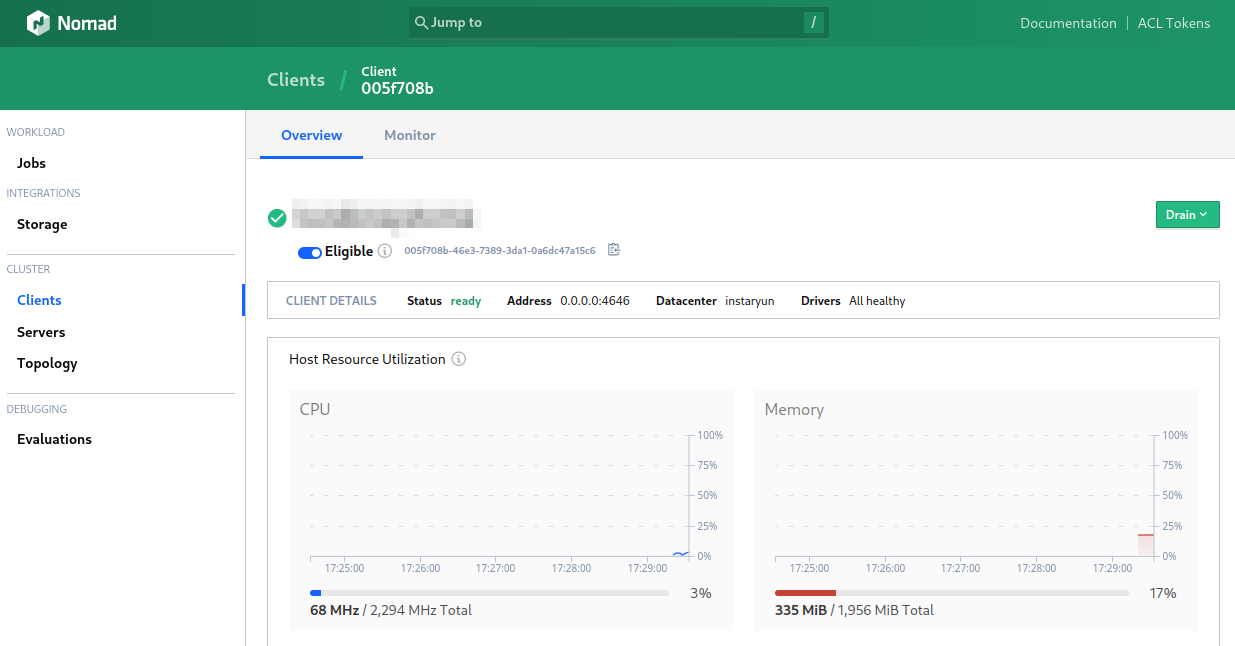
Use the Nomad UI to Check on your Cluster
If you opened the HTTP Port 4646 on your Nomad master server you can now access the Nomad web interface using your browser. Since I kept this port closed I will tunnel it through to my local machine using SSH:
ssh –L 8080:localhost:4646 root@nomad.master.server.com -p ssh.port
Which allows me to access the UI via http://localhost:8080 on my local machine - and lo and behold the client is listed: