Tesseract OCR on Arch Linux

- Part I - Tesseract OCR on Arch Linux
- Part II - spaCy NER on Arch Linux
- Part III - spaCy NER Predictions
Tesseract is an optical character recognition engine for various operating systems. It is free software, released under the Apache License. Originally developed by Hewlett-Packard as proprietary software in the 1980s, it was released as open source in 2005 and development has been sponsored by Google since 2006.
In 2006, Tesseract was considered one of the most accurate open-source OCR engines available.
- Project Setup
- Loading Image files from Disk
- Text Extraction
- Data Preparation
- Import all Cards
- Extract all Text
- Write Extracted Text to File
- Labeling your Data
Project Setup
Make sure you have Python installed and added to PATH:
python --version
Python 3.9.7

pip --version
pip 21.3.1
Create a work directory and set up a virtual environment:
mkdir -p opt/Python/pyOCR
python -m venv .env
source .env/bin/activate
Create a file dependencies.txt with all the necessary dependencies:
numpy
pandas
scipy
matplotlib
pillow
opencv-python
opencv-contrib-python
jupyter
And install them via the Python package manager:
pip install -r dependencies.txt
Install Tesseract globally with PACMAN:
pacman -Syu tesseract

looking for conflicting packages...
Packages (2) leptonica-1.82.0-1  tesseract-4.1.1-7
Verify that the installation was sucessful:
tesseract -v
tesseract 4.1.1
Install the trainings data you need depending on your language requirement - e.g. English:
sudo pacman -S tesseract-data-eng
Now we can add our last dependency - a libray that allows us to use Tesseract in our program:
pip install pytesseract
Successfully installed Pillow-8.4.0 pytesseract-0.3.8
I am going to use a Jupyter notebook to experiment with Tesseract:
jupyter notebook

When you are bale to import all dependencies without getting an error message you are all set!
Loading Image files from Disk
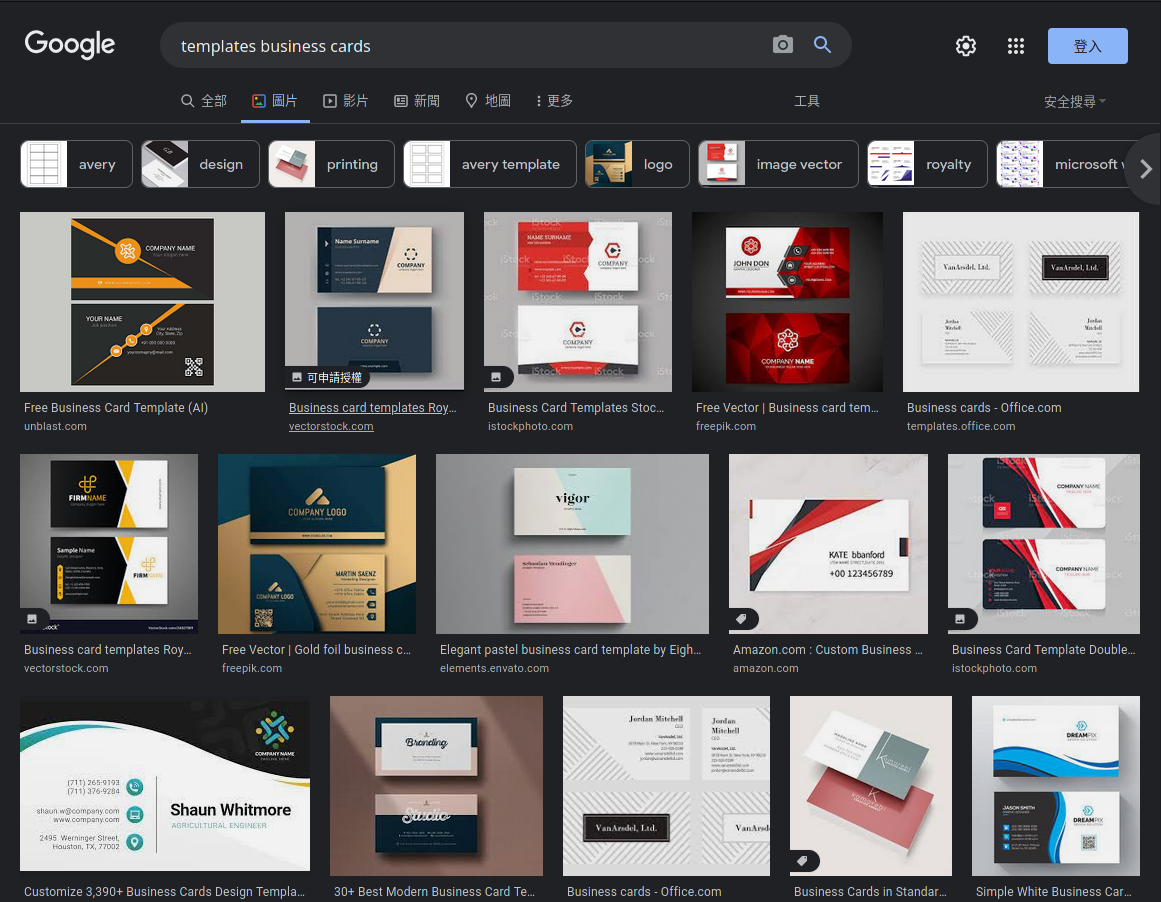
I want to train a model that allows me to extract contact information from business cards. To get started you can download card templates:

Download them to ./images and try to import them into your notebook using OpenCV and Pillow:
import numpy as np
import pandas as pd
import PIL as pl
import cv2 as cv
import pytesseract as ts

# Pillow
# Use the full path here
img_pl = pl.Image.open('/opt/Python/pyOCR/images/card_46.jpg')
img_pl

# OpenCV
# Use the full path here
img_cv = cv2.imread('/opt/Python/pyOCR/images/card_46.jpg')
cv.startWindowThread()
cv.imshow('Business Card', img_cv)
cv.waitKey(0)
cv.destoyAllWindows()
Pillow returns a Jpg image file, while OpenCV returns an array:
type(img_pl) #PIL.JpegImagePlugin.JpegImageFile

type(img_cv) #numpy.ndarray
There seems to be an issue with the OpenCV destroyAllWindows method under Linux. I will exclude it for now and work with Pillow instead.
Text Extraction
text_pl = ts.image_to_string(img_pl)
print(text_pl)
Test your business cards and see which one are readable and which one are not. I downloaded quite a few that were too low in resolution and had to be discarded.
data = ts.image_to_data(img_pl)
Now that we can read the text we now have to write it into an data object to be able to work with it. The data is structured by \n and \t markers:
'level\tpage_num\tblock_num\tpar_num\tline_num\tword_num\tleft\ttop\twidth\theight\tconf\ttext\n1\t1\t0\t0\t0\t0\t0\t0\t875\t518\t-1\t\n2\t1\t1\t0\t0\t0\t532\t37\t306\t38\t-1\t\n3\t1\t1\t1\t0\t0\t532\t37\t306\t38\t-1\t\n4\t1\t1\t1\t1 ...
We can clean up this data with a map:
dataList = list(map(lambda x: x.split('\t'),data.split('\n')))
We can now wrap this data into a Pandas Dataframe:
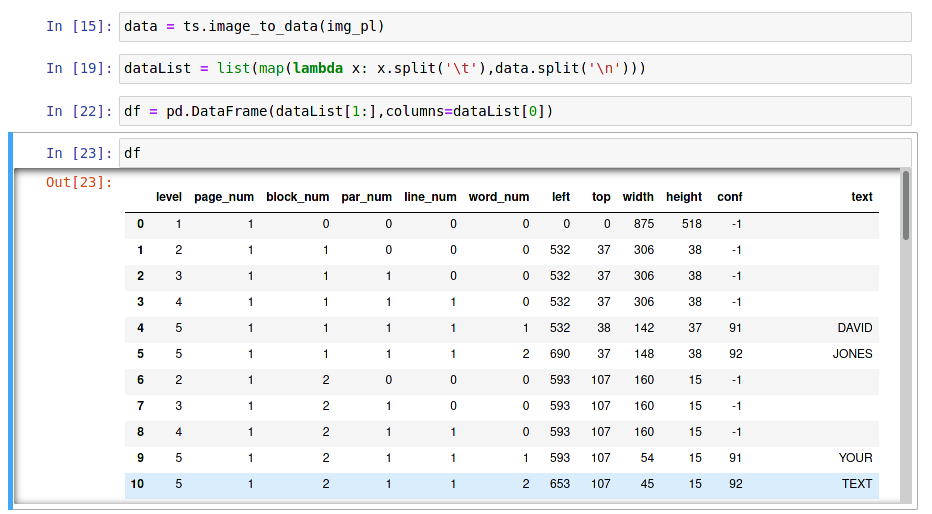
df = pd.DataFrame(dataList[1:],columns=dataList[0])
df.info()
<class 'pandas.core.frame.DataFrame'>
RangeIndex: 56 entries, 0 to 55
Data columns (total 12 columns):
 #   Column     Non-Null Count  Dtype
---  ------     --------------  -----
 0   level      56 non-null     object
 1   page_num   55 non-null     object
 2   block_num  55 non-null     object
 3   par_num    55 non-null     object
 4   line_num   55 non-null     object
 5   word_num   55 non-null     object
 6   left       55 non-null     object
 7   top        55 non-null     object
 8   width      55 non-null     object
 9   height     55 non-null     object
 10  conf       55 non-null     object
 11  text       55 non-null     object
dtypes: object(12)
memory usage: 5.4+ KB
Note the height column corresponds to the font size of your word. You can see a confidence drop when the size is too small.
df.head(10)

Data Preparation
df.dropna(inplace=True) # Drop empty values and rows
col_int = ['level','page_num','block_num','par_num','line_num','word_num','left','top','width','height','conf']
df[col_int] = df[col_int].astype(int) # Change all columns with number values to type int
df.dtypes
level         int64
page_num      int64
block_num     int64
par_num       int64
line_num      int64
word_num      int64
left          int64
top           int64
width         int64
height        int64
conf          int64
text         object
dtype: object
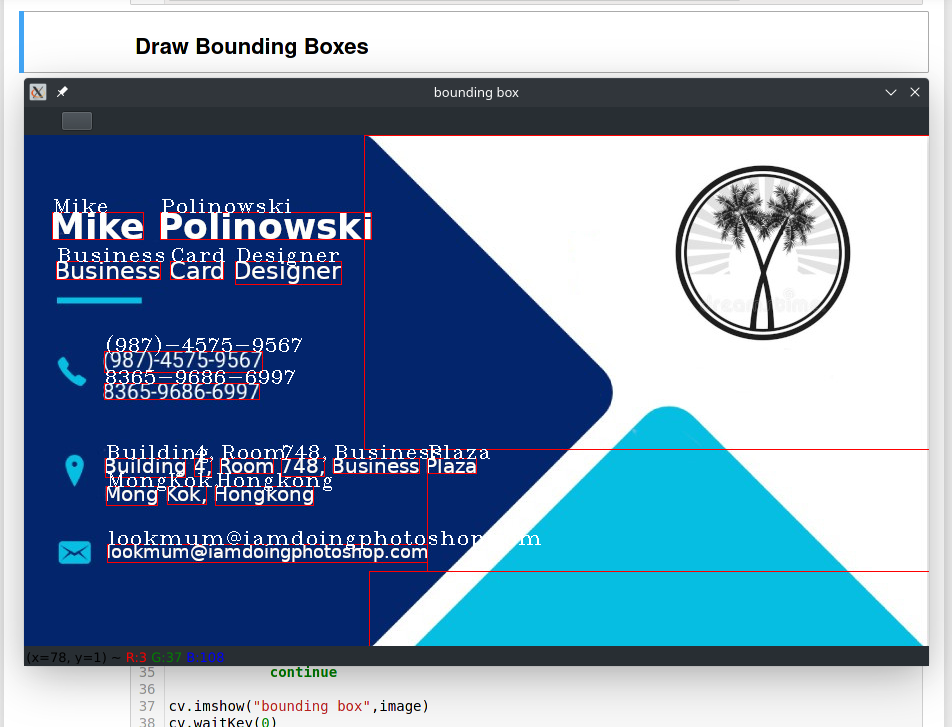
Drawing Bounding Box
image = img_cv.copy()
level = 'word'
for l,x,y,w,h,c,t in df[['level','left','top','width','height','conf','text']].values:
    #print(l,x,y,w,h,c)

    if level == 'page':
          if l == 1:
                cv.rectangle(image,(x,y),(x+w,y+h),(0,0,0,),2)
          else:
            continue

    elif level == 'block':
          if l == 2:
                cv.rectangle(image,(x,y),(x+w,y+h),(255,0,0,),1)
          else:
            continue

    elif level == 'paragraph':
          if l == 3:
                cv.rectangle(image,(x,y),(x+w,y+h),(0,255,0,),1)
          else:
            continue

    elif level == 'line':
          if l == 4:
                cv.rectangle(image,(x,y),(x+w,y+h),(255,0,51,),1)
          else:
            continue

    elif level == 'word':
          if l == 5:
                cv.rectangle(image,(x,y),(x+w,y+h),(0,0,255,),1)
                cv.putText(image,t,(x,y),cv.FONT_HERSHEY_COMPLEX_SMALL,1,(255,255,255),1)
          else:
            continue

cv.imshow("bounding box",image)
cv.waitKey(0)
cv.destoyAllWindows()
cv.waitKey(1)

Import all Cards
import numpy as np
import pandas as pd
import cv2 as cv
import pytesseract as ts

import os
from glob import glob
from tqdm import tqdm

import warnings
warnings.filterwarnings('ignore')

imgPaths = glob('/opt/Python/pyOCR/images/*.jpg')
Try print(imgPaths) to see if your images are found - note that I had to use the absolute path to my images folder here.
Extract the filename:
imgPath = imgPaths[0]
_, filename = os.path.split(imgPath)
Run print(filename) - now it only returns the image name instead of the entire path.
Extract all Text
image = cv.imread(imgPath)
data = ts.image_to_data(image)

dataList = list(map(lambda x: x.split('\t'),data.split('\n')))
df = pd.DataFrame(dataList[1:], columns=dataList[0])
Print the value of df to see if your image was sucessfully read.
Now we can filter for text (level=5) that has a suitable confidence value (e.g. >30%):
df.dropna(inplace=True)
df['conf'] = df['conf'].astype(int)
textData = df.query('conf >= 30')

businessCard = pd.DataFrame()
businessCard['text'] = textData['text']
businessCard['id'] = filename
Print out businessCard and you will see all the text that was discovered on your first (index 0) business card that had a confidence level of over 30%.
Now all we have to do is to take this code and run a loop over it to capture all images inside the directory:
allBusinessCards = pd.DataFrame(columns=['id', 'text'])

for imgPath in tqdm(imgPaths,desc="Business Card"):

    # Get Filenames
    _, filename = os.path.split(imgPath)
    # Extract Data
    image = cv.imread(imgPath)
    data = ts.image_to_data(image)
    # Write Data to Frame
    dataList = list(map(lambda x: x.split('\t'),data.split('\n')))
    df = pd.DataFrame(dataList[1:], columns=dataList[0])
    # Drop Everything that is not useful
    df.dropna(inplace=True)
    df['conf'] = df['conf'].astype(int)
    textData = df.query('conf >= 30')
    # Define a Business Card Entity
    businessCard = pd.DataFrame()
    businessCard['text'] = textData['text']
    businessCard['id'] = filename
    # Add Card to All Cards
    allBusinessCards = pd.concat((allBusinessCards,businessCard))
Write Extracted Text to File
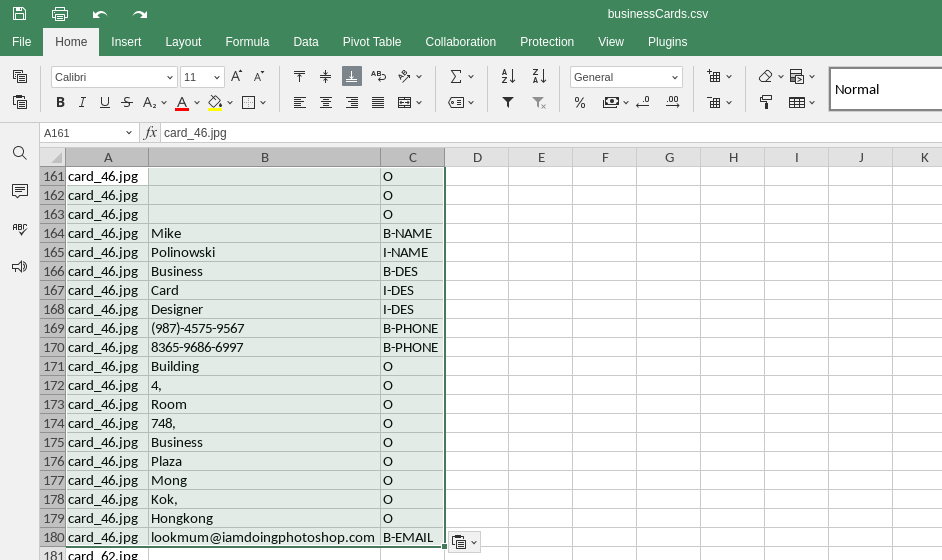
allBusinessCards.to_csv('businessCards.csv', index=False)
The data will be written to ./src/businessCards.csv for further processing.
Labeling your Data
Mark the start and end of each word of importance:
| B | Beginning |
| I | Inside |
| O | Outside |
And define the entities you want to search for:
| NAME | Name |
| DES | Designation |
| ORG | Organisation |
| PHONE | Phone Number |
| Email Address | |
| WEB | Website |
