Tensorflow2 Crash Course - Part II

This set of Notebooks provides a complete set of code to be able to train and leverage your own custom object detection model using the Tensorflow Object Detection API.
This article is based on a Tutorial by @nicknochnack.
Training
- Tensorflow2 Crash Course Part I
- Tensorflow2 Crash Course Part II
- Tensorflow2 Crash Course Part III
- Tensorflow2 Crash Course Part IV
- Tensorflow2 Crash Course Part V
Download Pre-trained Model
Begin training process by opening training_the_model.py.ipynb, this notebook will walk you through installing Tensorflow Object Detection, making detections, saving and exporting your model:
- Precision: True Positiv / (True Positiv + False Positive)
- Recall: True Positiv / (True Positiv + False Negative)
Detection Models: Tensorflow provides a collection of detection models pre-trained on the COCO 2017 dataset. These models can be useful for out-of-the-box inference if you are interested in categories already in those datasets.
The model table gives you both a Speed parameter as well as a COCO mAP that correlates with the accuracy of the model. The higher the speed the less accurate the detection will become.
Install TFOD
During this process the Notebook will install Tensorflow Object Detection. You should ideally receive a notification indicating that the API has installed successfully with the last line stating:
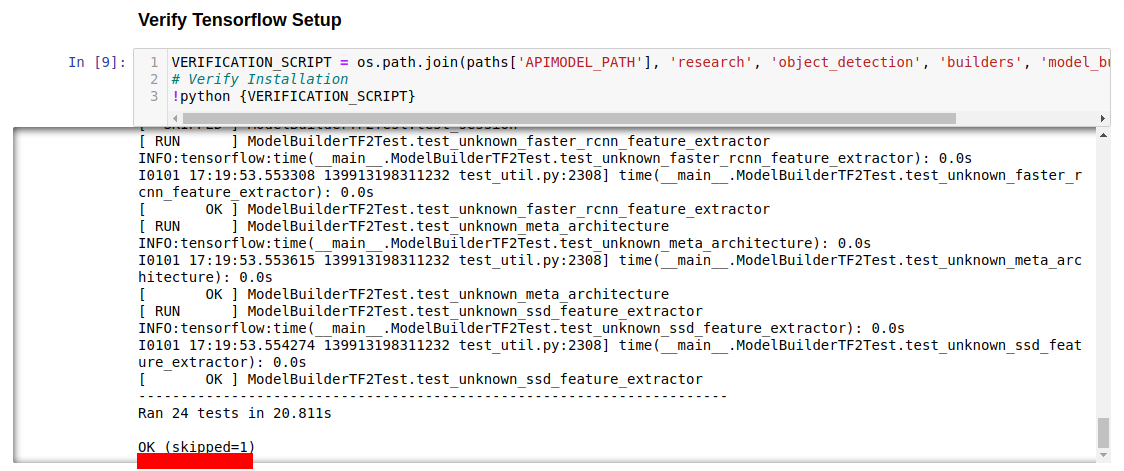
If not, resolve installation errors by referring to the Error Guide.md in this folder.
Prepare your Model
The Step Get your pretrained Model downloads the model you defined under PRETRAINED_MODEL_PATH and unzips it. The following steps provide a Label Map with the labels you assigned to your images as well as the location of all your training and testing images for the TF Records.
The model that was downloaded now has to be configured with the correct paths according to our project structure. This can be done in the following file:
Tensorflow/workspace/pre-trained-models/ssd_mobilenet_v2_fpnlite_320x320_coco17_tpu-8/pipeline.config
The file is going to be copied to the trainings folder and all the missing pieces will be automatically filled out. Here we have the 5 instances that need to be defined:
fine_tune_checkpoint: "PATH_TO_BE_CONFIGURED"
  num_steps: 50000
  startup_delay_steps: 0.0
  replicas_to_aggregate: 8
  max_number_of_boxes: 100
  unpad_groundtruth_tensors: false
  fine_tune_checkpoint_type: "classification"
  fine_tune_checkpoint_version: V2
}
train_input_reader {
  label_map_path: "PATH_TO_BE_CONFIGURED"
  tf_record_input_reader {
    input_path: "PATH_TO_BE_CONFIGURED"
  }
}
eval_config {
  metrics_set: "coco_detection_metrics"
  use_moving_averages: false
}
eval_input_reader {
  label_map_path: "PATH_TO_BE_CONFIGURED"
  shuffle: false
  num_epochs: 1
  tf_record_input_reader {
    input_path: "PATH_TO_BE_CONFIGURED"
  }
As well as the number of classes the model has to handle. By default this is set to 90. In our case we are only looking for 4 different hand gestures:
num_classes: 4
Train the Model
You may choose to train the model from within the notebook. I have noticed however that training inside of a separate terminal you're able to display live loss metrics. To do so run the following command from the root dir of your app (and within the virtual environment):
python Tensorflow/models/research/object_detection/model_main_tf2.py --model_dir=Tensorflow/workspace/models/my_ssd_mobnet --pipeline_config_path=Tensorflow/workspace/models/my_ssd_mobnet/pipeline.config --num_train_steps=2000
This will run a 2000 steps trainings run for the initial training:
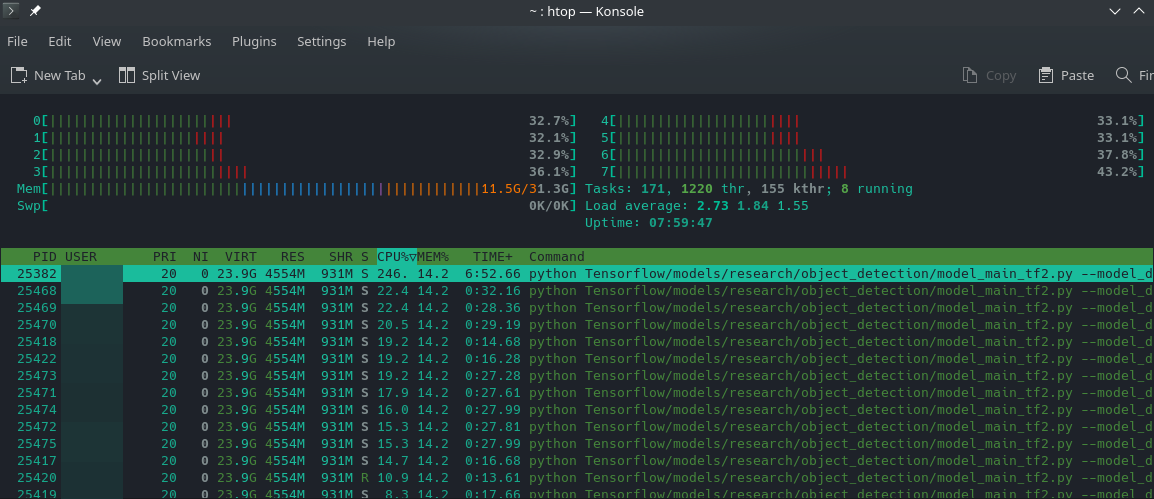
How to check the GPU load on Linux ? Mem load went up during the run. CPU load stayed low - I guess this means the calculations were run on my GPU ? There is a strang warning in the logs
returning NUMA node zero- though apparently you can ignore it:
2022-01-01 19:28:12.478293: I tensorflow/stream_executor/cuda/cuda_gpu_executor.cc:939] successful NUMA node read from SysFS had negative value (-1), but there must be at least one NUMA node, so returning NUMA node zero
2022-01-01 19:28:12.508530: I tensorflow/core/platform/cpu_feature_guard.cc:151] This TensorFlow binary is optimized with oneAPI Deep Neural Network Library (oneDNN) to use the following CPU instructions in performance-critical operations:  AVX2 FMA
To enable them in other operations, rebuild TensorFlow with the appropriate compiler flags.
2022-01-01 19:28:13.763340: I tensorflow/core/common_runtime/gpu/gpu_device.cc:1525] Created device /job:localhost/replica:0/task:0/device:GPU:0 with 4691 MB memory:  -> device: 0, name: NVIDIA GeForce GTX 1060 6GB, pci bus id: 0000:01:00.0, compute capability: 6.1
UPDATE run the nvidia-smi command and you will see the python process occupying the majority of your GPU resources:

The training will print out an intermediate result every 100 steps during which you should see a constant decrease of the Loss Parameter:
INFO:tensorflow:Step 2000 per-step time 0.119s
I0101 19:33:06.292452 140223989212992 model_lib_v2.py:705] Step 2000 per-step time 0.119s
INFO:tensorflow:{'Loss/classification_loss': 0.09995355,
All trainings data is stored in
/opt/Python/TFODCourse/Tensorflow/workspace/models/my_ssd_mobnet!
Evaluate the Model
Again, you can use the Jupyter notebook a=or just copy the command into your terminal:
python Tensorflow/models/research/object_detection/model_main_tf2.py --model_dir=Tensorflow/workspace/models/my_ssd_mobnet --pipeline_config_path=Tensorflow/workspace/models/my_ssd_mobnet/pipeline.config --checkpoint_dir=Tensorflow/workspace/models/my_ssd_mobnet
This will give you the average Precision and Recall for your model - both should ideally be 1 and are already ok-ish with 0.706 and 0.713 in my case:
Accumulating evaluation results...
DONE (t=0.02s).
 Average Precision  (AP) @[ IoU=0.50:0.95 | area=   all | maxDets=100 ] = 0.706
 Average Precision  (AP) @[ IoU=0.50      | area=   all | maxDets=100 ] = 1.000
 Average Precision  (AP) @[ IoU=0.75      | area=   all | maxDets=100 ] = 0.881
 Average Precision  (AP) @[ IoU=0.50:0.95 | area= small | maxDets=100 ] = -1.000
 Average Precision  (AP) @[ IoU=0.50:0.95 | area=medium | maxDets=100 ] = -1.000
 Average Precision  (AP) @[ IoU=0.50:0.95 | area= large | maxDets=100 ] = 0.706
 Average Recall     (AR) @[ IoU=0.50:0.95 | area=   all | maxDets=  1 ] = 0.713
 Average Recall     (AR) @[ IoU=0.50:0.95 | area=   all | maxDets= 10 ] = 0.725
 Average Recall     (AR) @[ IoU=0.50:0.95 | area=   all | maxDets=100 ] = 0.744
 Average Recall     (AR) @[ IoU=0.50:0.95 | area= small | maxDets=100 ] = -1.000
 Average Recall     (AR) @[ IoU=0.50:0.95 | area=medium | maxDets=100 ] = -1.000
 Average Recall     (AR) @[ IoU=0.50:0.95 | area= large | maxDets=100 ] = 0.744
You can optionally evaluate your model inside of Tensorboard. Once the model has been trained and you have run the evaluation command. Open Tensorboard for the Evaluation Metrics with the following command:
tensorboard --logdir=Tensorflow/workspace/models/my_ssd_mobnet/eval

Serving TensorBoard on localhost; to expose to the network, use a proxy or pass --bind_all
TensorBoard 2.7.0 at http://localhost:6006/ (Press CTRL+C to quit)
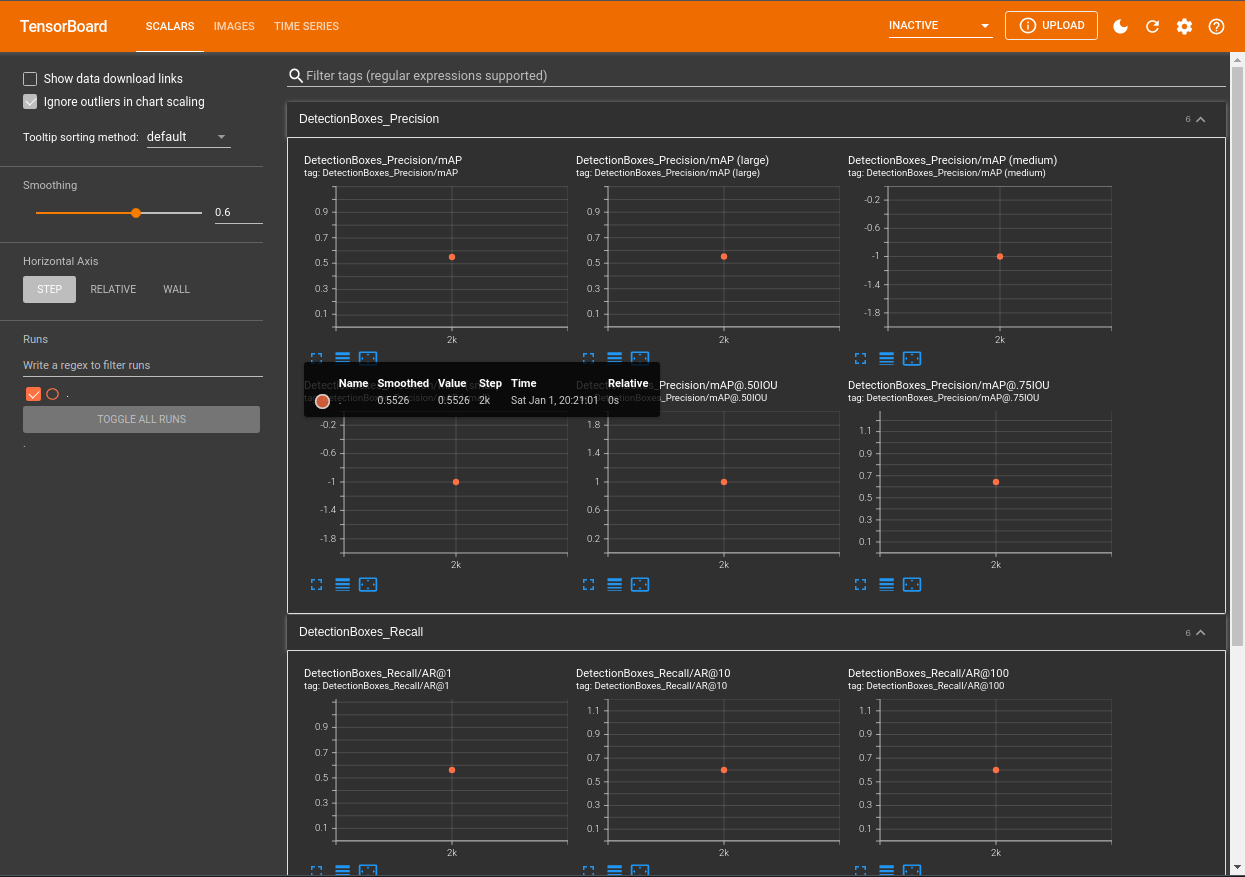
Tensorboard will be accessible through your browser and you will be able to see metrics including mAP - mean Average Precision, and Recall. Currently we only have one data point. But the metrics will be tracked over every trainings run.
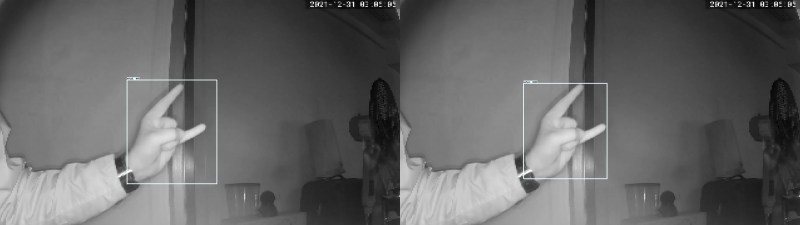
The board also gives us access to result images:
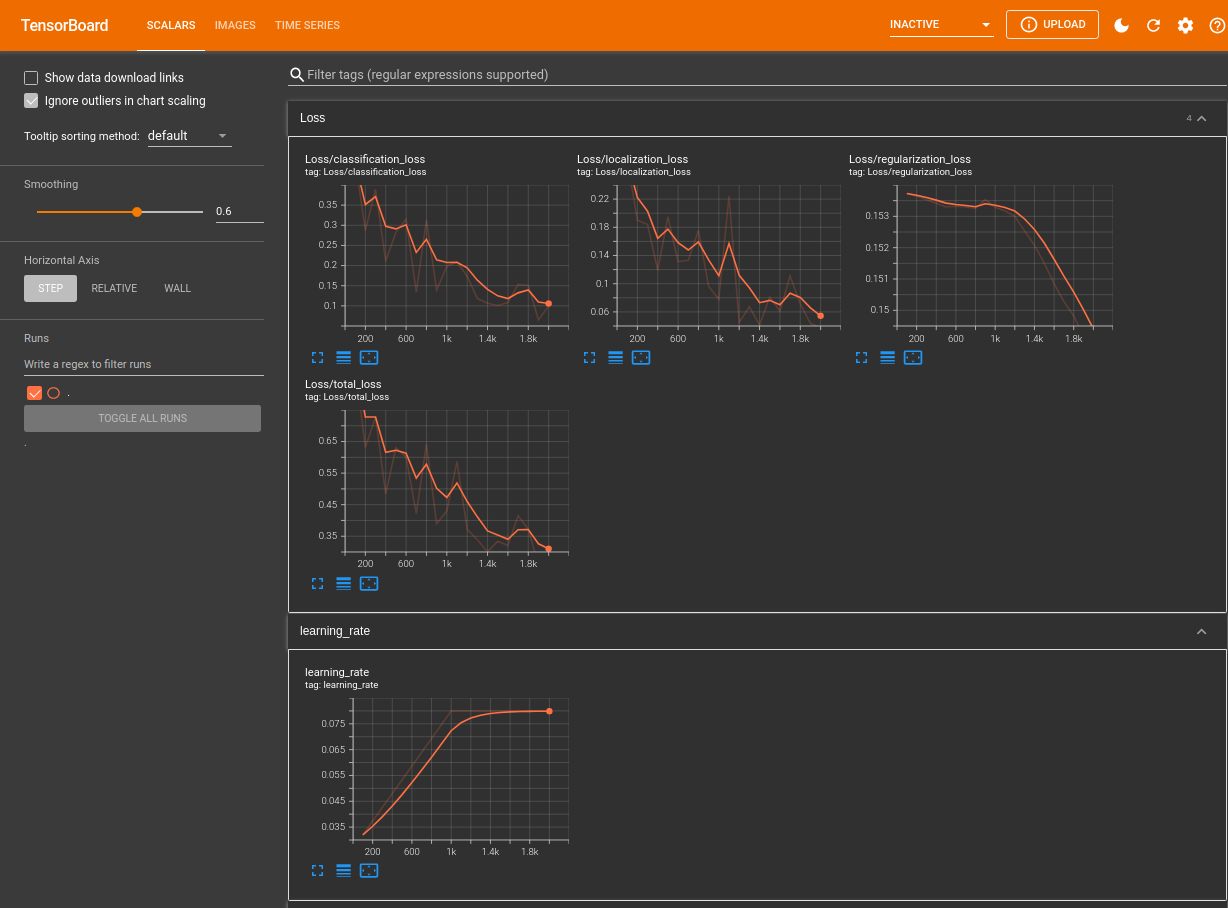
Your Loss Metrics are available from:
tensorboard --logdir=Tensorflow/workspace/models/my_ssd_mobnet/train