MiDaS Depth Vision

MiDaS - see Towards Robust Monocular Depth Estimation: Mixing Datasets for Zero-shot Cross-dataset Transfer by René Ranftl, Katrin Lasinger, David Hafner, Konrad Schindler, Vladlen Koltun - computes relative inverse depth from a single image. The repository provides multiple models that cover different use cases ranging from a small, high-speed model to a very large model that provide the highest accuracy. The models have been trained on 10 distinct datasets using multi-objective optimization to ensure high quality on a wide range of inputs.
MiDaS depends on timm:
pip install timm
import cv2
import os
import torch
import urllib.request

import matplotlib.pyplot as plt
Working with Image Files
url, filename = ("https://cdn.wallpapersafari.com/45/74/Ye9R0H.jpg", "bridge.jpg")
urllib.request.urlretrieve(url, filename)
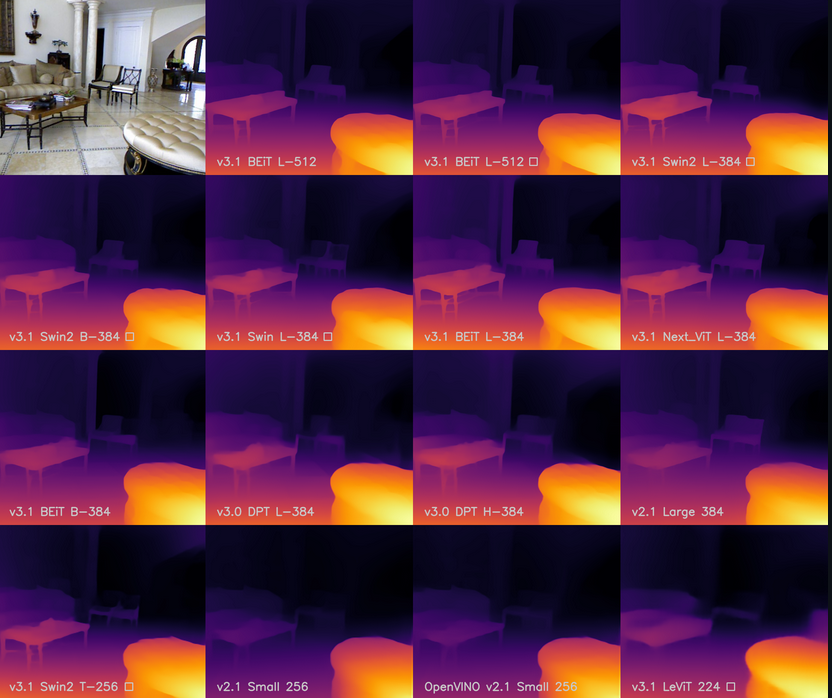
Choosing the Right Model
Depending on your Hardware you can choose one of three models with different accuracy and speed:
# Load a model
#model_type = "DPT_Large"     # MiDaS v3 - Large     (highest accuracy, slowest inference speed)
#model_type = "DPT_Hybrid"   # MiDaS v3 - Hybrid    (medium accuracy, medium inference speed)
model_type = "MiDaS_small"  # MiDaS v2.1 - Small   (lowest accuracy, highest inference speed)

midas = torch.hub.load("intel-isl/MiDaS", model_type)
GPU or CPU
You can run the prediction either on CUDA/Nvidia or CPU:
# Use GPU if available
device = torch.device("cuda") if torch.cuda.is_available() else torch.device("cpu")
midas.to(device)
midas.eval()
Transformations
Inputs need to be transformed to match the dataset the model was trained with. These are available on Torch Hub and can be downloaded matching the model you choose earlier:
# Use transforms to resize and normalize the image
midas_transforms = torch.hub.load("intel-isl/MiDaS", "transforms")

if model_type == "DPT_Large" or model_type == "DPT_Hybrid":
    transform = midas_transforms.dpt_transform
else:
    transform = midas_transforms.small_transform
Once downloaded you can apply them to your input image:
# Apply transforms
img = cv2.imread(filename)
img = cv2.cvtColor(img, cv2.COLOR_BGR2RGB)

input_batch = transform(img).to(device)
Prediction
Now we can run the prediction:
# Predict and resize to original resolution
with torch.no_grad():
    prediction = midas(input_batch)

    prediction = torch.nn.functional.interpolate(
        prediction.unsqueeze(1),
        size=img.shape[:2],
        mode="bicubic",
        align_corners=False,
    ).squeeze()

output = prediction.cpu().numpy()
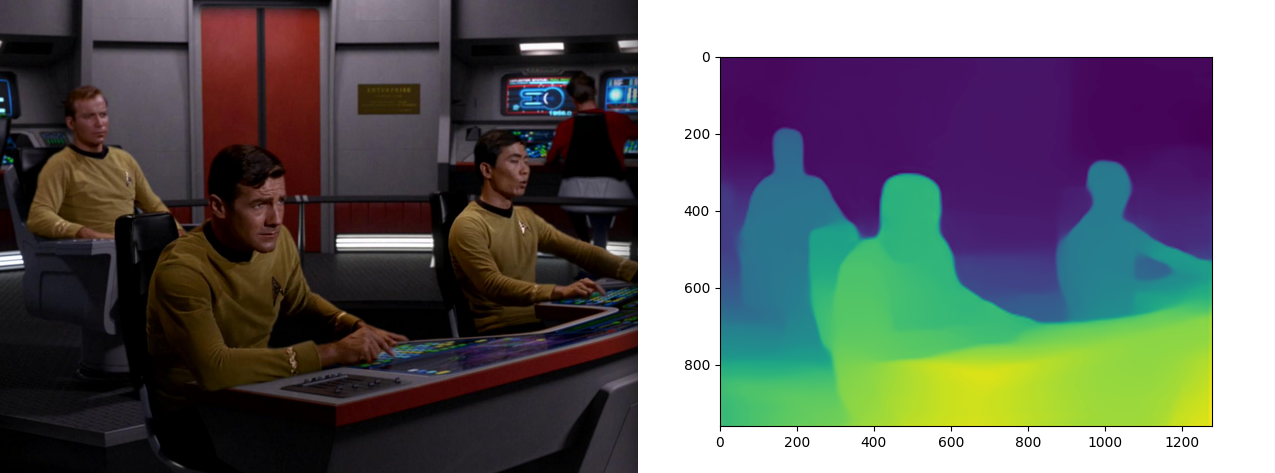
And show the result depth map:
# Show depth map
plt.imshow(output)
plt.show()
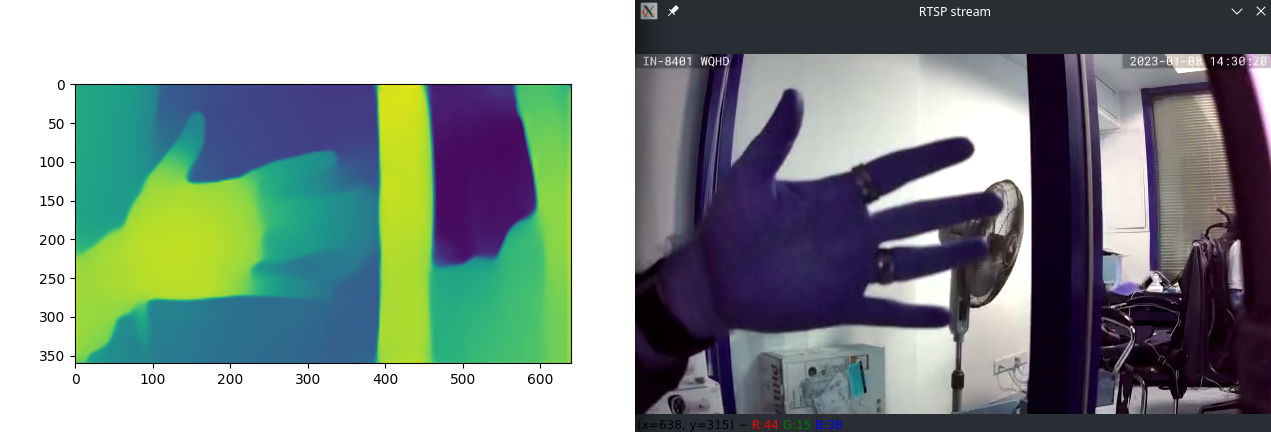
Working with Video Streams
Now that we know that the model is working I now want to see if I can feed it the RTSP Stream of my INSTAR IP Camera:
# Get the video stream
RTSP_URL = 'rtsp://admin:instar@192.168.2.120/livestream/12'

os.environ['OPENCV_FFMPEG_CAPTURE_OPTIONS'] = 'rtsp_transport;udp'

cap = cv2.VideoCapture(RTSP_URL, cv2.CAP_FFMPEG)

if not cap.isOpened():
    print('Cannot open RTSP stream')
    exit(-1)

while True:
    success, img = cap.read()
    cv2.imshow('RTSP stream', img)

    if cv2.waitKey(1) & 0xFF == ord('q'):  # Keep running until you press `q`
        break
This code will output the original video from our camera. So we now need to add the prediction code into the while loop like so:
while True:
    success, frame = cap.read()

    # Apply transforms
    img = cv2.cvtColor(frame, cv2.COLOR_BGR2RGB)
    input_batch = transform(img).to(device)

    # Predict and resize to original resolution
    with torch.no_grad():
        prediction = midas(input_batch)

        prediction = torch.nn.functional.interpolate(
            prediction.unsqueeze(1),
            size=img.shape[:2],
            mode="bicubic",
            align_corners=False,
        ).squeeze()

    output = prediction.cpu().numpy()

    plt.imshow(output)
    plt.pause(0.00001)

    cv2.imshow('RTSP stream', img)

    if cv2.waitKey(1) & 0xFF == ord('q'):  # Keep running until you press `q`
        break

plt.show()
This now outputs the RTSP source through OpenCV and the corresponding prediction with Matplotlib: