YOLOv7 Training with Custom Data
see also Getting started with object detection in YOLOv7
Preparation
In the previous step we cloned the YOLOv7 repository and run predictions using testing weights. To train the model we need the training weights that are also available through the repository:
wget https://github.com/WongKinYiu/yolov7/releases/download/v0.1/yolov7_training.pt
tar -xf dataset.tar.gz
rm dataset.tar.gz
Downloading the Dataset
To be able to train YOLOv7 we first need a dataset to train it on. A wide collection of image datasets are available from Open Images Dataset. YOLOv7 takes label data in the text(.txt) file and has the following format:
<object-class-id> <x> <y> <width> <height>
Annotations
I was searching for a dataset that I can use as a template - ready to go with YOLOv7 Annotations and found:
The set only has one class defined number_plate and every image is annotated the YOLO way - defining the class of the object together with a bounding box location, e.g.:
0 0.338281 0.676389 0.032813 0.028704
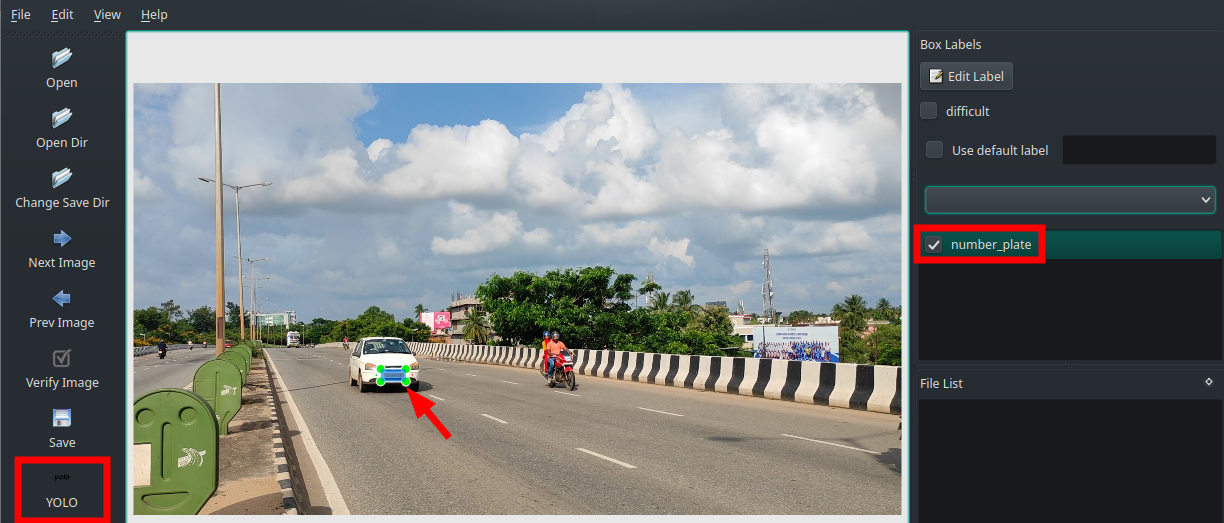
If you are using your own dataset you can use the tool LabelImg to generate those annotations:
pip install labelImg
You can start the application with labelImg and open your image folder. Make sure to toggle the app to generate YOLO annotations, create the class you want to annotate for and draw the bounding box around the object you want YOLO to search for (don't forget to save afterwards):
Move the image files with their annotations to yolov7/custom_data/indian_number_plate/train and split them up into sub-dirs images and labels and move around 20% of them into yolov7/custom_data/indian_number_plate/validation. Exclude a random selection for interference yolov7/custom_data/indian_number_plate/test.
Now we need to tell YOLO where to find the data. Create the following file coco.yaml inside the custom_data/indian_number_plates folder:
custom.yaml
# Custom Dataset
# train and val data as 1) directory: path/images/, 2) file: path/images.txt, or 3) list: [path1/images/, path2/images/]
train: path/custom_data/train/
val: path/custom_data/validation/
test: path/custom_data/test/
# number of classes
nc: 1
# class names
names: [ 'number_plate' ]
./yolov7/custom_data/indian_number_plate/
├── coco.yaml
├── test
│   ├── classes.txt
│   ├── images
│   │   ├── frame-1130.jpg
│   │   ├── frame-2.jpg
│   │   ...
│   └── labels
│       ├── frame-1130.txt
│       ├── frame-2.txt
│       ...
├── train
│   ├── classes.txt
│   ├── images
│   │   ├── frame-680.jpg
│   │   ├── frame-945.jpg
│   │   ...
│   └── labels
│       ├── frame-680.txt
│       ├── frame-945.txt
│       ...
└── validation
    ├── classes.txt
    ├── images
    │   ├── frame-305.jpg
    │   ├── frame-630.jpg
    │   ...
    └── labels
        ├── frame-305.txt
        ├── frame-630.txt
        ...
Now create a training configuration file by creating a copy of yolov7/cfg/training/yolov7.yaml. All we need to change there is the number of classes YOLO should expect - which is only 1:
yolov7_custom.yaml
# parameters
nc: 1  # number of classes
Training
We now have to use the train.py script and point it to our data with custom_data/custom.yaml and downloaded training weights yolov7_training.pt. The YOLOv7 repository already provides a file with hyperparameters for custom datasets that we can use data/hyp.scratch.custom.yaml. Other parameters are:
--device: Only for GPU support--workers: How many parallel processes can your system handle--batch-size: How many images should be used per batch (dependent on VRAM)--img: Image size to train on
python train.py --workers 1 --device 0 --batch-size 1 --epochs 100 --img 640 640 --hyp data/hyp.scratch.custom.yaml --data custom_data/indian_number_plate/coco.yaml --name yolov7-custom --weights yolov7_training.pt
ERROR:
torch.cuda.OutOfMemoryError: CUDA out of memory. Tried to allocate 200.00 MiB (GPU 0; 5.93 GiB total capacity; 4.25 GiB already allocated; 60.31 MiB free; 4.45 GiB reserved in total by PyTorch) If reserved memory is >> allocated memory try setting max_split_size_mb to avoid fragmentation. See documentation for Memory Management and PYTORCH_CUDA_ALLOC_CONF
I guess I need a new GPU after all... I had to reduce the batch size to --batch-size 1 to be able to run the training - now it is working. But the GPU memory only fills up to 2.5Gig. I will try a batch size of 2 next:
Epoch   gpu_mem       box       obj       cls     total    labels  img_size
99/99     2.54G   0.01324  0.001894         0   0.01513         2       640

Class      Images      Labels           P           R
  all          31          54        0.95       0.703
100 epochs completed in 1.213 hours.

Optimizer stripped from runs/train/yolov7-custom6/weights/last.pt, 74.8MB
Optimizer stripped from runs/train/yolov7-custom6/weights/best.pt, 74.8MB

The first results look promising - but there is still a lot of room for improvements - time for a larger dataset and more epochs:
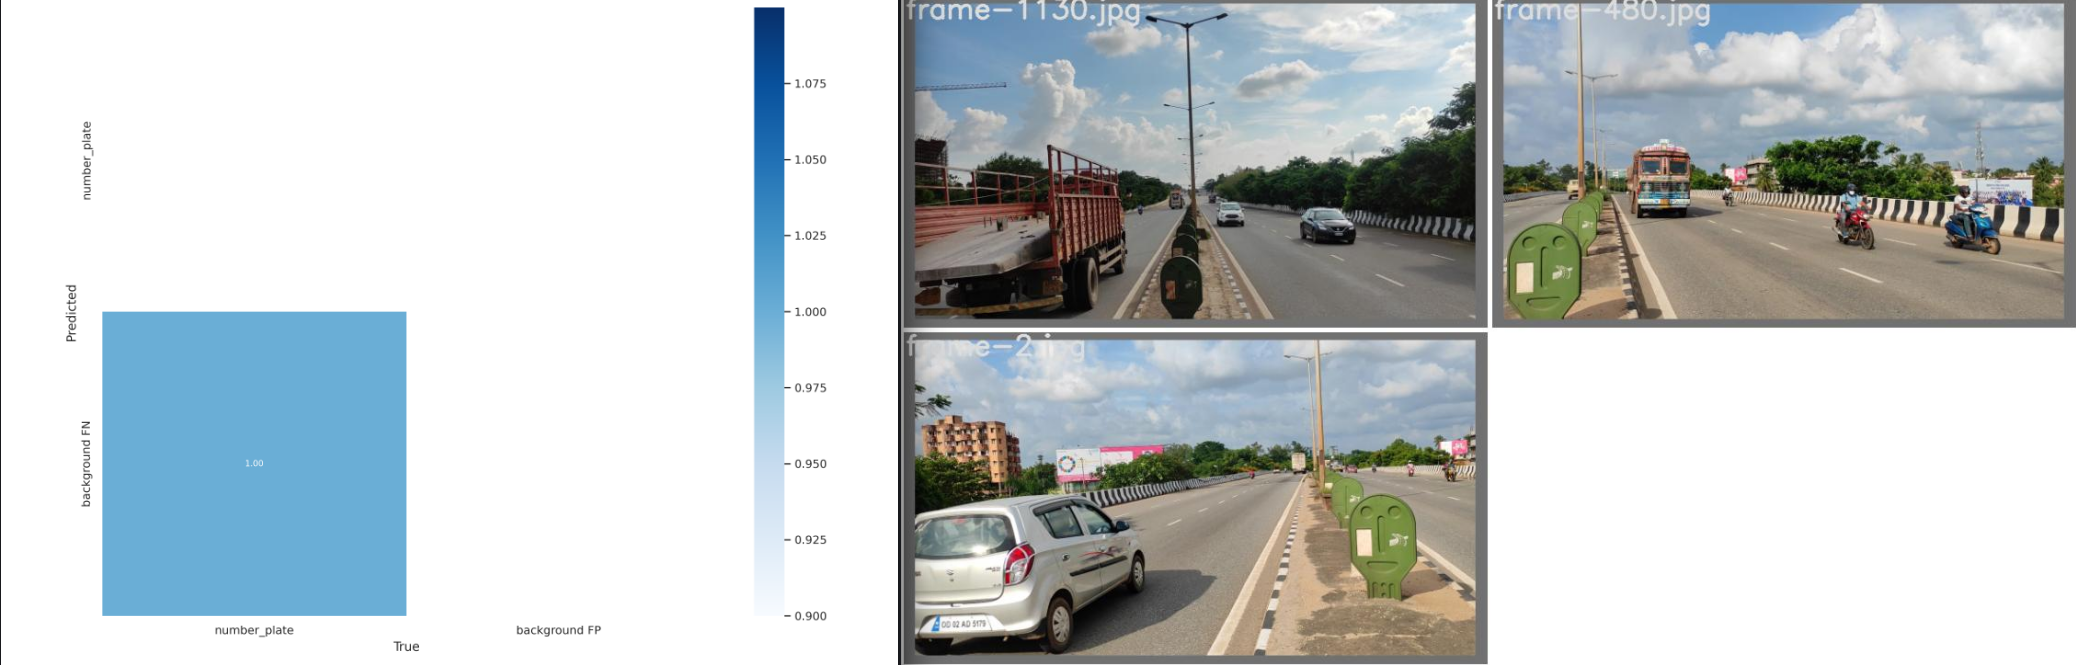
Testing
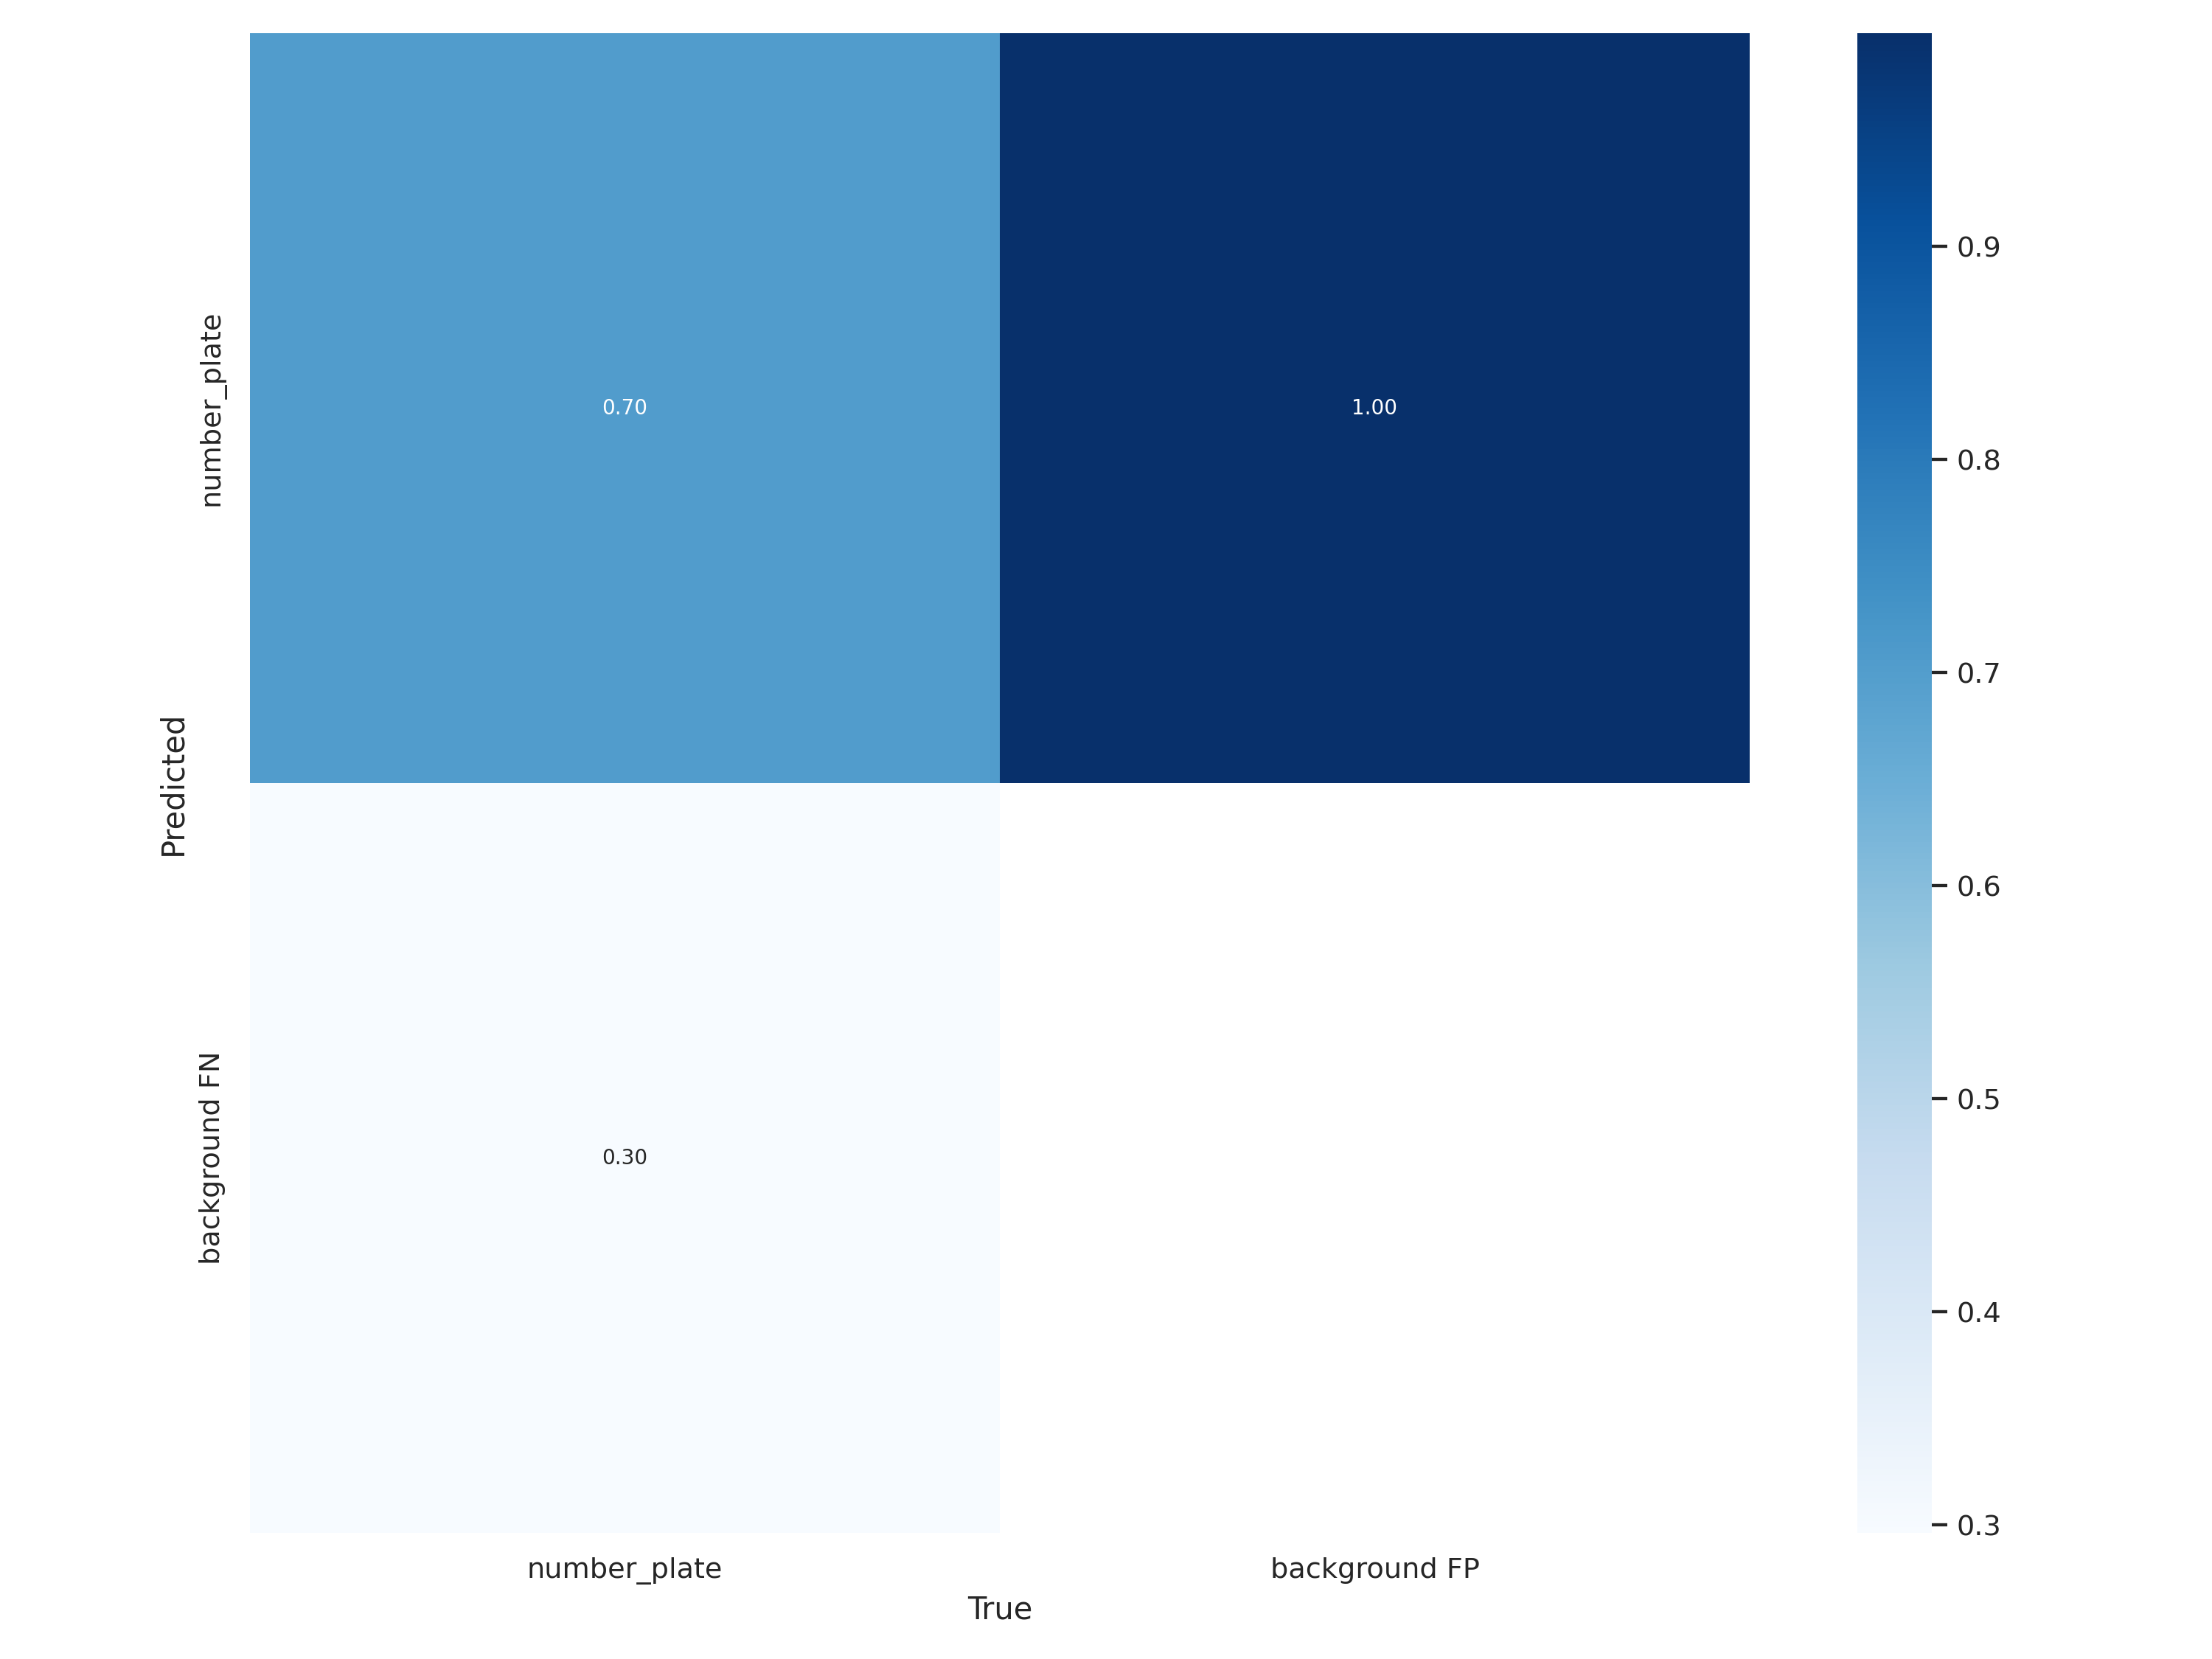
Now we can take an image from the testing dataset and run a prediction based on the best weights that were just generated:
python test.py --weights runs/train/yolov7-custom6/weights/best.pt \
    --task test \
    --data custom_data/indian_number_plate/coco.yaml
Class      Images      Labels           P           R
  all           3           7       0.999       0.429
Speed: 36.0/1.0/37.0 ms inference/NMS/total per 640x640 image at batch-size 32
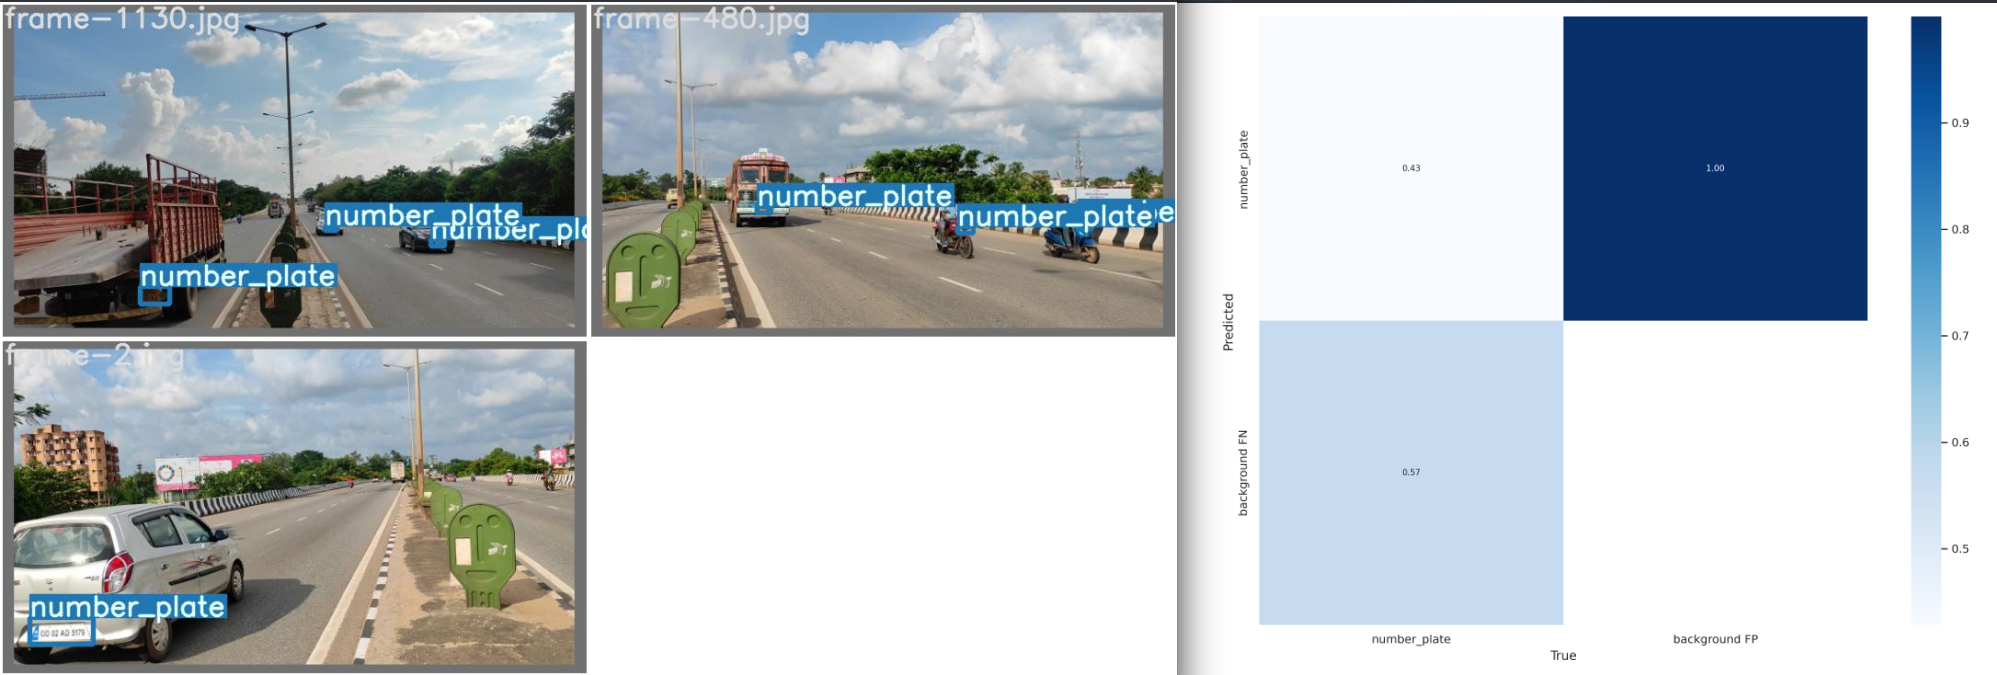
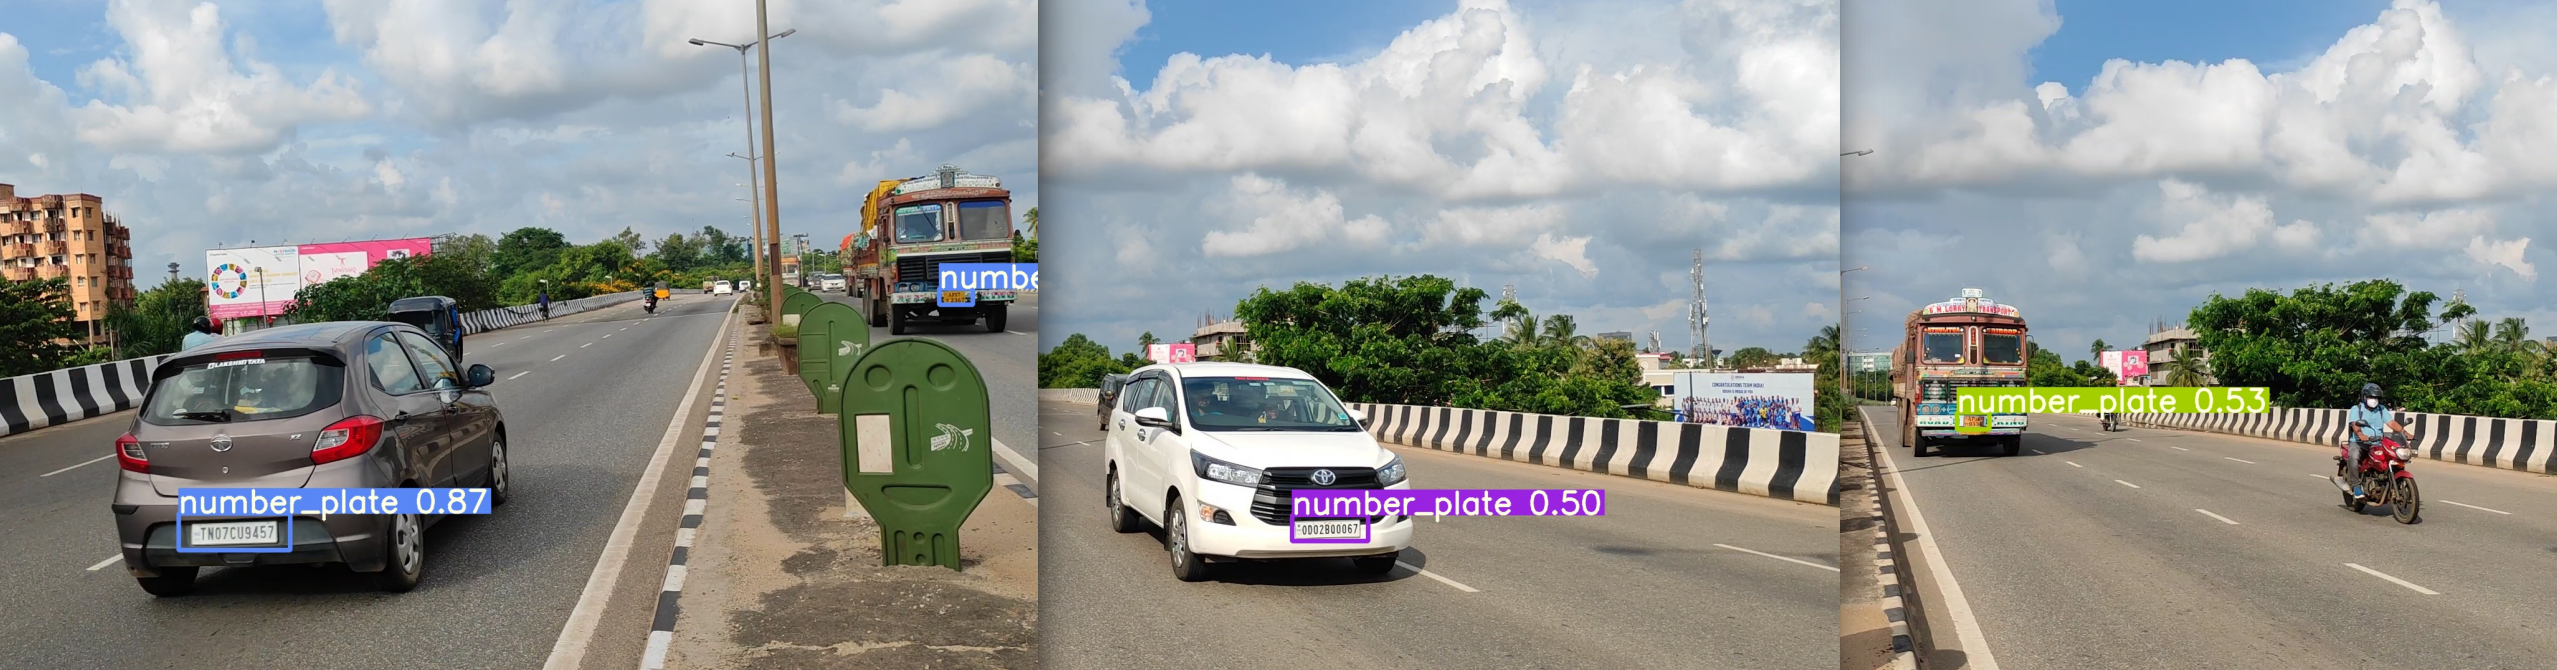
Predictions
Images
python detect.py --weights runs/train/yolov7-custom6/weights/best.pt \
    --conf 0.5 \
    --img-size 640 \
    --source custom_data/indian_number_plate/test/images/frame-2.jpg
Done. (45.7ms) Inference, (0.7ms) NMS
The image with the result is saved in: runs/detect/exp3/frame-2.jpg
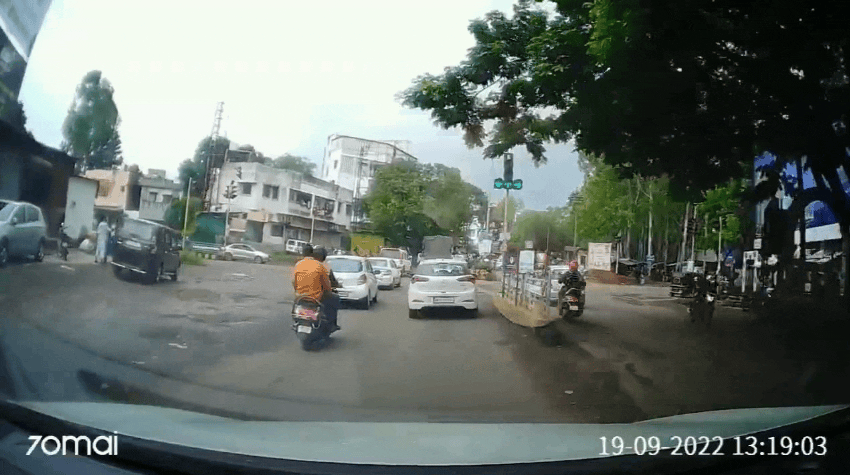
Videos
Video source Youtube Making no sense at all #2 | Indian Roads
python detect.py --weights runs/train/yolov7-custom6/weights/best.pt \
    --conf 0.5 \
    --img-size 640 \
    --source indian_roads.mp4 --no-trace
YOLOv7 Multi-Resolution Training
To get a more robust prediction model we can train YOLOv7 model with multi-resolution images. For this case, we just need to add the –multi-scale flag and change the project name.
python train.py --epochs 100 --workers 4 --device 0 --batch-size 1 \
--img 640 640 --data custom_data/indian_number_plate/coco.yaml --weights yolov7_training.pt \
--name yolov7_indian_number_plates --hyp data/hyp.scratch.custom.yaml \
--multi-scale
This time I tried a batch size of 2 but immediately ran into VRAM issues again. But increasing the amount of workers from 1 to 4 seems to work fine - let's see if this speeds things up:
ERROR:
torch.cuda.OutOfMemoryError: CUDA out of memory. Tried to allocate 2.97 GiB (GPU 0; 5.93 GiB total capacity; 1.00 GiB already allocated; 2.97 GiB free; 1.33 GiB reserved in total by PyTorch)
It uses less VRAM compared to before. But adding more workers did not speed it up (or using multi-res input is much slower - needs testing). Also the accuracy looks a lot worse:
Epoch   gpu_mem       box       obj       cls     total    labels  img_size
99/99     2.28G    0.0192  0.003187         0   0.02239         5       768
Class      Images      Labels           P           R
  all          31          54       0.411       0.259
100 epochs completed in 1.344 hours.

Optimizer stripped from runs/train/yolov7_indian_number_plates3/weights/last.pt, 74.8MB
Optimizer stripped from runs/train/yolov7_indian_number_plates3/weights/best.pt, 74.8MB
We can, again, test the model with:
python test.py --weights runs/train/yolov7_indian_number_plates3/weights/best.pt \
    --task test \
    --data custom_data/indian_number_plate/coco.yaml
As expected the results are unusable - hmmm:
Class      Images      Labels           P           R
                 all           3           7       0.996
Speed: 35.1/1.1/36.2 ms inference/NMS/total per 640x640 image at batch-size 32