Tensorflow Hub

In the previous tutorial I used the ResNet50 pre-trained model to help me with a binary image classification task - dogs or cats.
Tensorflow offers a large variety of pre-trained models that we can use on it's hub. TensorFlow Hub is a repository of trained machine learning models ready for fine-tuning and deployable anywhere.

pip install --upgrade tensorflow_hub
The MobileNet v2 Model
From the available collection of models we can choose MobileNet v2. MobileNet V2 is a family of neural network architectures for efficient on-device image classification and related tasks, originally published by
Mark Sandler, Andrew Howard, Menglong Zhu, Andrey Zhmoginov, Liang-Chieh Chen: Inverted Residuals and Linear Bottlenecks: Mobile Networks for Classification, Detection and Segmentation, 2018.
# import mobile net with trained weights
Trained_MobileNet_url ="https://tfhub.dev/google/tf2-preview/mobilenet_v2/classification/4"

Trained_MobileNet = tf.keras.Sequential([
    hub.KerasLayer(Trained_MobileNet_url, input_shape=(224,224,3))])
Side note:
OSError: https://tfhub.dev/google/tf2-preview/mobilenet_v2/classification/4 does not appear to be a valid module.means you do not have a connection to the server. I was able to open this page and download the model manually but the Hub download here refused to do that. China network issue... switching to another VPN server solved it.
Test the Pre-trained Model on an random Image
Just like with the ResNet50 model we can use the MobileNet model out-of-the-box to classify images it has already been trained on.
Before feeding it a test image we first have to preprocess the image - identical to the ResNet50 example before:
# test the raw mobilenet model
sample_image = tf.keras.preprocessing.image.load_img(r'./test_images/watch.png', target_size = (224, 224))

sample_image = np.array(sample_image)/255.0
predicted_class = Trained_MobileNet.predict(np.expand_dims(sample_image, axis = 0))
predicted_class = np.argmax(predicted_class)
The MobileNet classes are identical to the 1000 ImageNet labels it has been trained against and have to be downloaded manually this time:
labels_path = tf.keras.utils.get_file('ImageNetLabels.txt','https://storage.googleapis.com/download.tensorflow.org/data/ImageNetLabels.txt')
imagenet_labels = np.array(open(labels_path).read().splitlines())
Now we can run our prediction on our random image - the model will return a number label that we can assign an ImageNet label to using the downloaded file above:
# show image with predicted class
plt.imshow(sample_image)
predicted_class_name = imagenet_labels[predicted_class]
plt.title("Prediction: " + predicted_class_name.title())
plt.show()
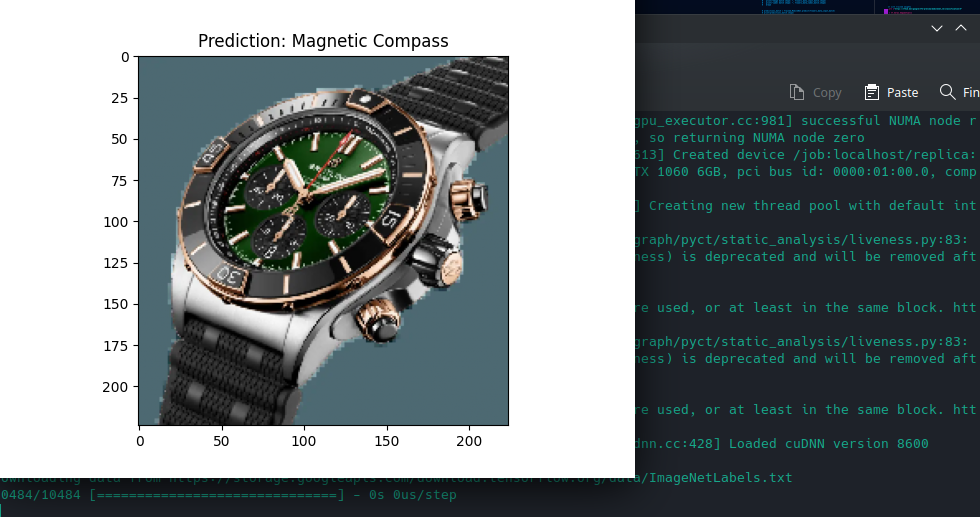
And we get a magnetic compass... oh well...
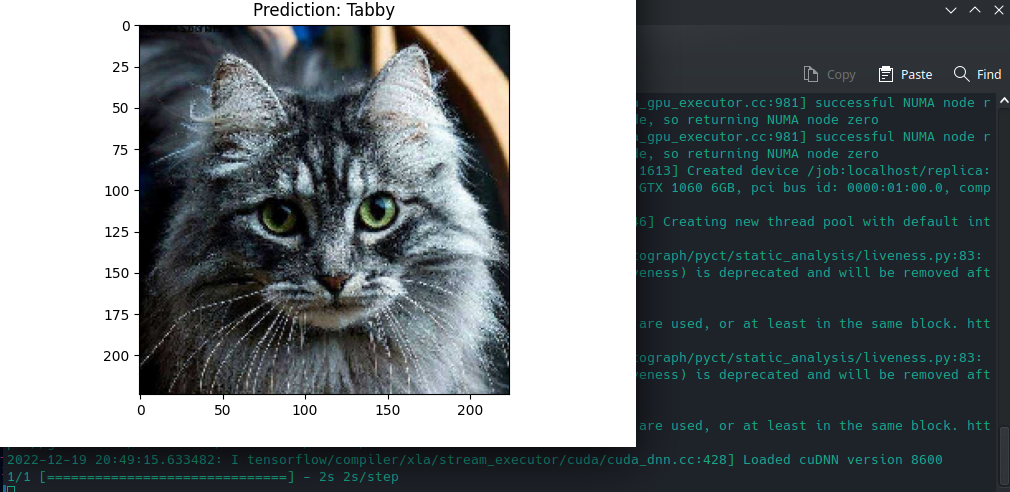
But as they say, when things start to fail, go with cats - excellent :thumbsup:
Test the Model on the Flower Dataset
We can use the flower dataset provided by Tensorflow to train our model:
# download and process training dataset
# specify path of the flowers dataset
flowers_data_url = tf.keras.utils.get_file(
  'flower_photos','https://storage.googleapis.com/download.tensorflow.org/example_images/flower_photos.tgz',
   untar=True)
# preprocessing
image_generator = tf.keras.preprocessing.image.ImageDataGenerator(rescale=1/255)
flowers_data = image_generator.flow_from_directory(str(flowers_data_url), target_size=(224,224), batch_size = 64, shuffle = True)
The dataset consists of 3670 pictures in 5 classes:
for flowers_data_input_batch, flowers_data_label_batch in flowers_data:
  print("Image batch shape: ", flowers_data_input_batch.shape)
  print("Label batch shape: ", flowers_data_label_batch.shape)
  break
Found 3670 images belonging to 5 classes.
Image batch shape:  (64, 224, 224, 3)
Label batch shape:  (64, 5)
We can now run a prediction on the first batch (64 images) of the flower dataset:
predictions_batch = Trained_MobileNet.predict(flowers_data_input_batch)
# We have a batch size of 64 with 1000 classes
# print(predictions_batch.shape)
# get classnames for imagenet classes
predicted_class_names = imagenet_labels[np.argmax(predictions_batch, axis=-1)]
# print(predicted_class_names)

# print all 64 images
# and add predicted class
plt.figure(figsize=(15,15))

for n in range(64):
  plt.subplot(8,8,n+1)
  plt.tight_layout()
  plt.imshow(flowers_data_input_batch[n])
  plt.title(predicted_class_names[n])
  plt.axis('off')

plt.show()
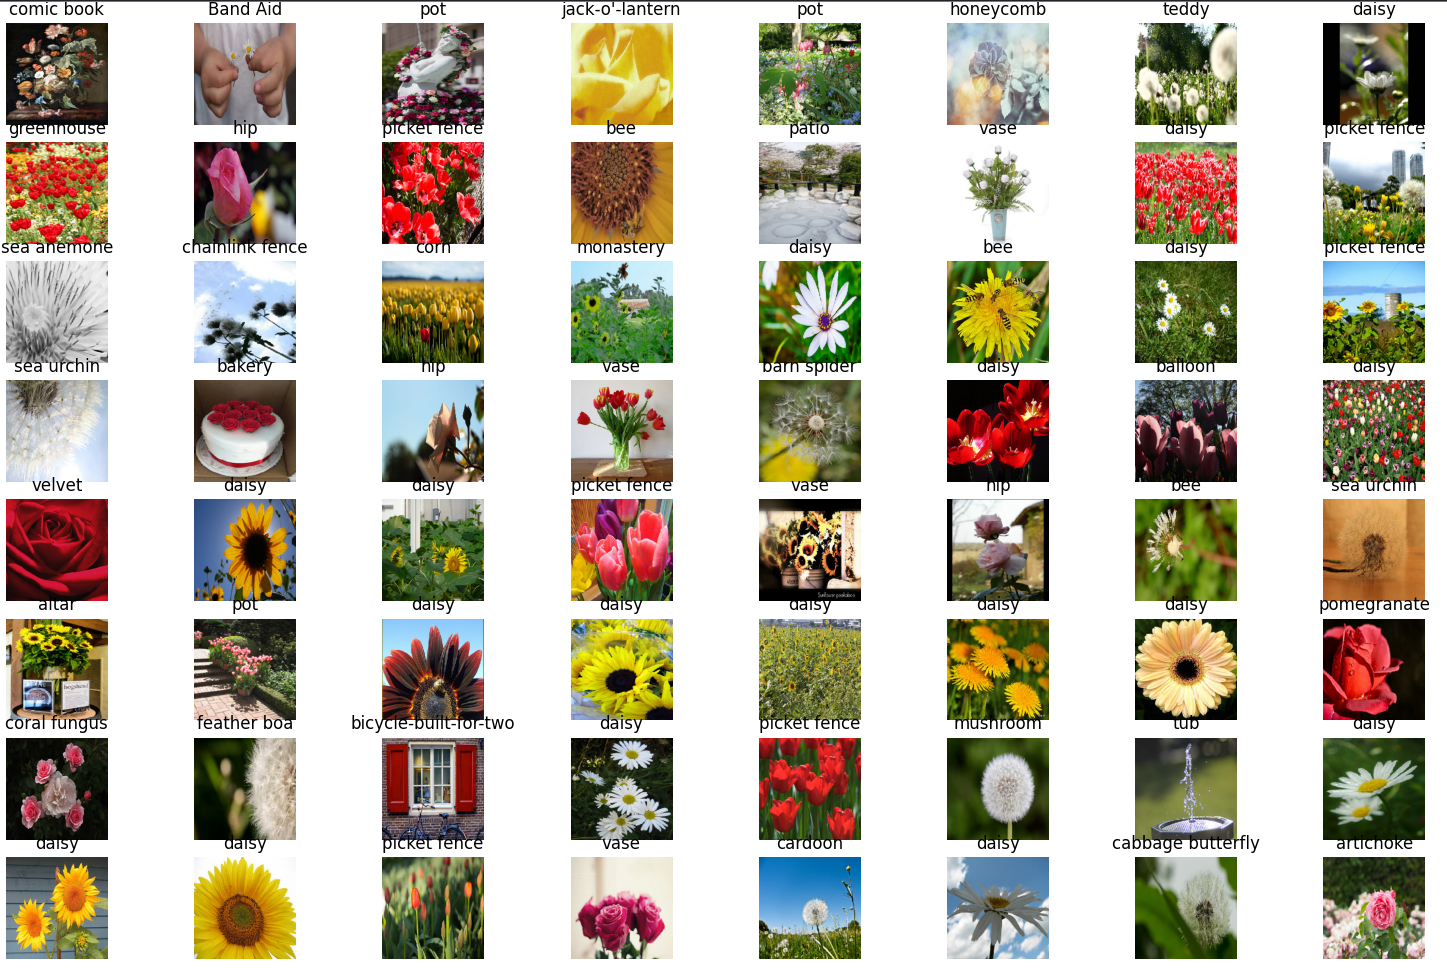
We can see that the model performed poorly without prior training with our dataset:
Model Building and Training
To improve the performance of our model we can download the feature extraction layer from MobileNet only and freeze it:
# download the MobileNet without the classification head
MobileNet_feature_extractor_url = "https://tfhub.dev/google/tf2-preview/mobilenet_v2/feature_vector/2"
MobileNet_feature_extractor_layer = hub.KerasLayer(MobileNet_feature_extractor_url, input_shape=(224, 224, 3))
# freeze the feature extraction layer from mobilenet
MobileNet_feature_extractor_layer.trainable = False
Again, we will need to download our dataset and preprocess it for consumption by our neural network:
# download and process training dataset
# specify path of the flowers dataset
flowers_data_url = tf.keras.utils.get_file(
  'flower_photos','https://storage.googleapis.com/download.tensorflow.org/example_images/flower_photos.tgz',
   untar=True)
# pre-processing data
image_generator = tf.keras.preprocessing.image.ImageDataGenerator(rescale=1/255)
flowers_data = image_generator.flow_from_directory(str(flowers_data_url), target_size=(224,224), batch_size = 64, shuffle = True)

# create input batches from flower data
for flowers_data_input_batch, flowers_data_label_batch in flowers_data:
  break
But instead of feeding the data directly into MobileNet we now need to build our own model - based on the locked feature detection layer from MobileNet and an additional dense that we can train with our dataset:
# build new model out of feature extraction layer
# and a fresh dense layer for us to train
model = tf.keras.Sequential([
  MobileNet_feature_extractor_layer,
  tf.keras.layers.Dense(flowers_data.num_classes, activation='softmax')
])
We can now build the model and train it's dense layer using the flower dataset:
# build the model
model.compile(optimizer=tf.keras.optimizers.Adam(), loss='categorical_crossentropy', metrics=['accuracy'])
# and train it with flower dataset
history = model.fit_generator(flowers_data, epochs=50)
And again, after a very short training we are already at an accuracy closing in to 100%:
Epoch 50/50
58/58 [==============================] - 6s 104ms/step - loss: 0.0212 - accuracy: 0.9984
Evaluation
To test our model we can first extract the classification labels from our dataset:
# evaluate the model
## get classification labels from dataset
class_names = sorted(flowers_data.class_indices.items(), key=lambda pair:pair[1])
class_names = np.array([key.title() for key, value in class_names])
print(class_names)
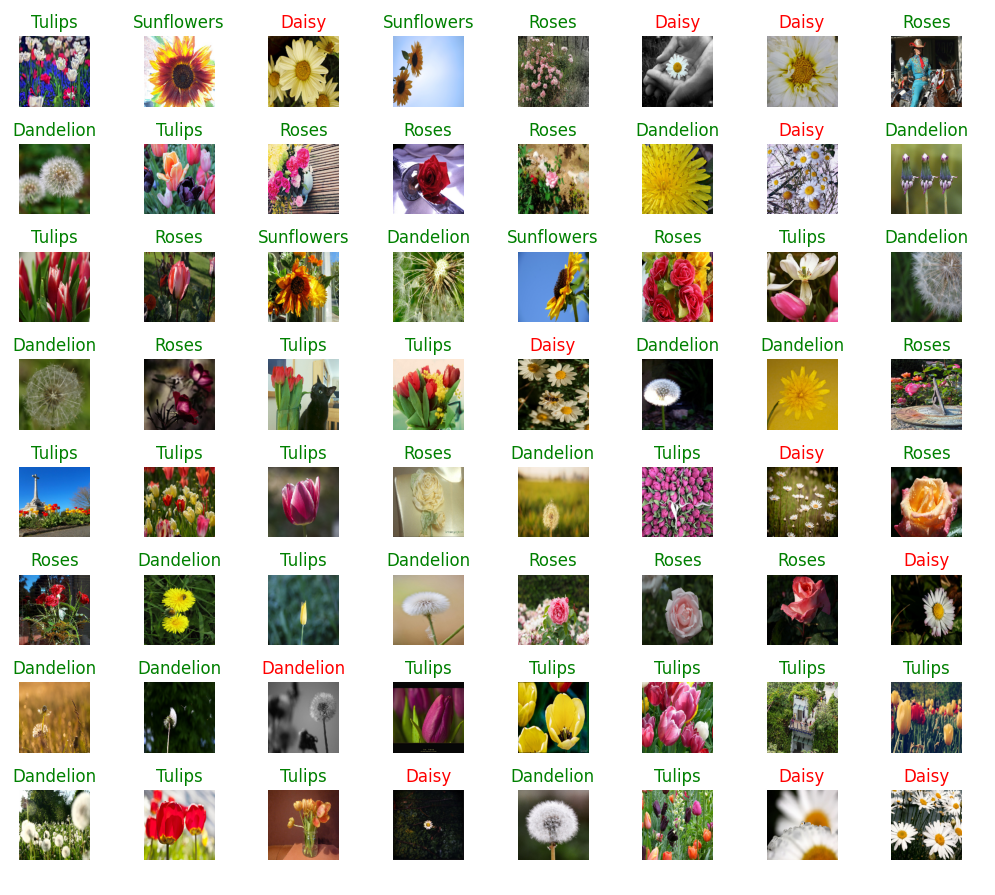
The dataset uses the following labels and image that go along with them
['Daisy' 'Dandelion' 'Roses' 'Sunflowers' 'Tulips']
# now we can feed a fresh batch of images to the trained model
predicted_batch = model.predict(flowers_data_input_batch)
# predict labels for each image inside the batch
predicted_id = np.argmax(predicted_batch, axis=-1)
predicted_label_batch = class_names[predicted_id]

label_id = np.argmax(flowers_data_input_batch, axis=-1)

# show images with labels
plt.figure(figsize=(10,9))
plt.subplots_adjust(hspace=0.5)

for n in range(64):
  plt.subplot(8,8,n+1)
  plt.tight_layout()
  plt.imshow(flowers_data_input_batch[n])
  # color = "green" if predicted_id[n] == label_id[n] else "red"
  color = "black"
  plt.title(predicted_label_batch[n].title(), color=color)
  plt.axis('off')

plt.show()
