YOLOv7 Introduction

Citation: YOLOv7: Trainable bag-of-freebies sets new state-of-the-art for real-time object detectors Chien-Yao Wang, Alexey Bochkovskiy, Hong-Yuan Mark Liao: YOLOv7 surpasses all known object detectors in both speed and accuracy in the range from 5 FPS to 160 FPS and has the highest accuracy 56.8% AP among all known real-time object detectors with 30 FPS or higher on GPU V100. YOLOv7-E6 object detector (56 FPS V100, 55.9% AP) outperforms both transformer-based detector SWIN-L Cascade-Mask R-CNN (9.2 FPS A100, 53.9% AP) by 509% in speed and 2% in accuracy, and convolutional-based detector ConvNeXt-XL Cascade-Mask R-CNN (8.6 FPS A100, 55.2% AP) by 551% in speed and 0.7% AP in accuracy, as well as YOLOv7 outperforms: YOLOR, YOLOX, Scaled-YOLOv4, YOLOv5, DETR, Deformable DETR, DINO-5scale-R50, ViT-Adapter-B and many other object detectors in speed and accuracy. Moreover, we train YOLOv7 only on MS COCO dataset from scratch without using any other datasets or pre-trained weights. Github
Run YOLOv7 on Arch LINUX
Clone the Repository
git clone https://github.com/mpolinowski/yolov7.git
cd yolov7
Install all Dependencies
The repository comes with an Requirements.txt that you can install globally or inside a virtEnvironment pip3 install -r requirements.txt. But I am going to use PipEnv instead:
pipenv --version
pipenv, version 2022.12.19

pipenv install -r requirements.txt
Creating a Pipfile for this project...
Requirements file provided! Importing into Pipfile...
Pipfile.lock not found, creating...
Installing dependencies from Pipfile.lock (9ec603)...
To activate this project's virtualenv, run pipenv shell.
Alternatively, run a command inside the virtualenv with pipenv run.
pipfile
[[source]]
url = "https://pypi.org/simple"
verify_ssl = true
name = "pypi"

[packages]
matplotlib = ">=3.2.2"
numpy = "<1.24.0,>=1.18.5"
opencv-python = ">=4.1.1"
pillow = ">=7.1.2"
pyyaml = ">=5.3.1"
requests = ">=2.23.0"
scipy = ">=1.4.1"
torch = ">=1.7.0,!=1.12.0"
torchvision = ">=0.8.1,!=0.13.0"
tqdm = ">=4.41.0"
protobuf = "<4.21.3"
tensorboard = ">=2.4.1"
pandas = ">=1.1.4"
seaborn = ">=0.11.0"
ipython = "*"
psutil = "*"
thop = "*"

[dev-packages]

[requires]
python_version = "3.10"
UPDATE: I ran into some issues changing the torch and torchvision version here to their CUDA counterparts. Since I had all the dependencies globally installed anyway, I dropped the virtual environment and made sure that PyTorch was installed with GPU support:
You can empty the virtual environment with pipenv uninstall --all and run all scripts without the pipenv run prefix if you encounter the same issue:
python detect.py --weights yolov7.pt --conf 0.25 --img-size 640 --source hongkong.jpg
Download pre-trained Weights
The weights we can use are linked in the repo README
wget https://github.com/WongKinYiu/yolov7/releases/download/v0.1/yolov7.pt
Test the Model
The README also holds the two commands we can use to try out the pre-trained model - one for video and one for still images:
python detect.py --weights yolov7.pt --conf 0.25 --img-size 640 --source yourvideo.mp4
python detect.py --weights yolov7.pt --conf 0.25 --img-size 640 --source inference/images/horses.jpg
Image Files
Since I used pipenv I have to prepend the python in this command:
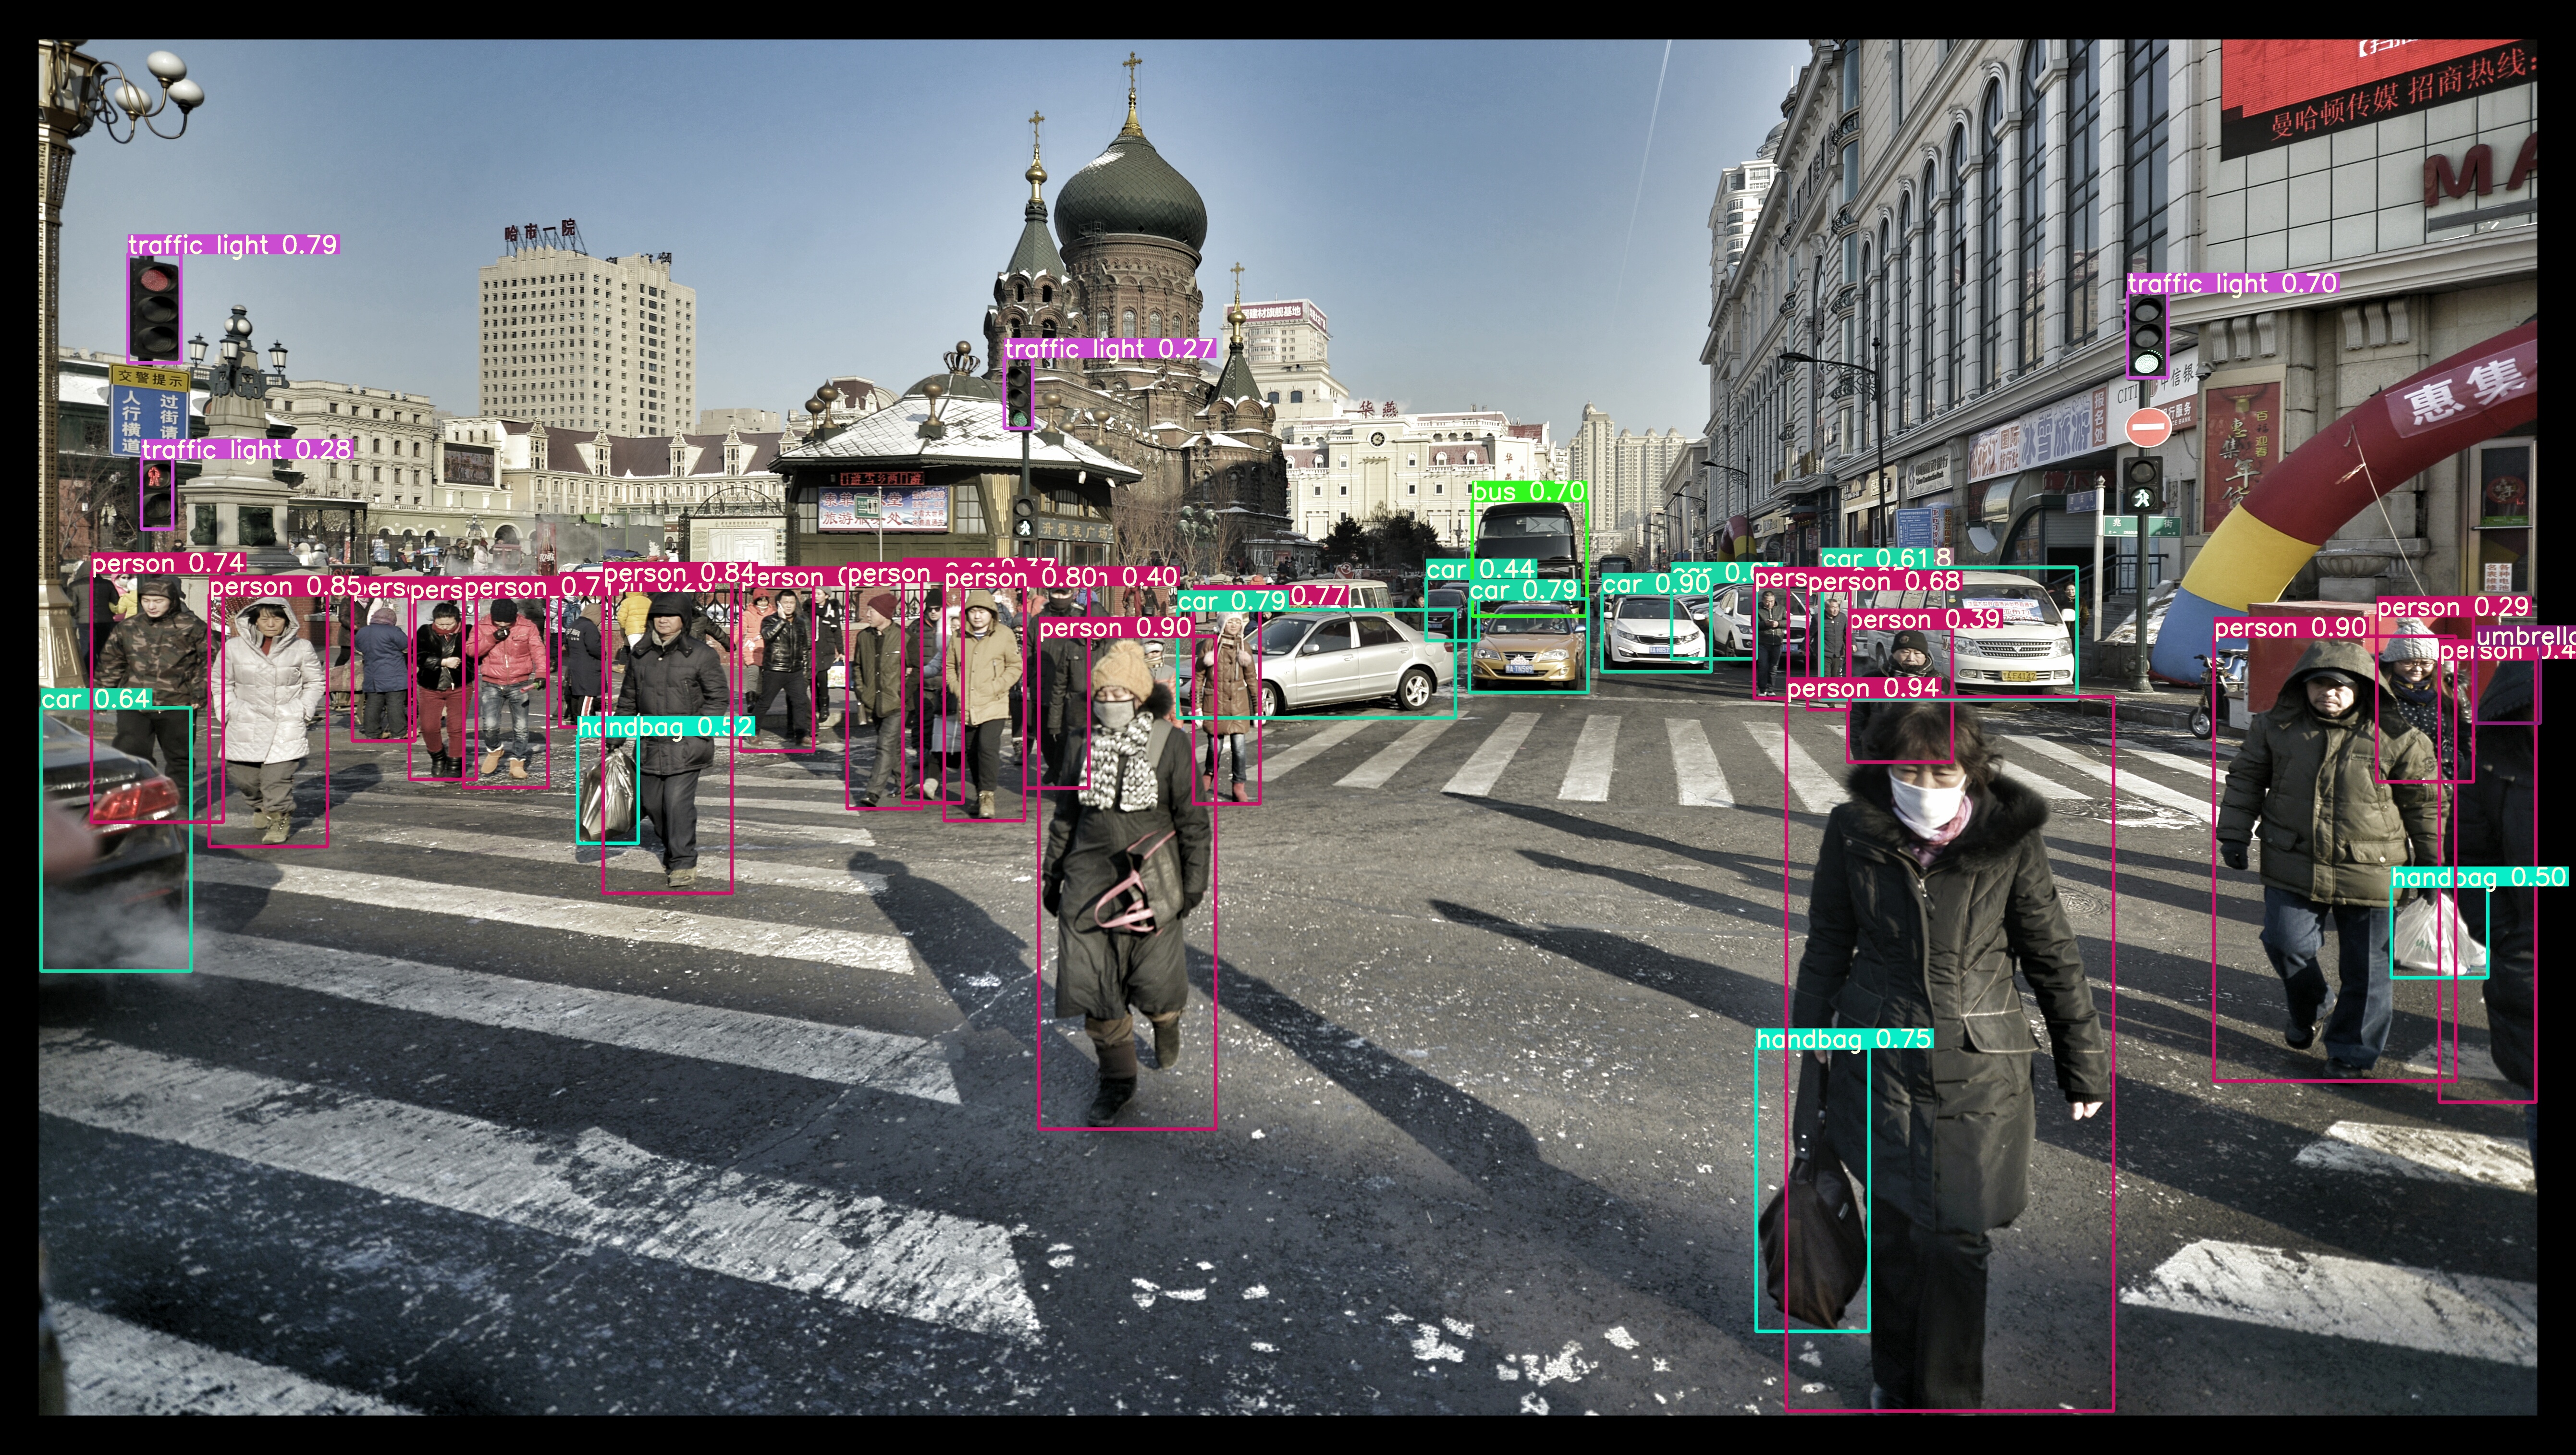
pipenv run python detect.py --weights yolov7.pt --conf 0.25 --img-size 640 --source harbin.jpeg
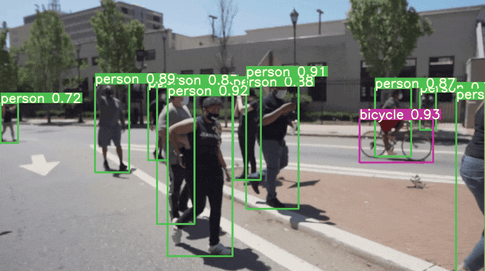
21 persons, 7 cars, 1 bus, 1 truck, 4 traffic lights, 1 umbrella, 3 handbags, Done. (49.1ms) Inference, (11.6ms) NMS
The image with the result is saved in: runs/detect/exp/harbin.jpeg
Done. (0.786s)
Video Files
pipenv run python detect.py --weights yolov7.pt --conf 0.25 --img-size 640 --source video.mp4
Videostreaming
According to the documentation you can select a connected webcam from your system as a video source by selected the video source, e.g. --source 0, --source 1 etc.:
pipenv run python detect.py --weights yolov7.pt --conf 0.25 --img-size 640 --view-img --nosave --source 0
But looking at the detect.py file shows me that it also accepts RTSP streams from IP cameras as source:
 webcam = source.isnumeric() or source.endswith('.txt') or source.lower().startswith(
        ('rtsp://', 'rtmp://', 'http://', 'https://'))
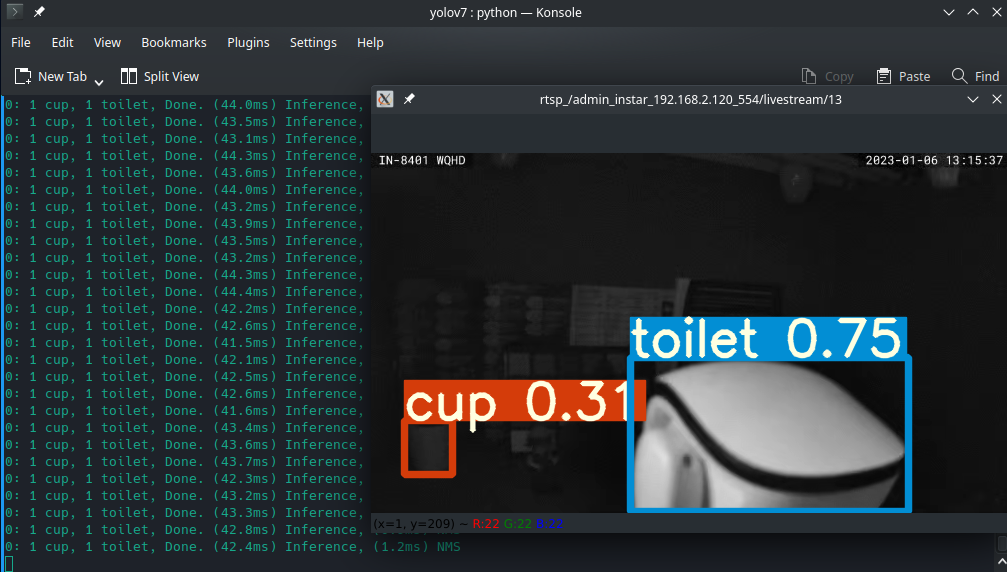
So let't try this with an INSTAR WQHD IP camera:
pipenv run python detect.py --weights yolov7.pt --conf 0.25 --img-size 640 --view-img --nosave --source rtsp://admin:instar@192.168.2.120:554/livestream/13